mirror of
https://github.com/Stirling-Tools/Stirling-PDF.git
synced 2026-09-02 21:03:34 +03:00
 stirlingbot[bot]
bbaff8d6c4
stirlingbot[bot]
bbaff8d6c4
Auto-generated by stirlingbot[bot].

Regenerates `frontend/editor/src/portal/generated/docsManifest.json`
from the Stirling docs repo via `npm run docs:sync`.

Signed-off-by: stirlingbot[bot] <stirlingbot[bot]@users.noreply.github.com>
Co-authored-by: stirlingbot[bot] <195170888+stirlingbot[bot]@users.noreply.github.com>
999 lines
537 KiB
JSON
999 lines
537 KiB
JSON
{
|
||
"source": {
|
||
"repo": "Stirling-Tools/Stirling-Tools.github.io",
|
||
"ref": "main",
|
||
"root": "docs"
|
||
},
|
||
"nav": [
|
||
{
|
||
"id": "overview",
|
||
"label": "Overview",
|
||
"icon": "▶",
|
||
"items": [
|
||
{
|
||
"id": "getting-started",
|
||
"label": "Getting Started"
|
||
},
|
||
{
|
||
"id": "server-admin-onboarding",
|
||
"label": "Production Deployment Guide"
|
||
},
|
||
{
|
||
"id": "api",
|
||
"label": "API"
|
||
},
|
||
{
|
||
"id": "modes-and-licensing",
|
||
"label": "Modes"
|
||
},
|
||
{
|
||
"id": "paid-offerings",
|
||
"label": "Paid Offerings"
|
||
},
|
||
{
|
||
"id": "faq",
|
||
"label": "FAQ"
|
||
},
|
||
{
|
||
"id": "contribute",
|
||
"label": "Contribution guidelines"
|
||
},
|
||
{
|
||
"id": "analytics-and-telemetry",
|
||
"label": "Analytics and Telemetry"
|
||
}
|
||
]
|
||
},
|
||
{
|
||
"id": "installation",
|
||
"label": "Installation",
|
||
"icon": "⤓",
|
||
"items": [
|
||
{
|
||
"id": "installation/versions",
|
||
"label": "Versions"
|
||
},
|
||
{
|
||
"id": "installation/docker-install",
|
||
"label": "Docker Guide"
|
||
},
|
||
{
|
||
"id": "installation/kubernetes",
|
||
"label": "Kubernetes Guide"
|
||
},
|
||
{
|
||
"id": "installation/mac",
|
||
"label": "Mac Installation Guide"
|
||
},
|
||
{
|
||
"id": "installation/unix",
|
||
"label": "Unix Installation Guide"
|
||
},
|
||
{
|
||
"id": "installation/windows",
|
||
"label": "Windows Guide"
|
||
},
|
||
{
|
||
"id": "installation/development-setup",
|
||
"label": "Development Setup Guide"
|
||
},
|
||
{
|
||
"id": "installation/managed-deployment",
|
||
"label": "Managed Desktop Deployment"
|
||
},
|
||
{
|
||
"id": "installation/path-structure",
|
||
"label": "Path Structure"
|
||
}
|
||
]
|
||
},
|
||
{
|
||
"id": "migration",
|
||
"label": "Migration from V1 to V2",
|
||
"icon": "⇄",
|
||
"items": [
|
||
{
|
||
"id": "migration/overview",
|
||
"label": "Migrating from V1 to V2"
|
||
},
|
||
{
|
||
"id": "migration/settings-changes",
|
||
"label": "Settings Changes from V1 to V2"
|
||
},
|
||
{
|
||
"id": "migration/new-features",
|
||
"label": "New Features in V2"
|
||
},
|
||
{
|
||
"id": "migration/breaking-changes",
|
||
"label": "Breaking Changes in V2"
|
||
}
|
||
]
|
||
},
|
||
{
|
||
"id": "configuration",
|
||
"label": "Configuration",
|
||
"icon": "⚙",
|
||
"items": [
|
||
{
|
||
"id": "configuration/configuration",
|
||
"label": "Configuration Guide"
|
||
}
|
||
]
|
||
},
|
||
{
|
||
"id": "configuration/security",
|
||
"label": "Security & SSO",
|
||
"icon": "🛡",
|
||
"items": [
|
||
{
|
||
"id": "configuration/security/system-and-security",
|
||
"label": "Login, System and Security"
|
||
},
|
||
{
|
||
"id": "configuration/security/single-sign-on-configuration",
|
||
"label": "Single Sign-On (SSO) Overview"
|
||
},
|
||
{
|
||
"id": "configuration/security/oauth-sso-configuration",
|
||
"label": "OAuth 2.0 Single Sign-On Configuration"
|
||
},
|
||
{
|
||
"id": "configuration/security/saml-sso-configuration",
|
||
"label": "SAML 2.0 Single Sign-On Configuration"
|
||
},
|
||
{
|
||
"id": "configuration/security/sign-with-custom-files",
|
||
"label": "Visual Sign with Custom File Storage"
|
||
},
|
||
{
|
||
"id": "configuration/security/ssrf-protection",
|
||
"label": "SSRF Protection"
|
||
},
|
||
{
|
||
"id": "configuration/security/fail2ban",
|
||
"label": "Fail2Ban Integration"
|
||
},
|
||
{
|
||
"id": "configuration/security/audit-logging",
|
||
"label": "Audit Logging"
|
||
}
|
||
]
|
||
},
|
||
{
|
||
"id": "configuration/storage",
|
||
"label": "Storage & Database",
|
||
"icon": "◇",
|
||
"items": [
|
||
{
|
||
"id": "configuration/storage/database",
|
||
"label": "Database Backups"
|
||
},
|
||
{
|
||
"id": "configuration/storage/external-database",
|
||
"label": "External Database"
|
||
},
|
||
{
|
||
"id": "configuration/storage/file-sharing-and-storage",
|
||
"label": "File Sharing and Storage"
|
||
},
|
||
{
|
||
"id": "configuration/storage/folderscanning",
|
||
"label": "Folder Scanning"
|
||
},
|
||
{
|
||
"id": "configuration/storage/google-drive-file-picker",
|
||
"label": "Google Drive File Picker"
|
||
}
|
||
]
|
||
},
|
||
{
|
||
"id": "configuration/automation",
|
||
"label": "Automation & Integrations",
|
||
"icon": "◇",
|
||
"items": [
|
||
{
|
||
"id": "configuration/automation/pipeline",
|
||
"label": "Pipeline Automation (Automate)"
|
||
},
|
||
{
|
||
"id": "configuration/automation/mcp-server",
|
||
"label": "MCP Server"
|
||
},
|
||
{
|
||
"id": "configuration/automation/telegram-bot",
|
||
"label": "Telegram Bot Integration"
|
||
},
|
||
{
|
||
"id": "configuration/automation/usage-monitoring",
|
||
"label": "Usage Monitoring"
|
||
}
|
||
]
|
||
},
|
||
{
|
||
"id": "configuration/customisation",
|
||
"label": "Customisation",
|
||
"icon": "◇",
|
||
"items": [
|
||
{
|
||
"id": "configuration/customisation/ui-customisation",
|
||
"label": "UI Customisation"
|
||
},
|
||
{
|
||
"id": "configuration/customisation/endpoint-or-feature-customisation",
|
||
"label": "Endpoints Customisation"
|
||
},
|
||
{
|
||
"id": "configuration/customisation/extra-settings",
|
||
"label": "Custom Settings Configuration"
|
||
},
|
||
{
|
||
"id": "configuration/customisation/other-customisations",
|
||
"label": "Other Customisations"
|
||
},
|
||
{
|
||
"id": "configuration/customisation/keyboard-shortcuts",
|
||
"label": "Keyboard Shortcuts"
|
||
},
|
||
{
|
||
"id": "configuration/customisation/mobile-scanner",
|
||
"label": "Mobile Scanner Configuration"
|
||
},
|
||
{
|
||
"id": "configuration/customisation/pdf-to-cbr-conversion",
|
||
"label": "Enabling PDF to CBR Conversion in Stirling PDF"
|
||
}
|
||
]
|
||
},
|
||
{
|
||
"id": "configuration/operations",
|
||
"label": "Performance & Operations",
|
||
"icon": "◇",
|
||
"items": [
|
||
{
|
||
"id": "configuration/operations/ocr",
|
||
"label": "OCR (Optical Character Recognition)"
|
||
},
|
||
{
|
||
"id": "configuration/operations/performance-optimization",
|
||
"label": "Performance Optimization & Sizing"
|
||
},
|
||
{
|
||
"id": "configuration/operations/process-limits",
|
||
"label": "Process Limits"
|
||
},
|
||
{
|
||
"id": "configuration/operations/libreoffice-parallel-processing",
|
||
"label": "LibreOffice Parallel Processing"
|
||
},
|
||
{
|
||
"id": "configuration/operations/diagnostics",
|
||
"label": "Diagnostics & Reporting Issues"
|
||
}
|
||
]
|
||
},
|
||
{
|
||
"id": "functionality",
|
||
"label": "Tools",
|
||
"icon": "▤",
|
||
"items": [
|
||
{
|
||
"id": "functionality/functionality",
|
||
"label": "PDF Tools"
|
||
},
|
||
{
|
||
"id": "functionality/recommended-tools",
|
||
"label": "Recommended Tools"
|
||
},
|
||
{
|
||
"id": "functionality/compare",
|
||
"label": "Compare PDFs"
|
||
},
|
||
{
|
||
"id": "functionality/compress",
|
||
"label": "Compress PDF"
|
||
},
|
||
{
|
||
"id": "functionality/features-pipeline",
|
||
"label": "Features - Pipeline / Automate"
|
||
},
|
||
{
|
||
"id": "functionality/ocr",
|
||
"label": "OCR (Optical Character Recognition)"
|
||
},
|
||
{
|
||
"id": "functionality/advanced-tools",
|
||
"label": "Advanced Tools"
|
||
},
|
||
{
|
||
"id": "functionality/multi-tool",
|
||
"label": "Multi-Tool Workbench"
|
||
},
|
||
{
|
||
"id": "functionality/read-and-annotate",
|
||
"label": "Read & Annotate PDFs"
|
||
},
|
||
{
|
||
"id": "functionality/fill-form",
|
||
"label": "Fill Form"
|
||
},
|
||
{
|
||
"id": "functionality/mobile-scanner",
|
||
"label": "Mobile Scanner"
|
||
},
|
||
{
|
||
"id": "functionality/the-technologies",
|
||
"label": "Third-Party Credits"
|
||
}
|
||
]
|
||
},
|
||
{
|
||
"id": "functionality/convert",
|
||
"label": "Convert",
|
||
"icon": "⇋",
|
||
"items": [
|
||
{
|
||
"id": "functionality/convert/convert",
|
||
"label": "Convert"
|
||
}
|
||
]
|
||
},
|
||
{
|
||
"id": "functionality/page-operations",
|
||
"label": "Page Operations",
|
||
"icon": "▦",
|
||
"items": [
|
||
{
|
||
"id": "functionality/page-operations/page-operations",
|
||
"label": "Page Operations"
|
||
},
|
||
{
|
||
"id": "functionality/page-operations/redact",
|
||
"label": "Redaction"
|
||
}
|
||
]
|
||
},
|
||
{
|
||
"id": "functionality/security",
|
||
"label": "Security",
|
||
"icon": "🛡",
|
||
"items": [
|
||
{
|
||
"id": "functionality/security/certificate-signing",
|
||
"label": "Certificate Signing"
|
||
},
|
||
{
|
||
"id": "functionality/security/security",
|
||
"label": "Features - Security"
|
||
},
|
||
{
|
||
"id": "functionality/security/sign",
|
||
"label": "Sign PDF (Handwritten Signatures)"
|
||
},
|
||
{
|
||
"id": "functionality/security/shared-signing",
|
||
"label": "Shared Signing"
|
||
}
|
||
]
|
||
},
|
||
{
|
||
"id": "functionality/content-editing",
|
||
"label": "Content & Editing",
|
||
"icon": "◇",
|
||
"items": [
|
||
{
|
||
"id": "functionality/content-editing/content-editing",
|
||
"label": "Content & Editing"
|
||
}
|
||
]
|
||
}
|
||
],
|
||
"docs": {
|
||
"api": {
|
||
"id": "api",
|
||
"title": "API",
|
||
"description": "Overview of API offering in S-PDF",
|
||
"section": "overview",
|
||
"markdown": "## Stirling PDF API\n\nStirling PDF exposes a simple API for easy integration with external scripts. You can access the API documentation in two ways:\n\n1. Local Swagger UI at `/swagger-ui.html` on your Stirling PDF instance\n2. Online [Swagger Documentation](https://app.swaggerhub.com/apis-docs/Frooodle/Stirling-PDF/)\n\nYou can also access the documentation through the settings menu (gear icon in the top-right corner).\n\n## Accessing API Documentation\n\n### Local Swagger UI\nYour Stirling PDF instance includes built-in API documentation:\n1. Navigate to `http://your-instance:port/swagger-ui.html`\n2. Or append `/swagger-ui.html` to your Stirling PDF URL\n3. This provides an interactive documentation interface where you can:\n - View all available endpoints\n - Test API calls directly\n - See request/response schemas\n - View authentication requirements\n\n### Settings Menu Access\n1. Click the gear icon (⚙️) in the top-right corner\n2. Look for the \"API Documentation\" or \"API\" link\n3. This will take you to the local Swagger UI\n\n## API Authentication\n\nWhen security is enabled, all API requests require authentication. There are two ways to handle API authentication:\n\n### User-Specific API Keys\n1. Obtain your API key:\n - Log into Stirling PDF\n - Go to Account Settings (via the gear icon)\n - Find your API key in the account details\n\n### Global API Key\nYou can set a custom global API key using the environment variable:\n```bash\nSECURITY_CUSTOMGLOBALAPIKEY=your-custom-api-key\n```\nThis allows you to set a single API key that works regardless of user authentication.\n\n2. Include the API key in all requests:\n ```http\n X-API-KEY: your-api-key-here\n ```\n\n3. Example authenticated request:\n ```bash\n curl -X POST \"http://localhost:8080/api/v1/security/add-watermark\" \\\n -H \"X-API-KEY: your-api-key-here\" \\\n -H \"Content-Type: multipart/form-data\" \\\n ...\n ```\n\n## Endpoint Paths\n\n> **ℹ️ Info**\n>\n> Every operation lives under `/api/v1/<category>/<operation>`, where the category is one of `security`, `general`, `misc`, `convert`, etc. For example, \"Add Watermark\" is at `/api/v1/security/add-watermark`. The exact path for any operation is shown in the [Swagger UI](#local-swagger-ui).\n\n\n### AI assistants / MCP\n\nTo drive these endpoints from an AI assistant (Claude Desktop, Cursor, etc.) over the Model Context Protocol, see [MCP Server](doc:configuration/automation/mcp-server).\n\n## API Limitations\n\nStirling PDF's feature set is not entirely confined to the backend, hence not all functionalities are accessible via the API. Certain operations, such as the \"view-pdf\" or \"visually sign\", are executed exclusively on the front-end, and as such, they are only available through the Web-UI. If you encounter a situation where some API endpoints appear to be absent, it is likely attributable to these front-end exclusive features.\n\nStirling PDF also has statistic and health endpoints to integrate with monitoring/dashboard applications.\n\n## Example CURL Commands\n\n\n \n ```bash\n curl -X POST \"http://localhost:8080/api/v1/security/add-watermark\" \\\n -H \"Content-Type: multipart/form-data\" \\\n -F \"fileInput=@/Users/username/Downloads/sample-1_cropped.pdf\" \\\n -F \"watermarkType=text\" \\\n -F \"watermarkText=YOUR_WATERMARK_TEXT\" \\\n -F \"alphabet=roman\" \\\n -F \"fontSize=30\" \\\n -F \"rotation=0\" \\\n -F \"opacity=0.5\" \\\n -F \"widthSpacer=50\" \\\n -F \"heightSpacer=50\" \\\n > \"/Users/username/Downloads/output.pdf\"\n ```\n \n \n ```bash\n curl -X POST \"http://localhost:8080/api/v1/security/add-watermark\" ^\n -H \"Content-Type: multipart/form-data\" ^\n -F \"fileInput=@C:\\Users\\systo\\Downloads\\sample-1_cropped.pdf\" ^\n -F \"watermarkType=text\" ^\n -F \"watermarkText=YOUR_WATERMARK_TEXT\" ^\n -F \"alphabet=roman\" ^\n -F \"fontSize=30\" ^\n -F \"rotation=0\" ^\n -F \"opacity=0.5\" ^\n -F \"widthSpacer=50\" ^\n -F \"heightSpacer=50\" ^\n > \"C:\\Users\\systo\\Downloads\\output.pdf\"\n ```\n \n\n\n## Integrations (n8n, Zapier, Make, Power Automate, etc.)\n\nStirling PDF does not ship dedicated plugins or nodes for any specific automation platform. Integration is **via the REST API** documented above, which works with any tool that can make an authenticated HTTP request.\n\n### What this looks like in practice\n\n- **n8n**: use the built-in [HTTP Request node](https://docs.n8n.io/integrations/builtin/core-nodes/n8n-nodes-base.httprequest/) pointed at your Stirling PDF instance. Set method `POST`, content type `multipart/form-data`, attach the binary as `fileInput`, add the `X-API-KEY` header, and connect the binary output to a `Read/Write Binary File` node or onward to your storage.\n- **Zapier / Make / Power Automate**: use the generic HTTP / Webhooks action with the same multipart pattern.\n- **Home Assistant**: a `rest_command` definition pointing at the appropriate Stirling endpoint.\n- **Bash / Python / JavaScript**: any HTTP client (`curl`, `requests`, `fetch`) - the curl examples on this page translate directly.\n\n### Common automation recipe: chain multiple operations in one call\n\nRather than wiring 5 separate HTTP nodes for \"OCR then compress then watermark then sign...\", you could use the **pipeline endpoint** to chain everything in one request:\n\n- Endpoint: `POST /api/v1/pipeline/handleData`\n- Request: multipart with one or more `fileInput` parts plus a `json` field containing the full pipeline configuration\n- Response: a single processed file, or a ZIP if the pipeline produced multiple outputs\n\nFull schema, operation list, parameter reference, and curl examples: see **[Pipeline Automation](doc:configuration/automation/pipeline)**.\n\n### Building the pipeline JSON\n\nThe fastest path is:\n1. Build the workflow visually in the **Automate** tool inside Stirling PDF.\n2. Click **Export for Folder Scanning** in the save panel - this produces the JSON in the format the API expects.\n3. Drop that JSON into your automation tool's HTTP request as the `json` form field.\n\nRe-import the same file later via the Automate UI's import dialog to round-trip workflows between machines.\n\n### Authentication for automation tools\n\nWhen security is enabled, set a global API key once via `SECURITY_CUSTOMGLOBALAPIKEY=<key>` and reference it from your automation tool as the `X-API-KEY` header. This avoids needing per-user logins from headless scripts.",
|
||
"sourcePath": "docs/API.md",
|
||
"editUrl": "https://github.com/Stirling-Tools/Stirling-Tools.github.io/blob/main/docs/API.md"
|
||
},
|
||
"analytics-and-telemetry": {
|
||
"id": "analytics-and-telemetry",
|
||
"title": "Analytics and Telemetry",
|
||
"section": "overview",
|
||
"markdown": "Stirling‑PDF uses analytics to understand usage patterns and improve the application. This page explains what data is collected, why we collect it, and how to disable analytics if desired.\n\n> **User control**: All analytics are **opt‑in via a consent banner** (disabled until a user allows it). A self‑hosted administrator can also turn all analytics off system‑wide. If analytics are disabled system‑wide, no banner is shown.\n\n## Overview\n\nStirling‑PDF uses two analytics services:\n\n1. **[Scarf](https://scarf.sh)** - a privacy‑friendly tool designed for open‑source projects.\n2. **[PostHog](https://posthog.com)** - an open‑source product analytics platform for detailed usage insights.\n\nBoth services are designed with privacy in mind and can be completely disabled.\n\n---\n\n## PostHog Analytics\n\n### What is PostHog?\n\nPostHog is an open‑source product analytics platform that provides detailed insights into how users interact with Stirling‑PDF. It's hosted on PostHog's European servers (`eu.i.posthog.com`) for GDPR alignment.\n\n### Data collected by PostHog\n\nPostHog collects comprehensive system and usage information **only when analytics are enabled and consented**:\n\n#### System information\n- Operating system name and version\n- Java version and vendor\n- CPU cores and memory allocation\n- Deployment type (Docker, JAR, EXE)\n- Docker/Kubernetes environment details (if applicable)\n- Timezone and locale settings\n\n#### Application configuration\n- Security settings (login enabled, OAuth/SAML configuration status)\n- UI customization settings\n- Feature flags and enabled functionality\n- Legal document URLs (terms, privacy policy, etc.)\n- System limits and quotas\n\n#### Usage data\n- Aggregate counts (e.g., total number of user accounts created)\n- Feature/tool usage (which tools/operations are used)\n- Error tracking\n- Browser and device information (for the web interface)\n\n**Important privacy notes**:\n- **No document content, PDF data, or file metadata is ever collected or transmitted.**\n- PostHog is configured with:\n - `opt_out_capturing_by_default: true`\n - `mask_all_text: true`\n - `mask_all_element_attributes: true`\n- Users must accept cookies before any data is captured.\n- Data is stored on EU servers.\n- Each instance has a unique UUID (not tied to individuals).\n\n### Why we use PostHog\n\nPostHog shows us which features get used, helps us catch bugs, and guides what to build next.\n\n---\n\n\n## Scarf\n\n### What is Scarf?\n\n[Scarf](https://scarf.sh) provides a simple tracking pixel (`pixel.stirling.com`) that collects basic, non‑personally identifiable information about Stirling‑PDF usage.\n\n### Data collected by Scarf\n\nThe Scarf pixel collects the following information:\n\n- **Machine Type**: Deployment type (Docker, JAR, or EXE)\n- **App Version**: The version of Stirling‑PDF you're running\n- **License Type**: Whether you're using Community or Enterprise edition\n- **Login Enabled**: Whether authentication is enabled\n- **Page Endpoint Loaded**: Which Stirling‑PDF page was loaded (e.g., `/split-pdf`)\n\n**Important**: The Scarf pixel does **not** collect or store:\n- Personal information (PII)\n- IP addresses (IP addresses are not stored)\n- User‑specific identifiers\n- Document content or file metadata\n- Fine‑grained user behavior beyond which page/endpoint was loaded\n\n### Why we use Scarf\n\nScarf gives us a rough idea of how Stirling-PDF is deployed and which pages are reached, so we can prioritise work and keep it compatible across setups.\n\n### How to disable Scarf\n\nScarf is opt‑in by default (via the cookie consent banner). To disable the Scarf tracking pixel **system‑wide** and suppress the banner for it:\n\n**Environment variable**\n```bash\nSYSTEM_ENABLESCARF=false\n```\n\n**settings.yml**\n```yaml\nsystem:\n enableScarf: false\n```\n\n---\n\n\n\n## Configuration and Control\n\nAnalytics are governed by a **global master toggle**, **component toggles**, and the **cookie consent banner**.\n\n### 1) Global analytics toggle (master switch)\n\nControls **all** analytics and whether a consent banner appears.\n\n\n \n ```yaml\n system:\n enableAnalytics: false # true | false | null (unset)\n ```\n \n \n ```bash\n SYSTEM_ENABLEANALYTICS=false # true | false | (unset = null)\n ```\n \n \n ```yaml\n services:\n stirling-pdf:\n environment:\n SYSTEM_ENABLEANALYTICS: false\n ```\n \n\n\n**Behavior**\n- `false`: Disables **all** analytics (no consent banner; PostHog & Scarf are off).\n- `true`: Allows analytics (banner still required for user consent before any capture).\n- `null`/unset: **First‑run admin choice** - on the first ever connection to a self‑hosted instance, the first visitor (assumed admin) is prompted to choose, and that choice sets the global behavior for all users (either disabling analytics or enabling the consent banner for others).\n\n### 2) Component toggles\n\nUse these to selectively enable/disable providers **in addition** to the global toggle.\n\n**PostHog:**\n\n\n \n ```yaml\n system:\n enablePosthog: false # true | false | null\n ```\n \n \n ```bash\n SYSTEM_ENABLEPOSTHOG=false\n ```\n \n\n\n**Scarf tracking pixel:**\n\n\n \n ```yaml\n system:\n enableScarf: false # true | false | null\n ```\n \n \n ```bash\n SYSTEM_ENABLESCARF=false\n ```\n \n\n\n**Interaction**\n- If `enableAnalytics` is `false`, everything is off regardless of component toggles.\n- If `enableAnalytics` is `true`/`null`, the consent banner is shown (see below). After consent:\n - PostHog runs only if `enablePosthog` is `true`/`null` **and** the user consented.\n - Scarf runs only if `enableScarf` is `true`/`null` **and** the user consented.\n\n### 3) Cookie consent banner\n\nWhen analytics are allowed globally (`system.enableAnalytics: true` or resolved via the first‑run admin choice), users see a cookie consent banner on their first visit. Users can:\n\n- **Accept all** → enables PostHog (if `enablePosthog` is `true`/`null`) and Scarf (if `enableScarf` is `true`/`null`)\n- **Accept only necessary** → disables PostHog and Scarf\n- **Customize** → granular selection where applicable\n\n**User control details**\n- Users can change preferences at any time.\n- Consent choices are stored locally in the user's browser.\n- PostHog and Scarf respect the consent decision immediately.\n- No tracking occurs until explicit consent is given.\n\n---\n\n## Complete analytics disable (shortcut)\n\nIf you want to disable **all** analytics and telemetry (and suppress any consent prompts) at once:\n\n\n \n ```yaml\n system:\n enableAnalytics: false\n ```\n \n \n ```bash\n SYSTEM_ENABLEANALYTICS=false\n ```\n \n \n ```yaml\n services:\n stirling-pdf:\n environment:\n SYSTEM_ENABLEANALYTICS: false\n ```\n \n\n\n---\n\n## Privacy and Data Security\n\n### Data retention\n- PostHog data is retained according to PostHog’s configured retention policies.\n- Scarf pixel data is aggregated and anonymized.\n- No personal documents or content are ever transmitted.\n\n### GDPR alignment\n- PostHog servers are located in the EU.\n- Cookie consent is required before tracking.\n- Users can opt out at any time.\n- No cross‑site tracking or fingerprinting.\n- Text and element masking helps prevent accidental PII collection.\n\n### Transparency\n- All analytics‑related code is open source and visible in the repository.\n- Analytics can be completely disabled with simple configuration changes.\n- Users have full control over their data via cookie preferences (when analytics are allowed globally).\n\n---\n\n## For Self‑Hosted Instances\n\nIf you're running Stirling‑PDF on your own infrastructure:\n\n1. **Private networks**: Analytics from self‑hosted instances help us understand deployment patterns but don't expose your internal network.\n2. **Air‑gapped environments**: Disable analytics; the application works perfectly without external connections.\n3. **Corporate environments**: Disable analytics if your security policy requires it, or allow it to help improve the product.\n\n---\n\n## Support\n\nIf you have questions or concerns about analytics:\n\n- Check our [Privacy Policy](https://www.stirling.com/privacy-policy)\n- Review the [source code](https://github.com/Stirling-Tools/Stirling-PDF)\n- Ask questions on [Discord](https://discord.gg/HYmhKj45pU)\n- Open an issue on [GitHub](https://github.com/Stirling-Tools/Stirling-PDF/issues)",
|
||
"sourcePath": "docs/Analytics-and-telemetry.md",
|
||
"editUrl": "https://github.com/Stirling-Tools/Stirling-Tools.github.io/blob/main/docs/Analytics-and-telemetry.md"
|
||
},
|
||
"configuration/automation/mcp-server": {
|
||
"id": "configuration/automation/mcp-server",
|
||
"title": "MCP Server",
|
||
"description": "Expose Stirling PDF's tools to MCP clients over a built-in Model Context Protocol server",
|
||
"section": "configuration/automation",
|
||
"markdown": "Stirling PDF ships a built-in [Model Context Protocol (MCP)](https://modelcontextprotocol.io) server. MCP is the open standard MCP clients (Claude Desktop, the MCP Inspector, IDE agents, and custom tools) use to discover and call tools on a remote server. When enabled, Stirling PDF exposes its PDF operations as MCP tools so an MCP-capable assistant can run them on your behalf.\n\nThe MCP server is built into the Stirling PDF self-hosted server and the desktop app in Local / Self-hosted modes. It is **off by default** and must be enabled and configured per deployment.\n\n> **ℹ️ Info: Self-hosted capability**\n>\n> This page documents the MCP server you run on your own Stirling PDF instance. The per-user MCP tab in Stirling Cloud is a separate, cloud-only surface and is not covered here. For where each deployment mode applies, see [Modes](doc:modes-and-licensing).\n\n\n---\n\n## Enable the server\n\nThe MCP server runs only when `mcp.enabled` is `true`. While off, there is no `/mcp` endpoint and no MCP metadata.\n\nTurn it on either way:\n\n- **Settings file / environment variable**: set `mcp.enabled: true` in `settings.yml`, or the environment variable `MCP_ENABLED=true`. A restart applies file edits.\n- **Admin UI**: open **Admin Settings → MCP Server**. This page is shown to admins, and on instances where login is disabled. Saving prompts for a restart.\n\nEnabling alone is not enough - you also need to choose and configure an [authentication mode](#authentication) before clients can call tools.\n\n---\n\n## Transport and protocol\n\n- **Endpoint**: `POST /mcp` on the same host and port as the rest of Stirling PDF.\n- **Protocol**: JSON-RPC 2.0 over streamable-HTTP.\n- **Supported MCP protocol versions**: `2025-06-18` (preferred), `2025-03-26`, and `2024-11-05`. The server echoes the client's requested version when it is supported, otherwise it advertises the preferred version.\n\n---\n\n## Tools exposed\n\nThe server presents a small set of category tools rather than one tool per operation. An MCP client lists them, then drills into a specific PDF operation using `stirling_describe_operation`.\n\n| Tool | Purpose |\n|---|---|\n| `stirling_describe_operation` | Look up the parameters and JSON schema for a specific operation id. |\n| `stirling_pages` | Page-level operations (merge, split, rotate, reorder, add blank pages, and similar). |\n| `stirling_convert` | Conversions to and from PDF (images, office formats, and similar). |\n| `stirling_misc` | Miscellaneous utilities (compress, flatten, repair, and similar). |\n| `stirling_security` | Security operations (encrypt, decrypt, permissions, and similar). |\n| `stirling_upload` | Store a file server-side and get back a `fileId` for large inputs. |\n| `stirling_download` | Fetch a result that was returned by reference rather than inline. |\n| `stirling_ai` | AI-engine capabilities. **Not usable in self-hosted - see the caveat below.** |\n\n> **⚠️ Warning: `stirling_ai` requires a Stirling Cloud AI engine**\n>\n> `stirling_ai` only has capabilities when a Stirling AI engine is configured. The AI engine is a Stirling Cloud feature and is **not available in self-hosted** today, so on a self-hosted server `stirling_ai` exposes nothing and only the PDF tools above are usable over MCP.\n\n\n---\n\n## Authentication\n\nPick one of two modes with `mcp.auth.mode`.\n\n### OAuth2 resource server (`oauth`, default)\n\nIn OAuth mode the `/mcp` endpoint runs as an OAuth2 resource server: it validates incoming JWTs (signature, issuer, expiry, and audience) and binds each token to an existing Stirling account. It publishes RFC 9728 protected-resource metadata at `/.well-known/oauth-protected-resource` so MCP clients can discover the authorization server.\n\n| Key | Env | Default | Purpose |\n|---|---|---|---|\n| `mcp.auth.issuerUri` | `MCP_AUTH_ISSUERURI` | empty | OAuth2 issuer URI (e.g. `http://localhost:9000`). **Required** in OAuth mode; every token is rejected until it is set. |\n| `mcp.auth.jwksUri` | `MCP_AUTH_JWKSURI` | empty | JWKS URI. Blank means it is derived from the issuer's `/.well-known/openid-configuration`. |\n| `mcp.auth.resourceId` | `MCP_AUTH_RESOURCEID` | empty | RFC 8707 resource identifier of this server. Must equal the public `/mcp` URL clients call and **end in `/mcp`** (e.g. `http://localhost:8080/mcp`). Tokens that do not list it in `aud` are rejected. |\n| `mcp.auth.acceptedAudiences` | `MCP_AUTH_ACCEPTEDAUDIENCES` | `[]` | Extra `aud` values accepted on top of `resourceId`. Empty keeps strict RFC 8707 binding. Use this for IdPs that cannot mint a resource-specific audience (e.g. Supabase always issues `aud=authenticated`). |\n| `mcp.auth.usernameClaim` | `MCP_AUTH_USERNAMECLAIM` | `sub` | JWT claim matched against a Stirling username. Set to `email` or `preferred_username` if your IdP maps users differently. |\n| `mcp.auth.requireExistingAccount` | `MCP_AUTH_REQUIREEXISTINGACCOUNT` | `true` | Reject tokens whose subject has no enabled Stirling account. Keep `true` unless you intend open access for any IdP-valid token. |\n| `mcp.scopesEnabled` | `MCP_SCOPESENABLED` | `true` | Enforce the `mcp.tools.read` / `mcp.tools.write` scopes. Read-style tools require `mcp.tools.read`; mutating operations require `mcp.tools.write`. Set `false` only if your IdP can issue a single coarse token. |\n\nEach validated token is bound to the matching Stirling account so that audit and attribution are correct.\n\n### API key (`apikey`)\n\nAPI-key mode is the low-friction option for self-hosters with no external identity provider. Set `mcp.auth.mode: apikey` (env `MCP_AUTH_MODE=apikey`) and clients authenticate with an existing per-user Stirling API key.\n\nSend the key as either header:\n\n```text\nX-API-KEY: <your-stirling-api-key>\n```\n\nor\n\n```text\nAuthorization: Bearer <your-stirling-api-key>\n```\n\nThe key must belong to an existing, enabled account (generate one under **Account → API Keys** - see [API documentation](doc:api)). No external IdP, OAuth, or JWKS configuration is needed.\n\n---\n\n## Restrict which operations are exposed\n\nTwo MCP-level lists control which operations clients can see and call. They use the same kebab-case operation ids as the [Endpoint or Feature Customisation](doc:configuration/customisation/endpoint-or-feature-customisation) page (e.g. `compress-pdf`).\n\n| Key | Env | Default | Behaviour |\n|---|---|---|---|\n| `mcp.allowedOperations` | `MCP_ALLOWEDOPERATIONS` | `[]` | When **non-empty**, acts as a strict allow-list - only these operations are exposed over MCP; everything else is hidden, undescribable, and uninvocable. Empty means allow all. |\n| `mcp.blockedOperations` | `MCP_BLOCKEDOPERATIONS` | `[]` | A deny-list. Anything listed is always removed, applied **after** the allow-list, so a blocked id wins even if it is also allowed. |\n\nThese lists layer **on top of** the global [`endpoints.toRemove` / `endpoints.groupsToRemove`](doc:configuration/customisation/endpoint-or-feature-customisation) configuration. An operation disabled globally is never exposed over MCP regardless of these lists.\n\n---\n\n## Limits\n\n| Key | Env | Default | Purpose |\n|---|---|---|---|\n| `mcp.maxRequestBytes` | `MCP_MAXREQUESTBYTES` | 10 MB | Maximum MCP request body size. Inline file uploads ride in the JSON-RPC body, so this caps how large an inline input can be. |\n| `mcp.maxInlineResponseBytes` | `MCP_MAXINLINERESPONSEBYTES` | 10 MB | Results up to this size return inline as base64; larger results return a `fileId` instead, which the client fetches with `stirling_download`. |\n| `mcp.engineCapabilityRefreshMinutes` | `MCP_ENGINECAPABILITYREFRESHMINUTES` | `5` | How often the AI capabilities manifest is refreshed from the engine (only relevant when an AI engine is available). |\n\n---\n\n## Troubleshooting and operability\n\n- **Startup config validation**: when MCP is enabled, the server validates the resolved config at boot and logs findings. Misconfiguration (missing issuer, a `resourceId` that does not end in `/mcp`, a `username-claim` of `sub` with `require-existing-account=true`, and similar) is logged as a warning so it surfaces in the logs instead of as a later rejected-token `401`.\n- **Meaningful `401` responses**: a rejected OAuth token returns a `WWW-Authenticate` header carrying a real `error_description` (audience, issuer, or expiry mismatch), plus a `resource_metadata` pointer for discovery. A tokenless `401` is the normal discovery handshake, not an error.\n- **Audit logging**: MCP calls are attributed to the bound Stirling account, and no secret is written to the audit log.\n\n---\n\n## Connect a client\n\nPoint any MCP client at `http://your-host:8080/mcp` (use your real host, port, and scheme).\n\n**MCP Inspector** (quick manual testing):\n\n```bash\nnpx @modelcontextprotocol/inspector\n```\n\nThen set the transport to streamable-HTTP and the URL to your `/mcp` endpoint, adding the appropriate auth header (`X-API-KEY` in API-key mode, or a Bearer token in OAuth mode).\n\n**Claude Desktop** via the `mcp-remote` bridge - add to your Claude Desktop config:\n\n```json\n{\n \"mcpServers\": {\n \"stirling-pdf\": {\n \"command\": \"npx\",\n \"args\": [\n \"-y\",\n \"mcp-remote\",\n \"http://your-host:8080/mcp\",\n \"--header\",\n \"X-API-KEY:your-stirling-api-key\"\n ]\n }\n }\n}\n```\n\nIn OAuth mode, drop the `X-API-KEY` header and let `mcp-remote` complete the OAuth flow against your configured issuer.\n\n---\n\n## Related Documentation\n\n- **[API documentation](doc:api)** - generate the per-user API key used in API-key mode\n- **[Endpoint or Feature Customisation](doc:configuration/customisation/endpoint-or-feature-customisation)** - the operation ids and global enable/disable config the MCP lists build on\n- **[Modes](doc:modes-and-licensing)** - where each deployment mode and feature applies",
|
||
"sourcePath": "docs/Configuration/Automation/MCP-Server.md",
|
||
"editUrl": "https://github.com/Stirling-Tools/Stirling-Tools.github.io/blob/main/docs/Configuration/Automation/MCP-Server.md"
|
||
},
|
||
"configuration/automation/pipeline": {
|
||
"id": "configuration/automation/pipeline",
|
||
"title": "Pipeline Automation (Automate)",
|
||
"description": "Create automated multi-step PDF workflows with the Automate tool",
|
||
"section": "configuration/automation",
|
||
"markdown": "Create powerful automated workflows that combine multiple PDF operations into sequential processes. The Automate tool (formerly called \"Pipeline\") lets you build, save, and reuse complex PDF processing workflows.\n\n> **ℹ️ Info: V2.0 Update - New \"Automate\" Feature**\n>\n> In V2.0, the pipeline frontend interface has been redesigned as the **\"Automate\"** feature with an improved user experience for creating and managing automation workflows. The backend pipeline system (JSON configuration and folder scanning) continues to work the same way.\n>\n> **What changed:**\n> - Backend pipeline processing - **No changes**\n> - JSON pipeline configurations - **Still work exactly the same**\n> - Folder scanning with pipelines - **Still works the same**\n> - Frontend interface - **Now called \"Automate\" with better UX**\n>\n> If you have existing pipeline JSON files, they continue to work in V2.0's Automate feature.\n\n\n---\n\n## What is Pipeline Automation?\n\nPipeline automation allows you to:\n- **Chain operations** - Combine multiple PDF tools in sequence\n- **Save workflows** - Reuse common operation sequences\n- **Automate processing** - Process files automatically with folder scanning\n- **Standardize procedures** - Ensure consistent processing across teams\n- **Batch process** - Apply same workflow to multiple files\n\nThink of it as **\"macros for PDFs\"** - record your steps once, replay them unlimited times.\n\n---\n\n## Why Use Pipelines?\n\n### Without Pipelines:\n1. Upload PDF to Split tool, download split files\n2. Upload each split file to Watermark tool, download watermarked files\n3. Upload each watermarked file to Compress tool, download final files\n4. Repeat for every batch of documents\n\n### With Pipelines:\n1. Create \"Split-Watermark-Compress\" pipeline once\n2. Upload PDFs, automatic processing, download results\n3. Reuse same pipeline for all future batches\n\n**Time saved:** Minutes per file, hours per day.\n\n---\n\n## Key Concepts\n\n### Operations\nIndividual PDF tools that perform specific tasks:\n- Split, Merge, Compress, Watermark, etc.\n- Each operation has configurable parameters\n- Operations execute in the order you define\n\n### Pipeline\nA sequence of operations with saved configurations:\n- Named workflow (e.g., \"Invoice Processing\")\n- Ordered list of operations\n- Pre-configured settings for each operation\n- Reusable across multiple files\n\n### Pipeline Configuration (JSON)\nText file that defines your pipeline:\n- Lists operations in order\n- Specifies parameters for each operation\n- Can be shared, versioned, and backed up\n- Human-readable and editable\n\n### Folder Scanning\nAutomated processing mode:\n- Watch a folder for new files\n- Automatically apply pipeline to new files\n- Move processed files to output folder\n- Unattended batch processing\n\n---\n\n## Getting Started with Automate\n\n### Accessing the Automate Tool\n\n1. **From Home Page**\n - Click \"Automate\" in the Advanced Tools section\n - Or search for \"automate\" or \"pipeline\"\n\n2. **Open the Automation Builder**\n - Click \"Create New Automation\"\n - The automation builder opens\n\n---\n\n## Building Your First Pipeline\n\n## Steps to Configure and Use Your Pipeline\n\n1. **Start a New Automation**\n - On the Automate screen, click **Create New Automation**.\n\n2. **Enter Automation Name**\n - Provide a name for your automation in the designated field (you can also add an optional description and icon).\n\n3. **Add Tools**\n - Choose the tools for your automation (e.g., **Split Pages**) with **Add Tool**. Tools run in the order you add them.\n\n4. **Configure Tool Settings**\n - Configure each added tool. A tool shows a **! Not Configured** marker until its settings are saved.\n\n5. **Add More Tools**\n - You can add and reorder multiple tools. Make sure each tool is configured.\n\n6. **Save Tool Settings**\n - Click **Save Configuration** in each tool's settings dialog after customizing it.\n\n7. **Save the Automation**\n - Click **Save Automation** once all tools are configured. The Save button stays disabled until the automation is complete.\n\n8. **Download Pipeline Configuration**\n - The Automate UI offers two download buttons:\n - **Export** - downloads `<name>.automate.json` in the **native Automate format** with frontend tool IDs. Use this for re-importing into another Stirling PDF instance via the UI.\n - **Export for Folder Scanning** - downloads `<name>.folder-scan.json` in the **backend format** with full endpoint paths. Use this for the REST API and for folder scanning.\n - To pre-load a pipeline for all users, place a folder-scanning-format JSON file in `/pipeline/defaultWebUIConfigs/` - it will appear in the dropdown.\n\n9. **Run the Automation**\n - Once saved, select the automation from the list, add your files, and run it.\n\n10. **Note on Web UI Limitations**\n - The current web UI version does not support operations that require multiple different types of inputs, such as adding a separate image to a PDF.\n\n### Current Limitations\n\n- Cannot have more than one of the same operation.\n- Cannot input additional files via UI.\n- All files and operations run in serial mode.\n\n---\n\n## Example Pipelines\n\n### Example 1: Invoice Processing\n**Goal:** Process scanned invoices for archival\n\n**Pipeline Steps:**\n1. **OCR** - Make invoices searchable\n - Language: English\n - Preserve formatting: Yes\n2. **Crop** - Remove scanner edges\n - Margins: 0.5 inches all sides\n3. **Add Watermark** - Mark as processed\n - Text: \"PROCESSED [DATE]\"\n - Position: Bottom right\n - Opacity: 50%\n4. **Compress** - Reduce file size\n - Level: Medium\n5. **Add Password** - Secure documents\n - Password: [configured per run]\n\n**Use Case:** Accounting department processing hundreds of invoices monthly\n\n---\n\n### Example 2: Report Distribution\n**Goal:** Prepare reports for external sharing\n\n**Pipeline Steps:**\n1. **Remove Pages** - Remove internal pages\n - Pages: 2,3 (remove cover sheets)\n2. **Add Page Numbers** - Number all pages\n - Position: Bottom center\n - Format: \"Page X of Y\"\n3. **Add Stamp** - Add \"CONFIDENTIAL\" stamp\n - Position: Top right\n - Color: Red\n4. **Change Permissions** - Restrict editing\n - Allow printing: Yes\n - Allow editing: No\n5. **Compress** - Optimize for email\n - Level: High\n\n**Use Case:** Monthly reports sent to clients\n\n---\n\n### Example 3: Document Standardization\n**Goal:** Standardize format of received documents\n\n**Pipeline Steps:**\n1. **Rotate** - Fix orientation\n - Mode: Auto-detect\n2. **Scale Pages** - Standardize to Letter size\n - Target: 8.5 x 11 inches\n3. **Add Metadata** - Tag documents\n - Title: [Auto-extracted]\n - Author: \"Company Name\"\n - Keywords: \"Standardized, Processed\"\n4. **Remove Annotations** - Clean markup\n5. **Flatten** - Remove form fields\n\n**Use Case:** HR department standardizing employee submissions\n\n---\n\n### Example 4: Batch Conversion\n**Goal:** Convert and optimize image scans\n\n**Pipeline Steps:**\n1. **Convert** - Images to PDF\n - Source: JPG, PNG\n2. **OCR** - Add text layer\n - Language: Multiple\n3. **Remove Blanks** - Delete empty pages\n - Threshold: 95%\n4. **Compress** - Optimize size\n - Level: Medium\n5. **PDF/A** - Convert for archival\n - Version: PDF/A-2b\n\n**Use Case:** Digitization project for paper archives\n\n---\n\n## Common Pipeline Patterns\n\n### Quality Enhancement Pipeline\n**Pattern:** Improve scanned document quality\n```\nOCR → Remove Blanks → Adjust Contrast → Compress → Add Metadata\n```\n\n### Security Pipeline\n**Pattern:** Secure documents for distribution\n```\nRemove Metadata → Add Watermark → Add Password → Change Permissions\n```\n\n### Compression Pipeline\n**Pattern:** Reduce file sizes for storage/email\n```\nRemove Annotations → Remove Images (optional) → Compress → Validate\n```\n\n### Branding Pipeline\n**Pattern:** Add company branding to documents\n```\nAdd Watermark → Add Stamp → Add Page Numbers → Add Metadata\n```\n\n### Preparation Pipeline\n**Pattern:** Prepare documents for printing\n```\nRotate → Scale Pages → Booklet Imposition → Remove Annotations\n```\n\n---\n\n## JSON Configuration\n\n### Basic Structure\n\nA pipeline JSON file has a `name` and a `pipeline` array. Each entry has an `operation` (the full API endpoint path) and a `parameters` object:\n\n```json\n{\n \"name\": \"My Pipeline\",\n \"pipeline\": [\n {\n \"operation\": \"/api/v1/general/split-pages\",\n \"parameters\": {\n \"pageNumbers\": \"5\"\n }\n },\n {\n \"operation\": \"/api/v1/misc/compress-pdf\",\n \"parameters\": {\n \"optimizeLevel\": 5,\n \"expectedOutputSize\": \"\"\n }\n }\n ]\n}\n```\n\n> **📝 Note: Operation names are full endpoint paths**\n>\n> Pipeline operation names use the **full REST API path**, not short names. For example, use `/api/v1/general/split-pages` (not just `split-pages`). The Folder-Scanning export from the Automate UI produces these paths automatically.\n>\n> If you have older pipeline JSONs that used short names, regenerate them from the Automate UI using **Export for Folder Scanning**.\n\n\n### Optional fields\n\nFor folder scanning (not used by the REST API):\n\n```json\n{\n \"name\": \"...\",\n \"pipeline\": [ ... ],\n \"outputDir\": \"{outputFolder}/{folderName}\",\n \"outputFileName\": \"{filename}-{pipelineName}-{date}-{time}\"\n}\n```\n\n`outputDir` and `outputFileName` accept the placeholders `{outputFolder}`, `{folderName}`, `{filename}`, `{pipelineName}`, `{date}`, `{time}`.\n\n---\n\n## Operation and parameter reference\n\nPipeline operations use the **full endpoint paths** of Stirling PDF's REST API, with the same field names. So once you know the underlying endpoint, you know the pipeline operation - no separate vocabulary to learn.\n\nFor the canonical list of operations and the full parameter schema for each, see:\n\n- **Local Swagger UI** at `/swagger-ui.html` on your instance - includes every endpoint, parameter types, and lets you try requests live\n- **Online API reference** - the [Stirling PDF API documentation](https://app.swaggerhub.com/apis-docs/Frooodle/Stirling-PDF/) and the [Scalar API registry](https://registry.scalar.com/@stirlingpdf/apis/stirling-pdf-processing-api/)\n\nSee [API Documentation](doc:api) for authentication and general API usage.\n\nPipelines can only call endpoints under `/api/v1/general/...`, `/api/v1/misc/...`, `/api/v1/security/...`, `/api/v1/convert/...`, `/api/v1/filter/...`, and `/api/v1/ai/tools/...`. Anything outside those namespaces is rejected by the pipeline processor with a `SecurityException` - this includes `/api/v1/info/...`, `/api/v1/auth/...`, `/api/v1/admin/...`, and `/api/v1/pipeline/handleData` itself (pipelines cannot recursively call themselves).\n\nThe `/api/v1/ai/tools/...` namespace currently exposes proprietary AI features (e.g. `math-auditor-agent`, `pdf-comment-agent`) and is only available with the corresponding paid license.\n\n> **💡 Tip: Build it in the UI, export it as JSON**\n>\n> The fastest way to get a correct pipeline JSON for any combination of operations is to build it visually in the **Automate** tool and click **Export for Folder Scanning**. The exported file uses exactly the format the API expects, with the right operation paths and parameters already filled in for you.\n\n\n---\n\n## Filter / conditional operations\n\nFilter operations let you **branch a pipeline**. Each one checks a property of the file and either lets the file **continue to the next steps** or **drops it** so the rest of the pipeline never sees it. This is how you say \"only keep processing files that match X\" inside an automation - for example, only run OCR on scans that have no text yet, or only watermark documents over a certain page count.\n\nA file that does not match a filter is simply removed from the rest of the pipeline. It is not treated as an error.\n\nThese operation names go in your pipeline configuration:\n\n| Operation name | Keeps the file when... |\n|---|---|\n| `filter-contains-text` | the PDF contains a given piece of text (you can limit the check to specific pages) |\n| `filter-contains-image` | the PDF contains an image (you can limit the check to specific pages) |\n| `filter-page-count` | the page count is greater than, equal to, or less than a value you set |\n| `filter-page-size` | the first page's size compares to a standard page size you choose |\n| `filter-file-size` | the file size compares to a value you set |\n| `filter-page-rotation` | the first page's rotation compares to a value you set |\n\nThe four comparison filters (`filter-page-count`, `filter-page-size`, `filter-file-size`, `filter-page-rotation`) take a `comparator` of `Greater`, `Equal`, or `Less`.\n\n**Example - only OCR files that are image-only scans:** detect scans with no text layer using `filter-contains-image`, then route the matching files through the OCR operation. Files that already contain text are dropped before the OCR step, so you only spend processing time on the scans that need it.\n\n```json\n{\n \"name\": \"OCR only image-only scans\",\n \"pipeline\": [\n {\"operation\": \"/api/v1/filter/filter-contains-image\", \"parameters\": {\"pageNumbers\": \"all\"}},\n {\"operation\": \"/api/v1/misc/ocr-pdf\", \"parameters\": {\"languages\": [\"eng\"], \"ocrType\": \"skip-text\"}}\n ]\n}\n```\n\nThese filter operations work both in the REST API and in folder scanning.\n\n---\n\n\n## REST API: `POST /api/v1/pipeline/handleData`\n\nTrigger a pipeline programmatically via the REST API. Use this from scripts, automation platforms (n8n, Zapier, Make, Power Automate), or your own integrations.\n\n### Request\n\n- **Method**: `POST`\n- **URL**: `/api/v1/pipeline/handleData`\n- **Content-Type**: `multipart/form-data`\n- **Authentication**: When security is enabled, set the `X-API-KEY` header. See [API Documentation](doc:api) for details.\n\n### Multipart fields\n\n| Field | Type | Required | Purpose |\n|---|---|---|---|\n| `fileInput` | file | yes | One or more PDF files. Repeat the field for multiple files. |\n| `json` | string | yes | The pipeline configuration JSON. |\n\nYou don't need to include `fileInput` inside the `parameters` object - the pipeline processor injects each uploaded file automatically. The Automate UI's \"Export for Folder Scanning\" includes `\"fileInput\": \"automated\"` as a marker in every step, which the backend ignores; you can leave it in or strip it out, both work.\n\n### Optional query parameters\n\n- `?async=true` - run the pipeline asynchronously and return a job ID instead of the file. Poll `GET /api/v1/general/job/{id}` for progress.\n\n### Response\n\n- **Single output file**: returned directly as `application/octet-stream` with `Content-Disposition: attachment; filename=...`.\n- **Multiple output files**: returned as `output.zip`.\n- **Async mode**: returns a JSON body with the job ID.\n\n### Working curl example\n\n```bash\ncurl -X POST \"http://localhost:8080/api/v1/pipeline/handleData\" \\\n -H \"X-API-KEY: $STIRLING_API_KEY\" \\\n -F \"fileInput=@/path/to/input.pdf\" \\\n -F 'json={\n \"name\": \"Repair-then-compress\",\n \"pipeline\": [\n {\"operation\": \"/api/v1/misc/repair\", \"parameters\": {}},\n {\"operation\": \"/api/v1/misc/compress-pdf\", \"parameters\": {\"optimizeLevel\": 2}}\n ]\n }' \\\n --output result.pdf\n```\n\nFor multiple files use repeated `-F \"fileInput=@...\"` flags; the response will be `output.zip`. For the full parameter list for each operation, see the API docs linked above.\n\n### Error responses\n\n| Situation | HTTP status | Body |\n|---|---|---|\n| Auth required and no key supplied | 401 | `{\"error\":\"Unauthorized\",\"message\":\"Authentication required...\",\"status\":401}` |\n| Multipart parsing failed (missing field, bad JSON) | 400 | Spring's standard error JSON |\n| Invalid operation name, disallowed endpoint, or missing required parameter | 200 with empty body | The server logs an `IllegalArgumentException` but returns an empty response. |\n| Downstream endpoint returned non-2xx | 200 with partial/empty body | The error is logged but does not surface in the HTTP response. |\n\n> **⚠️ Warning: Validate response bodies**\n>\n> Errors that occur after multipart parsing currently collapse to `HTTP 200` with an empty body. Always check that the response is a non-empty PDF (starts with `%PDF-`) or a ZIP (starts with `PK\\x03\\x04`) before treating the call as successful.\n\n\n### Tips\n\n- **Build in the UI, export the JSON.** The fastest way to get a correct JSON is to build the pipeline in the Automate UI, then click **Export for Folder Scanning**. The exported file works directly with `handleData`. The other button, **Export**, produces a different \"native Automate\" format (uses an `operations` key with frontend tool IDs like `\"merge\"`) that is only for re-importing into another Automate UI, not for the API.\n- **No image / file parameters.** Operations that take an additional file input (image watermarks, separate overlay PDFs, attaching files) cannot be expressed in pipeline JSON via the REST API. Call those endpoints directly instead.\n- **List parameters become repeated form fields.** Internally the processor expands `[\"eng\",\"deu\"]` into two `languages=eng` and `languages=deu` form parts, which is what the underlying endpoints expect.\n- **Filters drop files.** A filter step that doesn't match keeps the file out of later steps. Useful for \"process only PDFs that contain X\".\n- **Multi-input operations batch.** Operations marked multi-input (e.g. `merge-pdfs`) receive every matching file in a single call. If no files in the working set match the operation's expected extension, the step logs `No files with extension X found for operation Y...` and continues with the other files.\n- **Unknown JSON fields are ignored.** The pipeline parser silently drops fields it doesn't recognise, so you can add `description`, `icon`, or other metadata at the top level without breaking anything.\n\n---\n\n## Folder Scanning Setup\n\nAutomate processing of files placed in watched folders.\n\n### How Folder Scanning Works\n\n1. **Watch Input Folder** - Monitor for new files\n2. **Detect New Files** - Identify PDFs added to folder\n3. **Apply Pipeline** - Process with configured pipeline\n4. **Output Results** - Save to output folder\n5. **Archive Originals** - Move processed files (optional)\n\n### Directory Structure\n\n```\n/pipeline/\n ├── watchedFolders/\n │ ├── invoice-processing/\n │ │ ├── my-pipeline.json # any *.json file in the folder is the pipeline config\n │ │ ├── invoice-001.pdf # drop PDFs directly into the folder root\n │ │ ├── invoice-002.pdf\n │ │ └── processing/ # auto-created by the scanner while a file is in flight\n │ └── report-prep/\n │ └── ...\n ├── finishedFolders/ # outputs appear here by default (per `outputDir` placeholder)\n └── defaultWebUIConfigs/ # pre-loaded pipelines exposed in the Automate UI dropdown\n ├── invoice.json\n └── reports.json\n```\n\n### Configuration File\n\nDrop a `.json` file (any name) into each watched folder. The first `.json` the scanner finds is used as the pipeline:\n\n```json\n{\n \"name\": \"Invoice Processing\",\n \"pipeline\": [\n {\"operation\": \"/api/v1/misc/ocr-pdf\", \"parameters\": {\n \"languages\": [\"eng\"], \"ocrType\": \"skip-text\",\n \"ocrRenderType\": \"hocr\", \"deskew\": true, \"clean\": false,\n \"cleanFinal\": false, \"sidecar\": false, \"removeImagesAfter\": false}}\n ],\n \"outputDir\": \"{outputFolder}/{folderName}\",\n \"outputFileName\": \"{filename}-processed-{date}\"\n}\n```\n\nPDFs go directly in the watched folder root (NOT in an `input/` subdirectory). The scanner auto-creates a `processing/` subfolder while a file is being worked on, and writes outputs to wherever `outputDir` resolves to (typically `/pipeline/finishedFolders/...` via the `{outputFolder}` placeholder).\n\nThe watched-folder scanner runs every 60 seconds.\n\n**Learn more:** [Folder Scanning Guide](doc:configuration/storage/folderscanning)\n\n---\n\n## Best Practices\n\n### Pipeline Design\n\n1. **Test Incrementally**\n - Build pipeline one operation at a time\n - Test each step before adding the next\n - Verify output at each stage\n\n2. **Order Operations Logically**\n - Do OCR before text-based operations\n - Remove pages before processing remaining pages\n - Compress last to optimize final output\n\n3. **Use Descriptive Names**\n - Name pipelines clearly: \"Invoice-OCR-Watermark-Archive\"\n - Add descriptions in comments\n - Version your pipeline files\n\n4. **Handle Errors Gracefully**\n - Test with various file types\n - Consider edge cases (empty PDFs, locked files)\n - Monitor logs for errors\n\n### Performance Optimization\n\n1. **Minimize Operations**\n - Combine similar operations when possible\n - Remove unnecessary steps\n - Don't duplicate efforts\n\n2. **Optimize Compression**\n - Compress once at the end, not multiple times\n - Choose appropriate compression level\n - Balance quality vs. file size\n\n3. **Batch Intelligently**\n - Group similar files together\n - Process during off-peak hours\n - Monitor system resources\n\n### Maintenance\n\n1. **Version Control**\n - Keep pipeline JSONs in git repository\n - Track changes over time\n - Document modifications\n\n2. **Regular Review**\n - Audit pipelines quarterly\n - Remove unused pipelines\n - Update for new requirements\n\n3. **Monitor Performance**\n - Check processing times\n - Review error logs\n - Optimize slow operations\n\n---\n\n## Troubleshooting\n\n### Pipeline Fails to Execute\n\n**Symptoms:** Pipeline starts but doesn't complete\n\n**Common Causes:**\n- Invalid parameter values\n- Unsupported file format\n- Missing dependencies (OCR languages, fonts)\n- File permissions issues\n\n**Solutions:**\n1. Validate JSON configuration\n2. Test each operation individually\n3. Check server logs for errors\n4. Verify required dependencies installed\n\n---\n\n### `handleData` Returns Empty Response\n\n**Symptoms:** REST API call returns HTTP 200 with an empty body.\n\n**Cause:** Errors after multipart parsing (invalid operation name, missing required parameter, downstream endpoint failure) currently collapse to `200 OK` with no body. Check the server logs for the actual error.\n\n**Common reasons:**\n- Operation name used short form (e.g. `compress-pdf`) instead of full path (`/api/v1/misc/compress-pdf`)\n- Operation references an endpoint outside the allowed namespaces (only `general`, `misc`, `security`, `convert`, `filter`, `ai/tools` are permitted)\n- A required parameter was omitted (check the schema for the underlying endpoint in the [Swagger UI / API reference](#operation-and-parameter-reference))\n- The pipeline tries to call `/api/v1/pipeline/handleData` recursively\n\n---\n\n### Folder Scanning Not Working\n\n**Symptoms:** Files not processed automatically\n\n**Possible Issues:**\n- Folder permissions incorrect\n- Pipeline configuration invalid\n- Folder scanning not enabled\n\n**Solutions:**\n1. Check folder permissions (read/write access)\n2. Test pipeline manually first\n3. Check `docker logs` for errors\n4. Ensure folder scanning feature enabled\n5. The scanner runs once every 60 seconds - allow that long after dropping a file\n\n---\n\n### Operation Parameters Not Applying\n\n**Symptoms:** Pipeline runs but doesn't use specified settings\n\n**Causes:**\n- Incorrect parameter names\n- Wrong parameter data types\n- Parameters not supported in operation\n\n**Solutions:**\n1. Check parameter names against the endpoint's schema in the [Swagger UI / API reference](#operation-and-parameter-reference)\n2. Verify parameter value types (string, number, boolean)\n3. Test the same parameters by calling the endpoint directly first\n\n---\n\n### Results Not as Expected\n\n**Symptoms:** Pipeline completes but output incorrect\n\n**Debugging Steps:**\n1. Test each operation individually\n2. Check intermediate outputs\n3. Verify operation order makes sense\n4. Review parameter values\n5. Test with simpler input files\n\n---\n\n## Pipeline vs. Multi-Tool vs. Manual\n\n### Use Pipeline/Automate When:\n- Same workflow repeated frequently\n- Predictable, consistent operations\n- Automated folder processing needed\n- No manual intervention required\n- Standardizing team processes\n- Large batch processing\n- Scheduled/unattended processing\n\n### Use Multi-Tool When:\n- Workflow varies per file\n- Need visual feedback at each step\n- Experimenting with different settings\n- Manual decision points in workflow\n- One-time complex tasks\n\n### Use Individual Tools When:\n- Single, simple operation\n- Quick one-off task\n- Learning how operations work\n- No need for automation\n\n---\n\n## Security Considerations\n\n### Pipeline Files\n- **Protect JSON configs** - May contain passwords or sensitive settings\n- **Restrict folder access** - Limit who can create/modify pipelines\n- **Review before deploying** - Audit pipelines for security issues\n\n### Folder Scanning\n- **Isolate watched folders** - Don't expose to untrusted users\n- **Monitor activity** - Log all processing for audit trail\n- **Secure output folders** - Protect processed documents appropriately\n\n### Automated Processing\n- **Validate inputs** - Ensure only expected files processed\n- **Error handling** - Don't expose sensitive error messages\n- **Resource limits** - Prevent resource exhaustion attacks\n\n---\n\n## Related Documentation\n\n- **[Folder Scanning Setup](doc:configuration/storage/folderscanning)** - Detailed folder scanning guide\n- **[Multi-Tool](doc:functionality/multi-tool)** - Interactive multi-operation tool\n- **[Endpoint Customisation](doc:configuration/customisation/endpoint-or-feature-customisation)** - Operation names and IDs\n- **[API Documentation](doc:api)** - Programmatic pipeline execution\n- **[Advanced Tools](doc:functionality/advanced-tools)** - Other automation features\n\n---\n\n## Summary\n\nPipeline automation (Automate tool) transforms Stirling PDF into a workflow engine:\n\n- **Chain operations** - Combine multiple PDF tools sequentially\n- **Save workflows** - Reusable pipeline configurations\n- **Folder scanning** - Automated unattended processing\n- **REST API** - Trigger pipelines from any external system\n- **Standardization** - Consistent processing across teams\n- **Efficiency** - Minutes saved per file, hours per day\n\n**Perfect for:** Repetitive workflows, batch processing, automated document preparation, and standardized procedures.\n\nReady to automate? Create your first pipeline and transform how you process PDFs.",
|
||
"sourcePath": "docs/Configuration/Automation/Pipeline.md",
|
||
"editUrl": "https://github.com/Stirling-Tools/Stirling-Tools.github.io/blob/main/docs/Configuration/Automation/Pipeline.md"
|
||
},
|
||
"configuration/automation/telegram-bot": {
|
||
"id": "configuration/automation/telegram-bot",
|
||
"title": "Telegram Bot Integration",
|
||
"description": "Process PDFs through a Telegram bot powered by Stirling PDF pipelines",
|
||
"section": "configuration/automation",
|
||
"markdown": "Stirling PDF can run a Telegram bot that accepts PDF files from chats and returns processed results using your saved [Automate / Pipeline](doc:configuration/automation/pipeline) configurations. Send a PDF to the bot, get a processed PDF back.\n\nFree on all license tiers.\n\n> **⚠️ Warning: Community feature - not recommended for Enterprise use**\n>\n> The Telegram bot integration is a **community-built feature** in **beta**. It is not built, tested, or supported by Stirling Tools and is not covered by the Server / Enterprise support SLA. **We do not recommend it for Enterprise or production-critical deployments.** Raise issues on GitHub or in the community Discord. Behaviour and config keys may change in future releases.\n\n\n---\n\n## How it works\n\n1. A user, channel, or group sends a PDF file to your Telegram bot.\n2. The bot saves the file into a watched pipeline inbox folder.\n3. Stirling PDF processes the file using the pipeline JSON in that folder (see [Folder Scanning](doc:configuration/storage/folderscanning)).\n4. The bot sends the result back to the chat.\n\nThe bot talks to Telegram outbound only - no inbound port or webhook setup required, just outbound HTTPS to `api.telegram.org`.\n\n---\n\n## Setup overview\n\n1. Create the bot in Telegram and get a bot token.\n2. Set your token and username in Stirling PDF.\n3. Drop a pipeline JSON into the inbox folder.\n4. Send a PDF to the bot.\n\n---\n\n## 1. Create the bot in Telegram\n\n1. Open [@BotFather](https://t.me/BotFather) in Telegram.\n2. Send `/newbot`.\n3. Pick a display name and a username ending in `bot`.\n4. Copy the token BotFather returns.\n\n**If you plan to add the bot to groups:** also send `/setprivacy`, select your bot, choose **Disable**. With privacy mode on (the default), the bot only sees commands and direct mentions in groups.\n\n---\n\n## 2. Configure Stirling PDF\n\nThe `telegram:` block is already present in the shipped `settings.yml` - find it and update the values (set `enabled: true`, fill in `botToken` and `botUsername`), or set the equivalent environment variables. Restart Stirling PDF after saving via file edits; the Admin UI hot-applies.\n\n### Minimal config\n\n```yaml\ntelegram:\n enabled: true\n botToken: \"your-token-from-botfather\"\n botUsername: \"your_bot_username\"\n```\n\n### Recommended config\n\n```yaml\ntelegram:\n enabled: true\n botToken: \"your-token-from-botfather\"\n botUsername: \"your_bot_username\"\n customFolderSuffix: true # one inbox per chat\n enableAllowUserIDs: true # restrict to known users\n allowUserIDs: [123456789]\n processingTimeoutSeconds: 180 # max time to wait for a result\n```\n\n### Admin UI\n\nIf you have login enabled, configure the bot from **Admin Settings → Connections → Telegram Bot**. Changes saved through the UI apply without a restart.\n\n---\n\n## 3. Drop a pipeline JSON into the inbox\n\nThe bot will not process uploads until at least one `.json` pipeline file exists in the chat's inbox folder.\n\nDefault inbox path: `/pipeline/watchedFolders/telegram/`. With `customFolderSuffix: true` (recommended), each chat gets its own subfolder named after its Telegram chat ID.\n\n### How to get a chat ID\n\nThe folder is created the first time a chat messages the bot. Easiest bootstrap:\n\n1. Send any message from the chat to the bot.\n2. Look at the new subfolder name under `/pipeline/watchedFolders/telegram/`.\n3. That subfolder name is the chat ID.\n\nOr chat with [@userinfobot](https://t.me/userinfobot) which echoes your user ID.\n\n### Build the pipeline JSON\n\nOpen the **Automate** tool, build the workflow you want, then click **Export for Folder Scanning** to download the JSON. Drop the file into the chat's inbox folder. The filename does not matter - any `.json` is picked up.\n\nSee [Pipeline Automation](doc:configuration/automation/pipeline) for details.\n\n---\n\n## 4. Use the bot\n\nIn Telegram, send the bot a PDF. The bot acknowledges, processes it via the pipeline, and sends the result back. Typical end-to-end time is 1-3 minutes (depending on what the pipeline does).\n\nOnly files with MIME type `application/pdf` are accepted.\n\n`/start` in a private chat returns a welcome message.\n\n---\n\n## Configuration reference\n\nAll options live under the top-level `telegram:` block. Environment variables use the `TELEGRAM_*` form (Spring Boot relaxed binding: dots become underscores, camelCase joins stay glued).\n\n| YAML key | Default | Purpose |\n|---|---|---|\n| `enabled` | `false` | Master toggle. |\n| `botToken` | empty | BotFather token. |\n| `botUsername` | empty | Bot username, without the `@`. |\n| `pipelineInboxFolder` | `\"telegram\"` | Subfolder name under `/pipeline/watchedFolders/`. |\n| `customFolderSuffix` | `true` | Appends the chat ID as a subdirectory so each chat has its own inbox. |\n| `enableAllowUserIDs` | `true` | Turn on user ID allowlist (for private chats). |\n| `allowUserIDs` | `[]` | Allowed user IDs. |\n| `enableAllowChannelIDs` | `true` | Turn on channel ID allowlist. |\n| `allowChannelIDs` | `[]` | Allowed channel IDs (typically negative, e.g. `-1001234567890`). |\n| `processingTimeoutSeconds` | `180` | Max wait for a pipeline result. Keep ≥ 90s. |\n| `pollingIntervalMillis` | `2000` | How often to check for results. |\n| `feedback.user.*` | all `true` | Per-message-type replies in private chats (`noValidDocument`, `errorMessage`, `errorProcessing`, `processing`). |\n| `feedback.channel.*` | all `true` | Same for channels. |\n\n---\n\n## Access control\n\n- **Private chats**: controlled by `enableAllowUserIDs` + `allowUserIDs`.\n- **Channels**: controlled by `enableAllowChannelIDs` + `allowChannelIDs`.\n- **Groups and supergroups**: **always allowed** - the allowlist does not apply. To restrict group access, either don't add the bot to groups, or use BotFather's `/setjoingroups → Disable` so it can't be invited.\n\nFor production deployments, always enable the user or channel allowlist.\n\n---\n\n## Limitations\n\n- **20 MB upload limit** (a Telegram bot API constraint, not Stirling).\n- **One JSON per chat folder** when `customFolderSuffix: true`. Create the folder by messaging the bot first, then drop the JSON in.\n- **Output is sent file-by-file** - if your pipeline emits N files, the user gets N Telegram messages, no zipping.\n\n---\n\n## Recommended deployment patterns\n\n- **Personal use**: private-chat allowlist with your own user ID. Single pipeline JSON in your chat's subfolder.\n- **Team-shared inbox**: a Telegram group, with the bot's privacy mode disabled in BotFather. One pipeline JSON for the group.\n- **Per-user pipelines**: `customFolderSuffix: true` plus a tailored pipeline JSON per chat ID.\n- **Channel posting**: add the bot as a channel admin with \"Post Messages\" permission, restrict via `allowChannelIDs`.\n\n---\n\n## Related Documentation\n\n- **[Pipeline Automation](doc:configuration/automation/pipeline)** - Build the pipeline JSONs the bot uses\n- **[Folder Scanning](doc:configuration/storage/folderscanning)** - The processing engine the bot relies on\n- **[API Documentation](doc:api)** - Trigger pipelines without Telegram",
|
||
"sourcePath": "docs/Configuration/Automation/Telegram Bot.md",
|
||
"editUrl": "https://github.com/Stirling-Tools/Stirling-Tools.github.io/blob/main/docs/Configuration/Automation/Telegram Bot.md"
|
||
},
|
||
"configuration/automation/usage-monitoring": {
|
||
"id": "configuration/automation/usage-monitoring",
|
||
"title": "Usage Monitoring",
|
||
"section": "configuration/automation",
|
||
"markdown": "> **Tier**: Enterprise\n\nStirling PDF provides robust usage monitoring capabilities through its API, allowing you to track application usage patterns and performance metrics.\n\n## Non-Persistent Usage Monitoring API\n\nThe following API endpoints are available to all users to monitor usage statistics. These endpoints provide non-persistent usage data that can be queried on demand.\n\n| Endpoint | Description |\n|----------|-------------|\n| `GET /api/v1/info/status` | Application status and version information |\n| `GET /api/v1/info/requests` | Total count of POST requests for a specific endpoint (optional query parameter: `endpoint`) |\n| `GET /api/v1/info/requests/unique` | Count of unique users for POST requests for a specific endpoint |\n| `GET /api/v1/info/requests/all` | POST requests count for all endpoints |\n| `GET /api/v1/info/requests/all/unique` | Unique users count for POST requests for all endpoints |\n| `GET /api/v1/info/load` | Total count of GET requests for a specific endpoint (optional query parameter: `endpoint`) |\n| `GET /api/v1/info/load/unique` | Count of unique users for GET requests for a specific endpoint |\n| `GET /api/v1/info/load/all` | GET requests count for all endpoints |\n| `GET /api/v1/info/load/all/unique` | Unique users count for GET requests for all endpoints |\n\nAll endpoints return a JSON response with the requested statistics.\n\n## Prometheus Monitoring Configuration\n\nStirling PDF supports application metrics monitoring using Prometheus. This feature allows you to track application performance, usage patterns, and health metrics.\n\n### Prerequisites\n\n1. A valid Stirling PDF enterprise license\n2. Enterprise mode enabled in your configuration\n3. Running with additional features enabled (DISABLE_ADDITIONAL_FEATURES=false)\n\n### Configuration\n\nConfigure Prometheus monitoring using your preferred method:\n\n\n \n Configure in your `/configs/custom_settings.yml` file:\n\n ```yaml\n management:\n endpoints:\n web:\n exposure:\n include: prometheus,health,info\n endpoint:\n health:\n show-details: always\n metrics:\n export:\n prometheus:\n enabled: true\n enterprisemanagement:\n metrics:\n enabled: true\n ```\n \n \n Set the `JAVA_CUSTOM_OPTS` environment variable:\n\n ```bash\n JAVA_CUSTOM_OPTS=\"-Dmanagement.endpoints.web.exposure.include=prometheus,health,info -Dmanagement.endpoint.health.show-details=always -Dmanagement.metrics.export.prometheus.enabled=true -Denterprisemanagement.metrics.enabled=true\"\n ```\n \n \n ```bash\n docker run -d \\\n -p 8080:8080 \\\n -e JAVA_CUSTOM_OPTS=\"-Dmanagement.endpoints.web.exposure.include=prometheus,health,info -Dmanagement.endpoint.health.show-details=always -Dmanagement.metrics.export.prometheus.enabled=true -Denterprisemanagement.metrics.enabled=true\" \\\n docker.stirlingpdf.com/stirlingtools/stirling-pdf:latest\n ```\n \n \n ```yaml\n services:\n stirling-pdf:\n image: docker.stirlingpdf.com/stirlingtools/stirling-pdf:latest\n environment:\n JAVA_CUSTOM_OPTS: \"-Dmanagement.endpoints.web.exposure.include=prometheus,health,info -Dmanagement.endpoint.health.show-details=always -Dmanagement.metrics.export.prometheus.enabled=true -Denterprisemanagement.metrics.enabled=true\"\n ```\n \n\n\n**What this configures:**\n- Prometheus metrics endpoint exposure\n- Health and info endpoints for basic monitoring\n- Detailed health information\n- Prometheus metrics export\n- Enterprise metrics collection\n\n### Accessing Metrics\n\nOnce configured, Prometheus metrics are available at the following endpoint:\n\n```\nhttps://your-stirling-pdf-instance/actuator/prometheus\n```\n\nThis endpoint provides metrics in a format that can be scraped by a Prometheus server.\n\n### Configuring Prometheus Server\n\nAdd the following job configuration to your Prometheus server's configuration file (`prometheus.yml`):\n\n```yaml\nscrape_configs:\n - job_name: 'stirling-pdf'\n metrics_path: '/actuator/prometheus'\n scrape_interval: 15s\n static_configs:\n - targets: ['your-stirling-pdf-host:port']\n```\n\n### Available Metrics\n\nWith Prometheus integration enabled, Stirling PDF exposes the following types of metrics:\n- **JVM metrics**: Memory usage, garbage collection, thread utilization\n- **System metrics**: CPU usage, file descriptors\n- **Application metrics**: Request rates, processing times\n- **PDF processing metrics**: Document operations, conversion statistics",
|
||
"sourcePath": "docs/Configuration/Automation/Usage Monitoring.md",
|
||
"editUrl": "https://github.com/Stirling-Tools/Stirling-Tools.github.io/blob/main/docs/Configuration/Automation/Usage Monitoring.md"
|
||
},
|
||
"configuration/configuration": {
|
||
"id": "configuration/configuration",
|
||
"title": "Configuration Guide",
|
||
"description": "Configure Stirling PDF using environment variables, settings files, or in-app settings",
|
||
"section": "configuration",
|
||
"markdown": "Stirling PDF can be configured in three ways, depending on your deployment and preferences.\n\n## Configuration Methods\n\n### 1. In-App Settings (Recommended)\n\nIf you have login enabled, admins can configure everything through the Settings menu in the application.\n\n**To use:**\n1. Set `SECURITY_ENABLELOGIN=true`\n2. Log in as admin\n3. Go to Settings → configure through UI\n4. Changes apply immediately, no restart needed\n\n**Best for:** Production deployments with admin users\n\n---\n\n### 2. Environment Variables\n\nConfigure via Docker environment variables or system environment variables.\n\n**To use:**\n```bash\ndocker run -d \\\n -e SECURITY_ENABLELOGIN=true \\\n -e SYSTEM_DEFAULTLOCALE=en-US \\\n docker.stirlingpdf.com/stirlingtools/stirling-pdf:latest\n```\n\n**Best for:** Docker deployments, infrastructure-as-code, initial setup\n\n---\n\n### 3. Settings File (settings.yml)\n\nEdit `/configs/settings.yml` directly for advanced configuration.\n\n**To use:**\n```yaml\nsecurity:\n enableLogin: true\nsystem:\n defaultLocale: en-US\n```\n\n**Best for:** Complex configurations, when you prefer file-based config\n\n---\n\n## Common Settings\n\n### Authentication\n\n**Note:** Authentication and additional features are included by default in:\n- **Docker**: All images except ultra-lite (authentication is enabled by default)\n- **JAR**: [Stirling-PDF-with-login.jar](https://files.stirlingpdf.com/Stirling-PDF-with-login.jar) **(Recommended)**\n\nThe plain [Stirling-PDF.jar](https://files.stirlingpdf.com/Stirling-PDF.jar) does not include authentication or additional features.\n\nConfigure user login:\n\n\n \n ```yaml\n security:\n enableLogin: true\n initialLogin:\n username: admin\n password: changeme123\n ```\n \n \n ```bash\n SECURITY_ENABLELOGIN=true\n SECURITY_INITIALLOGIN_USERNAME=admin\n SECURITY_INITIALLOGIN_PASSWORD=changeme123\n ```\n \n\n\nDefault credentials: `admin` / `stirling` (change immediately after first login)\n\nFor more details, see [System and Security Configuration](doc:configuration/security/system-and-security).\n\n### Language & Localization\n\n\n \n ```yaml\n ui:\n languages: [] # Available languages (empty = all enabled), e.g. [\"en_US\", \"de_DE\"]\n system:\n defaultLocale: en-US # Default language for new users\n ```\n \n \n ```bash\n UI_LANGUAGES=en_US,de_DE # Restrict available languages (omit to enable all)\n SYSTEM_DEFAULTLOCALE=en-US # Default language\n ```\n \n\n\nLeaving `defaultLocale` empty (the default) auto-detects the language from the browser and falls back to `en-US` if no preference is found.\n\n**How language selection works:**\n\nStirling PDF determines the interface language using this priority order:\n\n1. **User's manual selection** (highest priority)\n - When a user clicks the language globe icon and selects a language\n - Choice is stored in browser's localStorage (persists across sessions)\n - Storage key: `i18nextLng`\n\n2. **System default locale**\n - Set via `SYSTEM_DEFAULTLOCALE` or `system.defaultLocale`\n - When configured, it overrides the browser's detected language for users who have not made a manual selection\n\n3. **Browser's language preference**\n - Automatically detected from the browser's language setting\n - Example: Firefox set to Swedish (sv-SE) shows Swedish UI when no `defaultLocale` is configured\n\n4. **Fallback** (lowest priority)\n - `en-US` is used when none of the above resolve to an available language\n\n**Example:**\n- Config: `SYSTEM_DEFAULTLOCALE=en-US`\n- Browser: Swedish (sv-SE)\n- Result: UI shows English (US) (the configured default overrides the browser preference)\n\nIf `defaultLocale` is left empty (the default), the browser-detected language is used instead. Users can always override either choice by manually selecting a language via the language globe icon.\n\n> **Tip**: Set `SYSTEM_DEFAULTLOCALE` to your organization's primary language. Users can always override it using the language selector in the top-right corner.\n\n### File Upload Limits\n\n\n \n ```yaml\n system:\n fileUploadLimit: \"500MB\" # Number (0-999) followed by KB, MB, or GB. Empty = no limit\n spring:\n servlet:\n multipart:\n max-file-size: 2000MB\n max-request-size: 2000MB\n ```\n \n \n ```bash\n SYSTEM_MAXFILESIZE=500 # Size in MB (valid range 1-999)\n SPRING_SERVLET_MULTIPART_MAX_FILE_SIZE=2000MB\n SPRING_SERVLET_MULTIPART_MAX_REQUEST_SIZE=2000MB\n ```\n \n\n\n### Memory Management\n\n```bash\nJAVA_TOOL_OPTIONS=\"-Xms512m -Xmx4g\" # Min 512MB, Max 4GB RAM\n```\n\n---\n\n## Specialized Configuration Guides\n\nFor advanced features and specific use cases, see these detailed guides:\n\n### Authentication & Security\n\n**[Single Sign-On (SSO)](doc:configuration/security/single-sign-on-configuration)**\n- OAuth2 (Google, GitHub, Keycloak, OIDC) - Server tier\n- SAML2 (Okta, Azure AD) - Enterprise tier\n- Complete configuration examples\n\n**[System and Security](doc:configuration/security/system-and-security)**\n- Server certificates\n- JWT configuration\n\n**[Fail2Ban Integration](doc:configuration/security/fail2ban)**\n- Protect against brute-force attacks\n- Auto-ban after failed login attempts\n\n---\n\n### Features & Customization\n\n**[UI Customization](doc:configuration/customisation/ui-customisation)**\n- Branding and logos\n- Theme customization\n- Custom styling\n\n**[Endpoint/Feature Control](doc:configuration/customisation/endpoint-or-feature-customisation)**\n- Enable/disable specific tools\n- Control feature availability by user/role\n\n**[Pipeline (Automation)](doc:configuration/automation/pipeline)**\n- Automated workflows\n- Folder scanning\n- Batch processing\n- Multi-step operations\n\n---\n\n### Integration & Storage\n\n**[External Database](doc:configuration/storage/external-database)**\n- PostgreSQL configuration (Pro/Enterprise)\n- Database migration\n- Backup strategies\n\n**[Google Drive File Picker](doc:configuration/storage/google-drive-file-picker)**\n- Direct Google Drive integration\n- OAuth setup\n\n**[MCP Server](doc:configuration/automation/mcp-server)**\n- Expose Stirling PDF tools over the Model Context Protocol\n- OAuth2 or API-key authentication\n- Operation allow/deny lists\n\n**[S3 / Object Storage](doc:configuration/storage/file-sharing-and-storage)**\n- Store uploads and job artifacts in S3-compatible object storage\n- Shared storage for multi-node deployments\n\n**[Telegram Bot](doc:configuration/automation/telegram-bot)**\n- Run a Telegram bot that processes PDFs sent in chat\n\n**[OCR Configuration](doc:configuration/operations/ocr)**\n- Tesseract language packs\n- OCR optimization\n\n**[Usage Monitoring](doc:configuration/automation/usage-monitoring)**\n- Prometheus metrics (Pro/Enterprise)\n- Application monitoring\n- Performance tracking\n\n---\n\n### Performance & Scaling\n\n**[Performance Optimization & Sizing](doc:configuration/operations/performance-optimization)**\n- Resource sizing, JVM tuning, memory model, and scaling guidance\n\n**[Process Limits](doc:configuration/operations/process-limits)**\n- Session limits and timeouts for external tools\n\n**[LibreOffice Parallel Processing](doc:configuration/operations/libreoffice-parallel-processing)**\n- Configure multiple LibreOffice instances for faster document conversion\n- Local UNO server pool and remote UNO server endpoints\n\n---\n\n### Diagnostics & Support\n\n**[Diagnostics & Reporting Issues](doc:configuration/operations/diagnostics)**\n- Built-in diagnostics tool for Docker containers\n- How to report issues via GitHub, Discord, and email\n\n---\n\n### Other Configuration\n\n**[Folder Scanning](doc:configuration/storage/folderscanning)**\n- Watch folders for automatic processing\n\n**[Custom Signature Files](doc:configuration/security/sign-with-custom-files)**\n- Pre-loaded signatures for quick signing\n\n**[Extra Settings](doc:configuration/customisation/extra-settings)**\n- Logging configuration\n- Server settings (port, SSL/TLS)\n- Advanced Spring Boot settings\n\n---\n\n## Configuration Priority\n\nWhen the same setting is defined in multiple places, this is the order of precedence (highest to lowest):\n\n1. **Environment Variables**\n2. **settings.yml / In-App Settings**\n3. **Default values**\n\n---\n\n## Environment Variable Format\n\nConvert YAML paths to environment variables:\n\n```yaml\n# settings.yml\nsecurity:\n enableLogin: true\n```\n\nBecomes:\n```bash\nSECURITY_ENABLELOGIN=true\n```\n\n**Rules:**\n- Uppercase everything\n- Replace `.` with `_`\n- Nested properties become `PARENT_CHILD`\n\n---\n\n## Troubleshooting\n\n### Settings Not Applied\n\n1. Check configuration priority (env vars override settings.yml)\n2. Restart container after changing environment variables\n3. Check logs: `docker logs stirling-pdf | grep ERROR`\n4. Verify file permissions on `/configs` volume\n\n### Database Issues\n\nDefault database location: `/configs/stirling-pdf-DB-<schema-version>.mv.db` (the schema version is part of the filename, e.g. `/configs/stirling-pdf-DB-2.3.232.mv.db`).\n\nIf missing:\n- Ensure `/configs` volume is mounted\n- Check write permissions\n- Review startup logs\n\n---\n\n## Next Steps\n\n- **Production Deployment:** See [Production Deployment Guide](doc:server-admin-onboarding)\n- **API Usage:** See [API Documentation](doc:api)\n- **Tool Reference:** See [Functionality](doc:functionality/functionality)\n- **Troubleshooting:** See [Diagnostics & Reporting Issues](doc:configuration/operations/diagnostics)",
|
||
"sourcePath": "docs/Configuration/Configuration.md",
|
||
"editUrl": "https://github.com/Stirling-Tools/Stirling-Tools.github.io/blob/main/docs/Configuration/Configuration.md"
|
||
},
|
||
"configuration/customisation/endpoint-or-feature-customisation": {
|
||
"id": "configuration/customisation/endpoint-or-feature-customisation",
|
||
"title": "Endpoints Customisation",
|
||
"section": "configuration/customisation",
|
||
"markdown": "You can selectively disable and remove endpoints and functionalities from Stirling PDF as per your requirements.\nThere are many use-cases for this such as\n- Avoid confusion for users for functionality you/your business don't use.\n- Running a reduced version of Stirling PDF that doesn't have the necessary server power to support the more advanced features.\n- Cleanup interface for features you don't use\n\nYou have two ways to disable endpoints:\n\n1. **Environment Variables** (`ENDPOINTS_TOREMOVE` and `ENDPOINTS_GROUPSTOREMOVE`):\n - Example: `ENDPOINTS_TOREMOVE=merge-pdfs,remove-pages` disables merge and remove page tools\n - Example: `ENDPOINTS_GROUPSTOREMOVE=LibreOffice` disables all LibreOffice-dependent tools\n\n2. **Settings File** (`settings.yml` under `endpoints.toRemove` and `endpoints.groupsToRemove`):\n - Example: `toRemove: [merge-pdfs, remove-pages]`\n - Example: `groupsToRemove: [LibreOffice]`\n\n## Available Endpoint Groups\n\nYou can disable entire groups of related endpoints using `ENDPOINTS_GROUPSTOREMOVE`:\n\n| Group Name | What It Disables | Example |\n|------------|------------------|---------|\n| `LibreOffice` | All office document conversions (DOCX, XLSX, PPTX to/from PDF) | `ENDPOINTS_GROUPSTOREMOVE=LibreOffice` |\n| `Python` | Python-backed features (scan extraction and some file/HTML/URL conversions) | `ENDPOINTS_GROUPSTOREMOVE=Python` |\n| `OpenCV` | Advanced image processing operations | `ENDPOINTS_GROUPSTOREMOVE=OpenCV` |\n| `OCRmyPDF` | OCR (Optical Character Recognition) features | `ENDPOINTS_GROUPSTOREMOVE=OCRmyPDF` |\n| `Weasyprint` | HTML to PDF conversion | `ENDPOINTS_GROUPSTOREMOVE=Weasyprint` |\n| `Calibre` | E-book format conversions | `ENDPOINTS_GROUPSTOREMOVE=Calibre` |\n| `qpdf` | Various PDF operations powered by QPDF | `ENDPOINTS_GROUPSTOREMOVE=qpdf` |\n| `Ghostscript` | Compression, repair and related operations powered by Ghostscript | `ENDPOINTS_GROUPSTOREMOVE=Ghostscript` |\n| `Automation` | Automation/pipeline endpoints (`handleData`, `automate`, `pipeline`) | `ENDPOINTS_GROUPSTOREMOVE=Automation` |\n| `DeveloperTools` | Developer tools such as Show JavaScript | `ENDPOINTS_GROUPSTOREMOVE=DeveloperTools` |\n| `DeveloperDocs` | In-app developer doc links (API docs, folder scanning, SSO, air-gapped) | `ENDPOINTS_GROUPSTOREMOVE=DeveloperDocs` |\n\n**Example - Disable multiple groups:**\n```bash\nENDPOINTS_GROUPSTOREMOVE=LibreOffice,Calibre,Weasyprint\n```\n\n## Usage Examples\n\n### Environment Variables\n\n**Disable specific tools:**\n```bash\n# Docker Run\ndocker run -e ENDPOINTS_TOREMOVE=sign,add-watermark,add-stamp docker.stirlingpdf.com/stirlingtools/stirling-pdf:latest\n\n# Docker Compose\nenvironment:\n - ENDPOINTS_TOREMOVE=sign,add-watermark,add-stamp\n```\n\n**Disable entire groups:**\n```bash\n# Disable all office conversions and OCR\nENDPOINTS_GROUPSTOREMOVE=LibreOffice,OCRmyPDF\n```\n\n**Combine both methods:**\n```bash\n# Disable groups AND specific tools\nENDPOINTS_GROUPSTOREMOVE=LibreOffice,Calibre\nENDPOINTS_TOREMOVE=sign,compare,multi-tool\n```\n\n### Settings File (settings.yml)\n\nIf you're editing `settings.yml` directly, use the kebab-case endpoint IDs:\n\n**Disable specific tools:**\n```yaml\nendpoints:\n toRemove:\n - sign\n - add-watermark\n - add-stamp\n - compare\n - merge-pdfs\n```\n\n**Disable entire groups:**\n```yaml\nendpoints:\n groupsToRemove:\n - LibreOffice\n - OCRmyPDF\n```\n\n**Combine both methods:**\n```yaml\nendpoints:\n toRemove:\n - sign\n - compare\n - multi-tool\n - merge-pdfs\n groupsToRemove:\n - LibreOffice\n - Calibre\n```\n\n## Complete Endpoint Reference for settings.yml\n\nUse these exact kebab-case IDs with `endpoints.toRemove` in settings.yml.\n\n### Page Operations\n- `merge-pdfs` - Merge PDFs\n- `split-pages` - Split PDFs\n- `extract-pages` - Extract Pages\n- `remove-pages` - Remove Pages\n- `rearrange-pages` - Rearrange Pages\n- `rotate-pdf` - Rotate PDFs\n- `crop` - Crop Pages\n- `scale-pages` - Scale Pages\n- `add-page-numbers` - Add Page Numbers\n- `pdf-to-single-page` - PDF to Single Page\n- `multi-page-layout` - Multi-Page Layout\n- `booklet-imposition` - Booklet Imposition\n- `overlay-pdf` - Overlay PDFs\n- `split-pdf-by-sections` - Split by Sections\n- `split-pdf-by-chapters` - Split by Chapters\n- `auto-split-pdf` - Auto Split PDF\n- `split-by-size-or-count` - Split by Size/Count\n- `add-attachments` - Add Attachments\n\n### Conversion\n- `pdf-to-img` - PDF to Image\n- `img-to-pdf` - Image to PDF\n- `file-to-pdf` - File to PDF\n- `pdf-to-word` - PDF to Word\n- `pdf-to-presentation` - PDF to Presentation\n- `pdf-to-text` - PDF to Text\n- `pdf-to-html` - PDF to HTML\n- `pdf-to-xml` - PDF to XML\n- `pdf-to-markdown` - PDF to Markdown\n- `pdf-to-csv` - PDF to CSV\n- `pdf-to-epub` - PDF to EPUB\n- `pdf-to-vector` - PDF to Vector\n- `pdf-to-json` - PDF to JSON\n- `pdf-to-rtf` - PDF to RTF\n- `pdf-to-cbz` - PDF to CBZ\n- `pdf-to-cbr` - PDF to CBR\n- `pdf-to-pdfa` - PDF to PDF/A\n- `html-to-pdf` - HTML to PDF\n- `url-to-pdf` - URL to PDF\n- `markdown-to-pdf` - Markdown to PDF\n- `eml-to-pdf` - Email to PDF\n- `cbz-to-pdf` - CBZ to PDF\n- `json-to-pdf` - JSON to PDF\n- `vector-to-pdf` - Vector to PDF\n\n### Security & Signing\n- `add-password` - Add Password Protection\n- `remove-password` - Remove Password\n- `change-permissions` - Change Permissions\n- `add-watermark` - Add Watermark\n- `add-stamp` - Add Stamp\n- `sanitize-pdf` - Sanitize PDF\n- `flatten` - Flatten Form Fields\n- `unlock-pdf-forms` - Unlock PDF Forms\n- `cert-sign` - Certificate Sign\n- `sign` - Draw/Text/Image Signature\n- `timestamp-pdf` - Add Trusted Timestamp\n- `remove-cert-sign` - Remove Certificate Signature\n- `validate-signature` - Validate Signature\n- `verify-pdf` - Verify PDF\n- `redact` - Redact Information\n- `auto-redact` - Auto Redact\n\n### Content Extraction & Removal\n- `extract-images` - Extract Images\n- `extract-image-scans` - Extract Image Scans\n- `remove-image-pdf` - Remove Images\n- `remove-annotations` - Remove Annotations\n- `remove-blanks` - Remove Blank Pages\n- `ocr-pdf` - OCR\n\n### Document Editing & Analysis\n- `text-editor-pdf` - Text Editor\n- `edit-table-of-contents` - Edit Table of Contents\n- `update-metadata` - Change Metadata\n- `get-info-on-pdf` - Get PDF Info\n- `compare` - Compare PDFs\n- `adjust-contrast` - Adjust Contrast\n- `replace-invert-pdf` - Replace/Invert Colors\n- `scanner-effect` - Scanner Effect\n- `repair` - Repair PDF\n- `add-image` - Add Image to PDF\n\n### Form Fields\n- `fields` - Form Fields\n- `fill` - Fill Form Fields\n- `modify-fields` - Modify Form Fields\n- `delete-fields` - Delete Form Fields\n\n### Multi-Tool & Automation\n- `multi-tool` - Multi-Tool Workbench\n- `compare` - Compare PDFs\n- `compress-pdf` - Compress PDFs\n- `automate` - Automation/Pipeline\n- `pipeline` - Pipeline\n- `auto-rename` - Auto Rename\n\n### Viewing & Display\n- `view-pdf` - PDF Viewer\n- `show-javascript` - Show JavaScript in PDF\n\n### Developer Tools\n- `dev-api-docs` - API Documentation\n- `dev-folder-scanning-docs` - Folder Scanning Guide\n- `dev-sso-guide-docs` - SSO Guide\n- `dev-airgapped-docs` - Air-gapped Setup Guide\n\n### Internal\n- `handleData` - Handle Data\n\n## Notes\n\n- Tool IDs are case-sensitive (use exact names from the reference above)\n- Group IDs are also case-sensitive - note the lowercase `qpdf`\n- Disabling a tool removes it completely from the UI and API\n- Some tools may depend on others - test your configuration\n- Changes require container restart to take effect\n- The [MCP server](doc:configuration/automation/mcp-server) applies its own allow/deny filtering on top of these removals, so an endpoint can be enabled here yet still be hidden from MCP clients",
|
||
"sourcePath": "docs/Configuration/Customisation/Endpoint or Feature Customisation.md",
|
||
"editUrl": "https://github.com/Stirling-Tools/Stirling-Tools.github.io/blob/main/docs/Configuration/Customisation/Endpoint or Feature Customisation.md"
|
||
},
|
||
"configuration/customisation/extra-settings": {
|
||
"id": "configuration/customisation/extra-settings",
|
||
"title": "Custom Settings Configuration",
|
||
"section": "configuration/customisation",
|
||
"markdown": "Stirling PDF provides a `/configs/custom_settings.yml` file where users can configure additional settings beyond the standard configuration. This file follows standard YAML format and supports Spring Boot application properties, allowing you to customize the application without modifying core files.\n\n## Logging Configuration\n\nControl the verbosity of logs by adjusting log levels for different components:\n\n```yaml\nlogging:\n level:\n root: INFO\n org.springframework: WARN\n org.hibernate: WARN\n org.eclipse.jetty: WARN\n stirling.software.SPDF: INFO\n # Enable debug logging for specific components when troubleshooting\n # org.springframework.security.saml2: TRACE\n # org.springframework.security: DEBUG\n # org.opensaml: DEBUG\n```\n\n## Server Configuration\n\nConfigure server behavior including port, address binding, and session timeout:\n\n```yaml\nserver:\n port: 8080 # Default port\n address: 0.0.0.0 # Bind to all interfaces\n servlet:\n context-path: / # Application context path\n session:\n timeout: 30m # Session timeout\n jetty:\n threads:\n max: 200 # Maximum number of request processing threads\n min: 10 # Minimum number of threads always kept running\n connection-idle-timeout: 30000 # Connection idle timeout in milliseconds\n max-http-request-header-size: 65536 # Maximum size of request headers in bytes\n```\n\n### HTTP 431 \"Request Header Fields Too Large\" during SSO/OAuth login\n\nSome SSO/OAuth providers send very large request headers (for example, large cookies or JWTs), which can trigger an **HTTP 431 Request Header Fields Too Large** error during login. Stirling PDF's default limit is `32768` (32 KB); raise it to resolve the error.\n\n\n \n ```yaml\n server:\n jetty:\n max-http-request-header-size: 65536 # bytes (Stirling default: 32768)\n ```\n \n \n ```yaml\n environment:\n SERVER_JETTY_MAX_HTTP_REQUEST_HEADER_SIZE: \"65536\"\n ```\n \n \n ```bash\n docker run -d \\\n -p 8080:8080 \\\n -e SERVER_JETTY_MAX_HTTP_REQUEST_HEADER_SIZE=65536 \\\n docker.stirlingpdf.com/stirlingtools/stirling-pdf:latest\n ```\n \n\n\nRaise the value further (for example `131072`) if the error persists, then restart Stirling PDF.\n\n## SSL/TLS Configuration\n\nConfigure HTTPS for secure connections:\n\n\n \n ```yaml\n server:\n port: 8443 # Standard HTTPS port\n ssl:\n enabled: true\n key-store: classpath:keystore.p12 # Path to keystore file\n key-store-password: your-keystore-password\n key-store-type: PKCS12 # Type of keystore\n key-alias: tomcat # Alias of the certificate\n ```\n \n \n ```bash\n SERVER_PORT=8443\n SERVER_SSL_ENABLED=true\n SERVER_SSL_KEY-STORE=classpath:keystore.p12\n SERVER_SSL_KEY-STORE-PASSWORD=your-keystore-password\n SERVER_SSL_KEY-STORE-TYPE=PKCS12\n SERVER_SSL_KEY-ALIAS=tomcat\n ```\n \n \n ```yaml\n services:\n stirling-pdf:\n image: docker.stirlingpdf.com/stirlingtools/stirling-pdf:latest\n environment:\n SERVER_PORT: 8443\n SERVER_SSL_ENABLED: true\n SERVER_SSL_KEY-STORE: classpath:keystore.p12\n SERVER_SSL_KEY-STORE-PASSWORD: your-keystore-password\n SERVER_SSL_KEY-STORE-TYPE: PKCS12\n SERVER_SSL_KEY-ALIAS: tomcat\n ```\n \n\n\n### Creating a Self-Signed Certificate\n\nTo generate a self-signed certificate for development or testing:\n\n```shell\nkeytool -genkeypair -alias tomcat -keyalg RSA -keysize 2048 -storetype PKCS12 -keystore keystore.p12 -validity 365\n```\n\n> **⚠️ Warning: Note**\n>\n> For production use, it's recommended to use a certificate from a trusted Certificate Authority.\n\n\n## Configuration Examples\n\n### Basic Configuration\n\nA simple configuration that changes the port and adjusts logging levels:\n\n```yaml\n# custom_settings.yml\nserver:\n port: 9000\n\nlogging:\n level:\n root: INFO\n org.springframework: WARN\n org.hibernate: WARN\n stirling.software.SPDF: INFO\n```\n\n### HTTPS Configuration\n\nEnable HTTPS with a custom certificate:\n\n```yaml\n# custom_settings.yml\nserver:\n port: 8443\n ssl:\n enabled: true\n key-store: classpath:keystore.p12\n key-store-password: your-keystore-password\n key-store-type: PKCS12\n key-alias: tomcat\n\nlogging:\n level:\n root: INFO\n org.springframework: WARN\n```\n\n## Troubleshooting Common Issues\n\n### Authentication Issues\n\nIncrease security logging to diagnose authentication problems:\n\n```yaml\nlogging:\n level:\n org.springframework.security: DEBUG\n stirling.software.SPDF.config.security: DEBUG\n```\n\n### SAML/OAuth Issues\n\nIncrease SAML-related logging for SSO troubleshooting:\n\n```yaml\nlogging:\n level:\n org.springframework.security.saml2: TRACE\n org.springframework.security.oauth2: DEBUG\n org.opensaml: DEBUG\n```\n\n### General Application Issues\n\nFor general application issues:\n\n```yaml\nlogging:\n level:\n stirling.software.SPDF: DEBUG\n```\n\n> **⚠️ Warning: Note**\n>\n> Debug-level logging can significantly increase log volume and may impact performance in production environments. Return logging to normal levels after troubleshooting.",
|
||
"sourcePath": "docs/Configuration/Customisation/Extra-Settings.md",
|
||
"editUrl": "https://github.com/Stirling-Tools/Stirling-Tools.github.io/blob/main/docs/Configuration/Customisation/Extra-Settings.md"
|
||
},
|
||
"configuration/customisation/keyboard-shortcuts": {
|
||
"id": "configuration/customisation/keyboard-shortcuts",
|
||
"title": "Keyboard Shortcuts",
|
||
"section": "configuration/customisation",
|
||
"markdown": "Stirling PDF supports keyboard shortcuts for quick tool access and PDF viewer navigation. Custom shortcuts are saved in your browser's local storage, with plans to bind to your account in the future.\n\n## Tool Shortcuts\n\n### Default shortcuts\n\nTools in the Quick Access bar (the \"Recommended Tools\" category) automatically receive shortcuts:\n\n| Windows / Linux | Mac | Action |\n|---|---|---|\n| `Ctrl + Alt + 1` | `⌘ + ⌥ + 1` | First Quick Access tool |\n| `Ctrl + Alt + 2` | `⌘ + ⌥ + 2` | Second Quick Access tool |\n| `Ctrl + Alt + 3` | `⌘ + ⌥ + 3` | Third Quick Access tool |\n| … up to `9` | | |\n\nAll other tools have no default shortcut but can be assigned one.\n\n### Customising shortcuts\n\n1. Open **Settings** (gear icon at the bottom of the Quick Access bar)\n2. Go to **Keyboard Shortcuts**\n3. Find the tool you want\n4. Click **Change shortcut**, then press your key combination\n5. Press **Esc** to cancel\n\nYour shortcut must include at least one modifier key (`Ctrl`, `Alt`, or `Cmd`). `Shift` alone does not count as a modifier. If the combination is already taken by another tool, you'll see a conflict warning.\n\n### Resetting a shortcut\n\nClick **Reset** next to any tool to restore its default. If a tool has no default, Reset clears the custom binding.\n\n## PDF Viewer Shortcuts\n\nThese shortcuts work when the PDF viewer is active (hovered), except for Print, Select all text, and zoom which work whenever the viewer is open.\n\n### Modifier shortcuts (Ctrl / Cmd + key)\n\n| Windows / Linux | Mac | Action |\n|---|---|---|\n| `Ctrl + P` | `⌘ + P` | Print (works globally when viewer is mounted) |\n| `Ctrl + A` | `⌘ + A` | Select all text (works globally when viewer is open) |\n| `Ctrl + F` | `⌘ + F` | Open / focus search |\n| `Ctrl + S` | `⌘ + S` | Save / apply changes |\n| `Ctrl + Z` | `⌘ + Z` | Undo |\n| `Ctrl + Shift + Z` | `⌘ + ⇧ + Z` | Redo |\n| `Ctrl + Y` | `⌘ + Y` | Redo (alternative) |\n| `Ctrl + =` / `Ctrl + +` | `⌘ + =` / `⌘ + +` | Zoom in |\n| `Ctrl + -` | `⌘ + -` | Zoom out |\n| `Ctrl + 0` | `⌘ + 0` | Reset zoom (fit width) |\n\n### Navigation shortcuts (no modifier needed)\n\n| Key | Action |\n|---|---|\n| `Home` | Jump to first page |\n| `End` | Jump to last page |\n| `Page Up` | Previous page |\n| `Page Down` | Next page |\n| `Escape` | Close search |\n\n### Rotate tool\n\nWhen the Rotate tool is active:\n\n| Key | Action |\n|---|---|\n| `←` (Left Arrow) | Rotate left |\n| `→` (Right Arrow) | Rotate right |\n\n## Desktop App\n\nThe desktop app adds one extra shortcut:\n\n| Windows / Linux | Mac | Action |\n|---|---|---|\n| `Ctrl + S` | `⌘ + S` | Save selected files to disk |",
|
||
"sourcePath": "docs/Configuration/Customisation/Keyboard-Shortcuts.md",
|
||
"editUrl": "https://github.com/Stirling-Tools/Stirling-Tools.github.io/blob/main/docs/Configuration/Customisation/Keyboard-Shortcuts.md"
|
||
},
|
||
"configuration/customisation/mobile-scanner": {
|
||
"id": "configuration/customisation/mobile-scanner",
|
||
"title": "Mobile Scanner Configuration",
|
||
"description": "Enable and configure Mobile Scanner for document scanning via phone camera",
|
||
"section": "configuration/customisation",
|
||
"markdown": "Enable and configure the Mobile Scanner feature, which lets users scan documents with their phone camera and upload them directly to Stirling PDF via QR code.\n\n## Settings\n\n\n \n ```yaml\n system:\n enableMobileScanner: true\n mobileScannerSettings:\n convertToPdf: true # Convert images to PDF (true/false)\n imageResolution: full # 'full' (original size) or 'reduced' (max 1200px)\n pageFormat: A4 # 'keep' (original dimensions), 'A4', or 'letter'\n stretchToFit: false # Stretch images to fill page (may distort)\n ```\n \n \n ```bash\n SYSTEM_ENABLEMOBILESCANNER=true\n SYSTEM_MOBILESCANNERSETTINGS_CONVERTTOPDF=true\n SYSTEM_MOBILESCANNERSETTINGS_IMAGERESOLUTION=full\n SYSTEM_MOBILESCANNERSETTINGS_PAGEFORMAT=A4\n SYSTEM_MOBILESCANNERSETTINGS_STRETCHTOFIT=false\n ```\n \n \n ```bash\n docker run -d \\\n -p 8080:8080 \\\n -e SYSTEM_ENABLEMOBILESCANNER=true \\\n -e SYSTEM_MOBILESCANNERSETTINGS_CONVERTTOPDF=true \\\n -e SYSTEM_MOBILESCANNERSETTINGS_IMAGERESOLUTION=full \\\n -e SYSTEM_MOBILESCANNERSETTINGS_PAGEFORMAT=A4 \\\n -e SYSTEM_MOBILESCANNERSETTINGS_STRETCHTOFIT=false \\\n docker.stirlingpdf.com/stirlingtools/stirling-pdf:latest\n ```\n \n \n ```yaml\n environment:\n SYSTEM_ENABLEMOBILESCANNER: true\n SYSTEM_MOBILESCANNERSETTINGS_CONVERTTOPDF: true\n SYSTEM_MOBILESCANNERSETTINGS_IMAGERESOLUTION: full\n SYSTEM_MOBILESCANNERSETTINGS_PAGEFORMAT: A4\n SYSTEM_MOBILESCANNERSETTINGS_STRETCHTOFIT: false\n ```\n \n\n\n## Configuration Options\n\n| Setting | Values | Description |\n|---------|--------|-------------|\n| `enableMobileScanner` | `true` / `false` | Enable/disable Mobile Scanner feature |\n| `convertToPdf` | `true` / `false` | Automatically convert uploaded images to PDF. If false, images are kept as-is. |\n| `imageResolution` | `full` / `reduced` | Image resolution for PDF conversion: `full` = original size, `reduced` = max 1200px on longest side. Only applies when `convertToPdf` is true. |\n| `pageFormat` | `keep` / `A4` / `letter` | Page format for converted PDFs: `keep` = original image dimensions, `A4` = A4 page size, `letter` = US Letter page size. Only applies when `convertToPdf` is true. |\n| `stretchToFit` | `true` / `false` | Stretch images to fill entire page (may distort aspect ratio). If false, images are centered with preserved aspect ratio. Only applies when `convertToPdf` is true. |\n\n## Desktop app behaviour\n\nThe Stirling PDF desktop app has built-in support for Mobile Scanner. For the end-user walkthrough, see [Mobile Scanner](doc:functionality/mobile-scanner).\n\nAdmin note specific to the desktop app:\n\n- In desktop mode the app serves its own simple upload page (controlled by the `STIRLING_PDF_TAURI_MODE` setting) instead of the standard web `/mobile-scanner` page, because a phone cannot load the desktop app's own window.",
|
||
"sourcePath": "docs/Configuration/Customisation/Mobile-Scanner.md",
|
||
"editUrl": "https://github.com/Stirling-Tools/Stirling-Tools.github.io/blob/main/docs/Configuration/Customisation/Mobile-Scanner.md"
|
||
},
|
||
"configuration/customisation/other-customisations": {
|
||
"id": "configuration/customisation/other-customisations",
|
||
"title": "Other Customisations",
|
||
"section": "configuration/customisation",
|
||
"markdown": "Stirling PDF offers various other customisation options, such as:\n\n## Static File Overrides\n\nYou can override static files (logos, images, favicons, etc.) by placing custom versions in the `customFiles/static/` directory.\n\n### How It Works\n\nStirling PDF checks for files in this order:\n1. **First:** `customFiles/static/` (your custom files)\n2. **Fallback:** Built-in static files embedded in the application\n\nThis means you can replace any static resource by placing a file with the matching path in `customFiles/static/`.\n\n### Finding File Paths to Override\n\nMost static files in the application come from the `frontend/editor/public/` folder in the source code (brand logos live in `frontend/shared/assets/brand/`). To override a file, place it under `customFiles/static/` matching the same path it is served at. The mapping is direct:\n\n**Frontend source → Your override path:**\n- `frontend/editor/public/manifest.json` → `customFiles/static/manifest.json`\n- `frontend/shared/assets/brand/modern-logo/StirlingPDFLogoBlackText.svg` → `customFiles/static/modern-logo/StirlingPDFLogoBlackText.svg`\n- `frontend/shared/assets/brand/classic-logo/StirlingPDFLogoBlackText.svg` → `customFiles/static/classic-logo/StirlingPDFLogoBlackText.svg`\n\n**To see what files you can override:**\n1. Browse the [frontend/editor/public folder on GitHub](https://github.com/Stirling-Tools/Stirling-PDF/tree/main/frontend/editor/public)\n2. Match the directory structure in your `customFiles/static/` folder\n\nCommon files you might want to override:\n\n**Favicons & Icons** (override by placing a matching file at the root of `customFiles/static/`):\n- `favicon.svg`, `favicon.ico` - Browser favicons\n- `apple-touch-icon.png` - iOS home screen icon\n- `android-chrome-192x192.png` - Android icon (192x192)\n- `android-chrome-512x512.png` - Android icon (512x512)\n\n**Logo Variants (Both classic-logo/ and modern-logo/):**\n\nBoth logo directories contain the same file structure - just replace `classic-logo/` or `modern-logo/` with whichever style you're using:\n\n- `{style}/StirlingPDFLogoBlackText.svg` - Logo with black text (light mode)\n- `{style}/StirlingPDFLogoWhiteText.svg` - Logo with white text (dark mode)\n- `{style}/StirlingPDFLogoGreyText.svg` - Logo with grey text\n- `{style}/StirlingPDFLogoNoTextDark.svg` - Logo without text (dark variant)\n- `{style}/StirlingPDFLogoNoTextLight.svg` - Logo without text (light variant)\n- `{style}/logo-tooltip.svg` - Small logo for tooltips\n- `{style}/favicon.ico` - Style-specific favicon\n- `{style}/logo192.png`, `{style}/logo512.png` - PNG versions at different sizes\n- `{style}/Firstpage.png` - First page preview image\n\nWhere `{style}` is either `classic-logo` or `modern-logo` depending on your logo style setting:\n\n**Settings file (configs/settings.yml):**\n```yaml\nui:\n logoStyle: classic # Options: 'classic' or 'modern'\n```\n\n**Environment variable (Docker):**\n```bash\nUI_LOGOSTYLE=classic\n```\n\n**In-app configuration:**\nSettings → Configuration → System Settings → Logo Style (requires login enabled)\n\n**Other Assets:**\n- `robots.txt` - Search engine directives\n- `manifest.json`, `manifest-classic.json` - Web app manifests\n- Images, fonts, and locales\n\n### Example: Custom Favicon\n\n```bash\n# Your directory structure\ncustomFiles/\n └── static/\n ├── favicon.svg\n └── favicon.ico\n```\n\nDocker compose:\n```yaml\nvolumes:\n - ./customFiles:/customFiles:rw\n```\n\nRestart the container - your custom favicons will be used!\n\n### Example: Custom Logo (Simple)\n\n```bash\ncustomFiles/\n └── static/\n └── classic-logo/\n └── StirlingPDFLogoBlackText.svg\n```\n\nThis overrides the classic logo with black text (used in light mode).\n\n**Important:** Make sure your logo style is set to `classic` in your configuration:\n```yaml\nui:\n logoStyle: classic # Must match the directory you're overriding!\n```\n\nOr via environment variable:\n```bash\nUI_LOGOSTYLE=classic\n```\n\nIf you have `logoStyle: modern` set, override files in `modern-logo/` instead!\n\n### Example: Complete Branding Customization\n\nTo fully rebrand Stirling PDF with your company logo, override multiple variants:\n\n```bash\ncustomFiles/\n └── static/\n ├── favicon.svg # Main favicon\n ├── favicon.ico # Legacy favicon\n └── classic-logo/ # Or modern-logo/ if using modern style\n ├── StirlingPDFLogoBlackText.svg # Light mode with text\n ├── StirlingPDFLogoWhiteText.svg # Dark mode with text\n ├── StirlingPDFLogoNoTextLight.svg # Light mode icon only\n ├── StirlingPDFLogoNoTextDark.svg # Dark mode icon only\n ├── logo-tooltip.svg # Small icon\n ├── favicon.ico # Style-specific favicon\n └── Firstpage.png # Homepage preview\n```\n\n**Important:** Set your logo style to match the directory:\n```yaml\nui:\n logoStyle: classic # Use 'classic' if overriding classic-logo/, 'modern' if overriding modern-logo/\n```\n\nOr via environment variable: `UI_LOGOSTYLE=classic`\n\n**Tips:**\n- For consistent branding across light/dark modes, provide both:\n - `StirlingPDFLogoBlackText.svg` (shows on light backgrounds)\n - `StirlingPDFLogoWhiteText.svg` (shows on dark backgrounds)\n- You can also configure this in-app: Settings → Configuration → System Settings → Logo Style (if you have login enabled)\n\n### Advanced: Overriding Built Files (HTML, JS, CSS)\n\n**⚠️ For developers only!**\n\nFiles like `index.html`, JavaScript bundles, and CSS are **generated** by the build process from `frontend/editor/src/`. To override these:\n\n1. Clone the Stirling PDF repository\n2. Make your changes to the React source code in `frontend/editor/src/`\n3. Build the frontend: `task frontend:build` (from the repository root)\n4. The built files appear in `frontend/editor/dist/`\n5. Copy the specific files you want to override to `customFiles/static/` matching the path structure\n\n**Example:** To override `index.html`:\n```bash\n# After building the frontend\ncp frontend/editor/dist/index.html customFiles/static/index.html\n```\n\n**Warning:** Built files may include hashed filenames (e.g., `assets/index-abc123.js`) that change with each build. Overriding these requires matching the exact filename from your build and is not recommended for most users.\n\n---\n\n## Defaulting Language\nDefault language selection via the `SYSTEM_DEFAULTLOCALE` environment variable. Accepted values include `de-DE`, `fr-FR`, `ar-AR` and all other languages codes that are within Stirling PDFs current list.\n\n## Google Search Visibility (robots.txt)\nEnable or disable search engine visibility (via `robots.txt`) with the `SYSTEM_GOOGLEVISIBILITY` environment variable, or in `configs/settings.yml`:\n```yaml\nsystem:\n googlevisibility: true # 'true' to allow Google visibility, 'false' to disallow\n```\n\n## Custom Root path\nHost the interface under a sub-path with the `SYSTEM_ROOTURIPATH` environment variable.\nThis is for changing websites like stirlingtools.com to instead host the interface at stirlingtools.com/demo:\n```bash\nSYSTEM_ROOTURIPATH=/demo\n```\nThe setting can also be written in `configs/settings.yml`:\n```yaml\nserver:\n servlet:\n context-path: /demo\n```\n\n## Enable/Disable Analytics\nAnalytics can be enabled/disabled with ``SYSTEM_ENABLEANALYTICS`` or\n```yaml\nsystem:\n enableAnalytics: 'true'\n```\nIn configs/settings.yml\n\n## Using an outgoing HTTP(S) proxy\nTo make Stirling PDF use an outgoing proxy server (e.g. for checking the license validity):\n\n\n \n ```bash\n JAVA_CUSTOM_OPTS=\"-Dhttp.proxyHost=proxyserver -Dhttp.proxyPort=8888 -Dhttp.nonProxyHosts='localhost|127.0.0.1|127.0.1.1|127.0.0.0/8|::1|10.0.0.0/8|.svc|.cluster.local' -Dhttps.proxyHost=proxyserver -Dhttps.proxyPort=8888 -Dhttps.nonProxyHosts='localhost|127.0.0.1|127.0.1.1|127.0.0.0/8|::1|10.0.0.0/8|.svc|.cluster.local'\"\n ```\n \n \n ```bash\n docker run -d \\\n -p 8080:8080 \\\n -e JAVA_CUSTOM_OPTS=\"-Dhttp.proxyHost=proxyserver -Dhttp.proxyPort=8888 -Dhttp.nonProxyHosts='localhost|127.0.0.1|127.0.1.1|127.0.0.0/8|::1|10.0.0.0/8|.svc|.cluster.local' -Dhttps.proxyHost=proxyserver -Dhttps.proxyPort=8888 -Dhttps.nonProxyHosts='localhost|127.0.0.1|127.0.1.1|127.0.0.0/8|::1|10.0.0.0/8|.svc|.cluster.local'\" \\\n docker.stirlingpdf.com/stirlingtools/stirling-pdf:latest\n ```\n \n \n ```yaml\n services:\n stirling-pdf:\n image: docker.stirlingpdf.com/stirlingtools/stirling-pdf:latest\n environment:\n JAVA_CUSTOM_OPTS: \"-Dhttp.proxyHost=proxyserver -Dhttp.proxyPort=8888 -Dhttp.nonProxyHosts='localhost|127.0.0.1|127.0.1.1|127.0.0.0/8|::1|10.0.0.0/8|.svc|.cluster.local' -Dhttps.proxyHost=proxyserver -Dhttps.proxyPort=8888 -Dhttps.nonProxyHosts='localhost|127.0.0.1|127.0.1.1|127.0.0.0/8|::1|10.0.0.0/8|.svc|.cluster.local'\"\n ```",
|
||
"sourcePath": "docs/Configuration/Customisation/Other Customisations.md",
|
||
"editUrl": "https://github.com/Stirling-Tools/Stirling-Tools.github.io/blob/main/docs/Configuration/Customisation/Other Customisations.md"
|
||
},
|
||
"configuration/customisation/pdf-to-cbr-conversion": {
|
||
"id": "configuration/customisation/pdf-to-cbr-conversion",
|
||
"title": "Enabling PDF to CBR Conversion in Stirling PDF",
|
||
"section": "configuration/customisation",
|
||
"markdown": "## Overview\n\nStirling PDF can convert PDF files into the Comic Book RAR (`.cbr`) format. This process relies on an external command-line utility, `rar`, which is not included by default. To enable this feature, you must first install the `rar` utility on your system and then make it accessible to Stirling PDF.\n\n### What is a CBR file?\n\nA CBR (Comic Book RAR) file is an archive used for distributing digital comic books. It is essentially a collection of sequential image files (e.g., JPEG, PNG) compressed into a single file using RAR compression.\n\nWhile CBR is a popular format, it requires the proprietary `rar` utility for creation. Its more common, open-standard alternative is CBZ (Comic Book ZIP), which is supported by Stirling PDF out of the box.\n\n-----\n\n## Step 1: Install the `rar` Command-Line Utility\n\nThis is a mandatory prerequisite for both Docker and non-Docker setups. The `rar` executable must be installed on the host machine.\n\n### Linux\n\nThe easiest method is to use your distribution's package manager.\n\n**Debian / Ubuntu:**\nThe `rar` package is available in the `non-free` repository.\n\n```bash\nsudo apt update\nsudo apt install rar\n```\n\n**Fedora / CentOS / RHEL:**\nThe `rar` package is available in the RPM Fusion \"non-free\" repository.\n\n```bash\n# First, enable the RPM Fusion non-free repository for your system.\n# See https://rpmfusion.org/Configuration for instructions.\n\n# Then, install rar\nsudo dnf install rar # For Fedora, RHEL 8+, CentOS Stream\n# or\nsudo yum install rar # For CentOS 7\n```\n\n**Manual Installation (Any Linux Distribution):**\n\n1. Visit the official download page: [rarlab.com/download.htm](https://www.rarlab.com/download.htm).\n2. Download the \"RAR for Linux x64\" command-line version.\n3. Extract the archive and install the binary:\n ```bash\n # The version number (e.g., 712, as of writing this guide) will change.\n # Use the actual filename.\n tar -xzf rarlinux-x64-*.tar.gz\n\n # Move the binary to a standard location in your system's PATH\n sudo mv rar/rar /usr/local/bin/\n\n # Ensure it has execute permissions\n sudo chmod +x /usr/local/bin/rar\n ```\n\n### Windows\n\n1. Download the \"WinRAR and RAR command line tools\" from [rarlab.com/download.htm](https://www.rarlab.com/download.htm).\n2. Extract the downloaded archive.\n3. Copy the `rar.exe` file to a folder that is included in your system's `PATH` environment variable. A common and reliable location is `C:\\Windows\\System32`.\n4. If Stirling PDF is already running, restart it to ensure it recognizes the updated `PATH`.\n\n### macOS\n\nThe recommended method is to use the [Homebrew](https://brew.sh/) package manager.\n\n```bash\nbrew install rar\n```\n\n-----\n\n## Step 2: Configure Stirling PDF\n\nAfter installing `rar` on your host system, follow the appropriate instructions for your environment.\n\n### For Non-Docker Users\n\nIf you installed Stirling PDF directly on your operating system (without Docker), no further configuration is needed. As long as the `rar` command is available in your system's `PATH`, Stirling PDF will automatically (after restart) detect and use it.\n\n### For Docker Users\n\nFor the binary to be accessible inside the container, you have to mount the binary as a volume.\n\nUpdate your `docker-compose.yml` to include the volume mount. The path on the host side must match where you installed `rar`.\n\n```yaml\nservices:\n stirling-pdf:\n image: docker.stirlingpdf.com/stirlingtools/stirling-pdf:latest\n ports:\n - '8080:8080'\n volumes:\n - ./StirlingPDF/trainingData:/usr/share/tessdata\n - ./StirlingPDF/extraConfigs:/configs\n - ./StirlingPDF/customFiles:/customFiles/\n - ./StirlingPDF/logs:/logs/\n - ./StirlingPDF/pipeline:/pipeline/\n # Add the following line to mount the rar binary\n - /usr/local/bin/rar:/usr/local/bin/rar:ro\n```\n\n**Note for Windows Docker Users:**\nThe host path must use forward slashes. For example, if you placed `rar.exe` in `C:\\Program Files\\RAR`, your volume mount would look like this:\n\n```yaml\n# Example for Windows host path\n- \"C:/Program Files/RAR/rar.exe:/usr/local/bin/rar:ro\"\n```\n\n-----\n\n## Step 3: Verification\n\nConfirm that Stirling PDF can access the `rar` command.\n\n* **For Docker Users:** Execute a command inside the running container.\n\n ```bash\n docker exec -it stirling-pdf rar\n ```\n\n* **For Non-Docker Users:** Check if the `rar` command is recognized in your terminal.\n\n ```bash\n # On Linux and macOS\n which rar\n\n # On Windows\n where rar\n ```\n\nIn both cases, a successful setup will display the RAR version and usage information. An error like \"command not found\" means there is a problem with the installation or `PATH`.\n\n-----\n\n## Important Considerations\n\n### License Note\n\nRAR is shareware. While it is free to use for personal, non-commercial purposes, business or commercial use may require purchasing a license. Please review the official RAR license terms on the RARLAB website for complete details.\n\n### Alternative: Use the CBZ Format\n\nFor broader compatibility and to avoid proprietary software, using the **CBZ (Comic Book ZIP)** format is highly recommended.\n\n* CBZ uses the open and universal ZIP standard.\n* The **PDF to CBZ** tool is enabled in Stirling PDF by default and requires no extra software.\n* CBZ is supported by virtually all modern comic book reader applications.",
|
||
"sourcePath": "docs/Configuration/Customisation/PDF to CBR Conversion.md",
|
||
"editUrl": "https://github.com/Stirling-Tools/Stirling-Tools.github.io/blob/main/docs/Configuration/Customisation/PDF to CBR Conversion.md"
|
||
},
|
||
"configuration/customisation/ui-customisation": {
|
||
"id": "configuration/customisation/ui-customisation",
|
||
"title": "UI Customisation",
|
||
"section": "configuration/customisation",
|
||
"markdown": "Stirling PDF allows straightforward customization of the application name and appearance to make Stirling PDF your own.\n\n## Application Name Settings\nThis setting controls the application name:\n- `appNameNavbar` - Used as the browser tab title and as the issuer name shown in authenticator apps for two-factor (TOTP) login. Despite its name it is not shown in the navigation bar (which displays the logo), so do not leave it blank if you use TOTP. Empty falls back to \"Stirling PDF\".\n\n## Show update notifications\nThese settings (in Settings.yml) control system behavior and customization capabilities:\n- `showUpdate` - Controls whether update notifications are displayed\n- `showUpdateOnlyAdmin` - When true, restricts update notifications to admin users only (requires `showUpdate: true`)\n\n## UI Customization Options\n\n### In-App Settings Management (Recommended)\n\nIf you have login enabled and are logged in as an admin, you can configure all settings directly in the application through the **Settings** menu. No need to edit `settings.yml` manually!\n\n**How to access:**\n1. Enable login: `SECURITY_ENABLELOGIN=true`\n2. Log in as an admin user\n3. Navigate to **Settings** in the application\n4. Configure all options through the UI\n5. Changes apply immediately\n\n**Available customizations:**\n- Application name and branding\n- Update notification settings\n- Language settings\n- Theme preferences\n- Logo style (classic/modern)\n\nTo replace the bundled logo with your own, see [Static File Overrides](doc:configuration/customisation/other-customisations) - you drop your logo files into `customFiles/static/<style>-logo/` and they replace the built-in ones.\n\n### Static File Overrides (Advanced)\n\nFor customization beyond the built-in settings, you can override static files like logos, favicons, and images:\n\n```yaml\nservices:\n stirling-pdf:\n image: docker.stirlingpdf.com/stirlingtools/stirling-pdf:latest\n ports:\n - '8080:8080'\n volumes:\n - ./customFiles:/customFiles:rw\n```\n\nThen place your custom files in `customFiles/static/` matching the path structure. Common examples:\n- `customFiles/static/favicon.svg` - Custom favicon\n- `customFiles/static/classic-logo/logo.svg` - Custom logo\n- `customFiles/static/modern-logo/logo.svg` - Custom modern logo\n\n**Learn more:** [Other Customisations - Static File Overrides](doc:configuration/customisation/other-customisations)\n\n### Injecting Custom CSS\n\nStirling PDF does not have a \"drop a CSS file here\" setting - the bundled `index.html` doesn't reference an extension stylesheet, so a `customFiles/static/custom.css` on its own won't load. To inject CSS you need to provide your own copy of `index.html` that links to your stylesheet.\n\nThis is the right approach for things like:\n\n- Tweaking colors or fonts beyond what theme settings cover\n- Overriding component z-index values (e.g. lifting the Google Drive Picker above modal overlays)\n- Hiding specific UI elements\n- Embedding tracking / analytics snippets in `<head>`\n\n#### Recipe\n\n**1. Drop your CSS file into `customFiles/static/`**\n\n```\ncustomFiles/\n └── static/\n └── custom.css\n```\n\nIt will be served at `/custom.css` (or under your configured root path if you've set `SYSTEM_ROOTURIPATH`).\n\n**2. Get a copy of the current bundled `index.html`**\n\nThe easiest way is to copy it out of a running container:\n\n```bash\ndocker cp stirling-pdf:/app/BOOT-INF/classes/static/index.html ./customFiles/static/index.html\n```\n\nIf that path doesn't exist on a future release (e.g. a layered JAR layout), try `/app/app.jar` instead and extract `BOOT-INF/classes/static/index.html` from it with `unzip`. The endpoint location is what matters - any equivalent copy of the served `index.html` works.\n\n**3. Add your stylesheet link**\n\nOpen `customFiles/static/index.html` and insert a `<link>` immediately before `</head>`:\n\n```html\n <link rel=\"stylesheet\" href=\"/custom.css\">\n </head>\n```\n\n**4. Restart Stirling PDF**\n\nOn the next boot, the log will show:\n\n```\nUsing custom index.html from: /customFiles/static/index.html\n```\n\nYour stylesheet now loads on every page.\n\n> **⚠️ Warning: Re-export `index.html` after every Stirling PDF upgrade**\n>\n> The bundled `index.html` references hashed JS/CSS asset filenames (e.g. `index-fSaGHxPC.js`) that change on every release. Your override will reference stale filenames after an upgrade and break the UI. Repeat step 2 (copy the new `index.html` and re-add your `<link>`) after each upgrade, or automate it with a small script in your deployment pipeline.\n\n\n#### Worked example - lift the Google Drive Picker above modal overlays\n\nThe file manager modal sits at `z-index: 1200`. The Google Drive picker, rendered by Google's own scripts, doesn't always respect this. Force its iframe overlay higher:\n\n```css\n/* customFiles/static/custom.css */\n.picker-dialog,\n.picker-dialog-bg {\n z-index: 9999 !important;\n}\n```\n\nAfter completing the recipe above, restart and the picker now floats over the file manager.\n\n### Fork the Frontend (Developers)\n\nFor deeper customization than CSS can express (changing layouts, replacing components, adding new tools):\n\n1. Clone the Stirling PDF repository\n2. Modify the React components in `frontend/editor/src/`\n3. Build from the repo root: `cd frontend && npm ci`, then `task frontend:build:proprietary` (or pass `-PbuildWithFrontend=true` to the gradle build)\n4. Output appears in `frontend/editor/dist/`\n5. Copy the built artifacts into `customFiles/static/` and restart, or build your own Docker image\n\nThis approach requires maintaining your fork and manually merging updates.\n\n## Configuration Examples\n\n\n \n ```yaml\n ui:\n appNameNavbar: navbarName # Browser tab title and TOTP issuer label (not the navbar)\n\n system:\n showUpdate: false # Control update notification visibility\n showUpdateOnlyAdmin: false # Restrict update notifications to admins\n ```\n \n \n You can configure the UI and system settings in two ways when running locally:\n\n **Option 1: Using Java Properties**\n ```bash\n java -jar Stirling-PDF.jar \\\n -DUI_APPNAMENAVBAR=\"Stirling PDF\" \\\n -DSHOW_UPDATE=false \\\n -DSHOW_UPDATE_ONLY_ADMIN=false\n ```\n\n **Option 2: Using Environment Variables**\n ```bash\n export UI_APPNAMENAVBAR=\"Stirling PDF\"\n export SYSTEM_SHOWUPDATE=false\n export SYSTEM_SHOWUPDATEONLYADMIN=false\n ```\n \n \n ```bash\n -e UI_APPNAMENAVBAR=Stirling PDF \\\n -e SYSTEM_SHOWUPDATE=false \\\n -e SYSTEM_SHOWUPDATEONLYADMIN=false\n ```\n \n \n ```yaml\n environment:\n UI_APPNAMENAVBAR: Stirling PDF\n SYSTEM_SHOWUPDATE: \"false\"\n SYSTEM_SHOWUPDATEONLYADMIN: \"false\"\n ```",
|
||
"sourcePath": "docs/Configuration/Customisation/UI Customisation.md",
|
||
"editUrl": "https://github.com/Stirling-Tools/Stirling-Tools.github.io/blob/main/docs/Configuration/Customisation/UI Customisation.md"
|
||
},
|
||
"configuration/operations/diagnostics": {
|
||
"id": "configuration/operations/diagnostics",
|
||
"title": "Diagnostics & Reporting Issues",
|
||
"description": "Use the built-in diagnostics tool and learn how to report issues effectively",
|
||
"section": "configuration/operations",
|
||
"markdown": "Stirling PDF includes a built-in diagnostics tool inside Docker containers that collects logs, configuration, system information, and application metrics into a single archive. This is the fastest way to gather the information needed when troubleshooting or reporting issues.\n\n---\n\n## Running the Diagnostics Tool\n\nOpen an interactive shell inside the running container and invoke the tool:\n\n```bash\ndocker exec -it <container_name> diag\n```\n\nThe following aliases all work identically: `diag`, `debug`, `diagnostic`, `diagnostics`, `stirling-diagnostics`.\n\n> **⚠️ Caution: Interactive Terminal Required**\n>\n> The diagnostics tool requires an interactive terminal (`-it` flag). It will not run in non-interactive or headless sessions.\n\n\n---\n\n## Collection Modes\n\nWhen you run the tool, you'll be prompted to choose a collection mode.\n\n### Auto Mode (Recommended)\n\nSelect option **1** when prompted. Auto mode collects:\n\n- Application logs from the last 24 hours\n- Configuration files from `/configs`\n- System information (OS, CPU, memory, disk, Java version)\n- Application metrics and health endpoints\n\nThis is sufficient for most issue reports.\n\n### Custom Mode\n\nSelect option **2** for granular control over what gets collected:\n\n| Prompt | Default | What It Collects |\n|---|---|---|\n| Output directory | `/configs` | Where to save the archive |\n| Days of logs | 1 | How many days of logs to include |\n| Include /configs | Yes | Configuration files |\n| Include /customFiles | No | Custom files (excluding PDFs and images) |\n| Include /pipeline | No | Pipeline working files (excluding PDFs) |\n| Include /tmp/stirling-pdf | No | Temporary processing files |\n| Include system information | Yes | OS, CPU, RAM, disk, Java/Python versions |\n| Include environment variables | No | Full environment dump |\n| Fetch metrics endpoints | Yes | Application status, health, and load data |\n| Include UI data endpoints | No | Sign, pipeline, and OCR endpoint data |\n| Redact sensitive information | Yes | Apply redaction filters (see below) |\n\n### Redaction Options\n\nWhen redaction is enabled, you can selectively mask:\n\n- **Secrets/tokens/passwords** - Redacts Authorization headers, API keys, passwords, and similar credentials\n- **URL hosts/domains** - Masks hostnames in URLs\n- **Email addresses** - Replaces email addresses with `[REDACTED_EMAIL]`\n- **Host/Domain/Server fields** - Masks values in host-related configuration fields\n\n> **⚠️ Caution**\n>\n> Always enable redaction if you plan to share the diagnostics bundle publicly (for example, in a GitHub issue). However, redaction is not perfect and may miss some sensitive values - always review the output manually before sharing publicly. You can disable redaction for private support channels if full detail is needed.\n\n\n---\n\n## What Gets Collected\n\nThe diagnostics bundle is a `.tar.gz` archive saved to the output directory (default: `/configs`). It contains:\n\n```\nstirling-diagnostics-YYYYMMDD-HHMMSS.tar.gz\n├── summary.txt # Collection metadata and settings\n├── bundle/\n│ ├── logs/ # Application log files\n│ ├── configs/ # Configuration files (settings.yml, etc.)\n│ ├── system/ # System information\n│ │ ├── uname.txt # Kernel version\n│ │ ├── os-release # OS distribution info\n│ │ ├── meminfo.txt # Memory details\n│ │ ├── cpuinfo.txt # CPU details\n│ │ ├── df.txt # Disk usage\n│ │ ├── free.txt # Memory summary\n│ │ ├── ps.txt # Running processes\n│ │ ├── java-version.txt # Java runtime version\n│ │ └── python-version.txt # Python version\n│ ├── metrics/ # Application metrics\n│ │ ├── api/v1/info/status.json\n│ │ ├── api/v1/info/uptime.json\n│ │ ├── api/v1/info/health.json\n│ │ ├── api/v1/info/requests.json\n│ │ ├── api/v1/info/load.json\n│ │ ├── actuator/health.json\n│ │ └── actuator/prometheus.txt\n│ ├── env/ # Environment variables (if requested)\n│ └── tree/ # Directory listings\n│ ├── logs.txt\n│ ├── configs.txt\n│ ├── customFiles.txt\n│ ├── pipeline.txt\n│ ├── tessdata.txt # Installed OCR language packs\n│ └── tessdata-mount.txt\n```\n\nPDFs, images, and compressed archives are always excluded from collection.\n\n### Retrieving the Bundle\n\nAfter the tool finishes, copy the archive out of the container:\n\n```bash\ndocker cp <container_name>:/configs/stirling-diagnostics-*.tar.gz ./\n```\n\n---\n\n## AOT Diagnostics\n\nIf you are running with AOT (Ahead-of-Time) compilation enabled (`STIRLING_AOT_ENABLE=true`), an additional diagnostics tool is available:\n\n```bash\ndocker exec -it <container_name> aot-diag\n```\n\nThis tool diagnoses AOT cache generation failures, particularly on ARM64/aarch64 platforms. It checks cache integrity, JVM compatibility, and can run smoke tests.\n\nAliases: `aot-diag`, `aot-diagnostics`\n\n---\n\n## How to Report Issues\n\nWhen you encounter a problem with Stirling PDF, choose the right channel depending on the nature of your issue.\n\n### GitHub Issues - Bug Reports & Feature Requests\n\nFor reproducible bugs and feature requests, open an issue at:\n**https://github.com/Stirling-Tools/Stirling-PDF/issues**\n\nThe repository includes issue templates for bug reports and feature requests that will guide you through providing the right information.\n\nWhen submitting a bug report, include as much detail as possible: the diagnostics bundle (run `diag` in your container first), steps to reproduce the issue, expected vs. actual behavior, your deployment method (Docker, bare metal, Kubernetes), Stirling PDF version (visible in the UI footer or in `summary.txt` from the diagnostics bundle), and any commands, API requests, or actions you were performing when the issue occurred. The more context you provide, the faster it can be resolved.\n\n### Discord Community - Questions & Discussion\n\nFor quick questions, troubleshooting help, and community discussion:\n**https://discord.gg/HYmhKj45pU**\n\nDiscord is the best place for configuration help, setup questions, sharing workarounds with other users, general discussion about features and usage, and getting faster informal feedback before filing a formal issue. It's also great for following up on GitHub issues and having deeper conversations with the community.\n\n### Email Support\n\nFor enterprise customers and licensing inquiries:\n**support@stirlingpdf.com**\n\nFor security vulnerabilities:\n**security@stirlingpdf.com** or use the [GitHub Security Advisory](https://github.com/Stirling-Tools/Stirling-PDF/security) process.",
|
||
"sourcePath": "docs/Configuration/Operations/Diagnostics.md",
|
||
"editUrl": "https://github.com/Stirling-Tools/Stirling-Tools.github.io/blob/main/docs/Configuration/Operations/Diagnostics.md"
|
||
},
|
||
"configuration/operations/libreoffice-parallel-processing": {
|
||
"id": "configuration/operations/libreoffice-parallel-processing",
|
||
"title": "LibreOffice Parallel Processing",
|
||
"description": "Configure multiple LibreOffice instances for parallel document conversion",
|
||
"section": "configuration/operations",
|
||
"markdown": "Stirling PDF uses LibreOffice for converting office documents (DOCX, XLSX, PPTX, etc.) to PDF and other formats. LibreOffice processes each conversion in a single thread, meaning one conversion uses one CPU core at 100% regardless of how many cores are available. To process multiple conversions at the same time, you need to run multiple LibreOffice instances.\n\n---\n\n## Local UNO Server Pool\n\nBy default, Stirling PDF manages a local pool of UNO (Universal Network Objects) server instances. The number of instances is controlled by the `libreOfficeSessionLimit` setting.\n\n\n \n ```yaml\n processExecutor:\n autoUnoServer: true\n sessionLimit:\n libreOfficeSessionLimit: 4 # Run 4 LibreOffice instances\n ```\n \n \n ```bash\n PROCESS_EXECUTOR_SESSION_LIMIT_LIBRE_OFFICE_SESSION_LIMIT=4\n ```\n \n \n ```yaml\n services:\n stirling-pdf:\n image: docker.stirlingpdf.com/stirlingtools/stirling-pdf:latest\n environment:\n PROCESS_EXECUTOR_SESSION_LIMIT_LIBRE_OFFICE_SESSION_LIMIT: 4\n ```\n \n\n\nA reasonable starting point is one instance per 2 CPU cores. See [Host resource requirements](#host-resource-requirements) for memory and storage sizing.\n\n> **ℹ️ Info**\n>\n> The default `libreOfficeSessionLimit` is `1`, meaning only one conversion runs at a time. If you see conversions queuing up or running slowly, increasing this is the first thing to try.\n\n\n### Throughput expectations\n\nPer-conversion time varies from sub-second (small DOCX) to tens of seconds (complex PPTX, large spreadsheets). Pool throughput scales roughly linearly with worker count up to host CPU saturation - benchmark a representative document before sizing.\n\n---\n\n## Remote unoservers\n\nFor larger deployments, or when you want to isolate LibreOffice from the main application, run UNO servers as separate containers and configure Stirling PDF to connect to them remotely. This is a two-step setup: start the unoserver containers, then point Stirling PDF at them.\n\n### Starting unoserver Containers\n\nEach container is a single worker that listens internally on port `2003`. Expose it on a different host port per instance if you want to reach them from outside Docker or from another host.\n\n\n \n ```yaml\n services:\n unoserver1:\n image: ghcr.io/stirling-tools/stirling-unoserver:latest\n ports:\n - \"2003:2003\"\n\n unoserver2:\n image: ghcr.io/stirling-tools/stirling-unoserver:latest\n ports:\n - \"2004:2003\"\n ```\n Add these alongside your `stirling-pdf` service. Host-port mappings are only required if Stirling PDF runs outside Docker, on a different host, or on a separate Docker network.\n \n \n ```bash\n docker run -d --name unoserver1 -p 2003:2003 \\\n ghcr.io/stirling-tools/stirling-unoserver:latest\n\n docker run -d --name unoserver2 -p 2004:2003 \\\n ghcr.io/stirling-tools/stirling-unoserver:latest\n ```\n \n\n\nFor tunable options (timeouts, periodic recycling, CJK fonts), see [The `stirling-unoserver` Image](#the-stirling-unoserver-image) below.\n\n### Connecting Stirling PDF to Remote Endpoints\n\nOnce your unoserver containers are running, set `autoUnoServer` to `false` and point Stirling PDF at them:\n\n\n \n ```yaml\n processExecutor:\n autoUnoServer: false\n unoServerEndpoints:\n - host: \"unoserver1\"\n port: 2003\n hostLocation: \"remote\"\n protocol: \"http\"\n - host: \"unoserver2\"\n port: 2003\n hostLocation: \"remote\"\n protocol: \"http\"\n - host: \"unoserver3\"\n port: 2003\n hostLocation: \"remote\"\n protocol: \"http\"\n ```\n \n \n ```bash\n PROCESS_EXECUTOR_AUTO_UNO_SERVER=false\n PROCESS_EXECUTOR_UNO_SERVER_ENDPOINTS_0_HOST=unoserver1\n PROCESS_EXECUTOR_UNO_SERVER_ENDPOINTS_0_PORT=2003\n PROCESS_EXECUTOR_UNO_SERVER_ENDPOINTS_0_HOST_LOCATION=remote\n PROCESS_EXECUTOR_UNO_SERVER_ENDPOINTS_0_PROTOCOL=http\n PROCESS_EXECUTOR_UNO_SERVER_ENDPOINTS_1_HOST=unoserver2\n PROCESS_EXECUTOR_UNO_SERVER_ENDPOINTS_1_PORT=2003\n PROCESS_EXECUTOR_UNO_SERVER_ENDPOINTS_1_HOST_LOCATION=remote\n PROCESS_EXECUTOR_UNO_SERVER_ENDPOINTS_1_PROTOCOL=http\n ```\n \n \n ```yaml\n services:\n stirling-pdf:\n image: docker.stirlingpdf.com/stirlingtools/stirling-pdf:latest\n ports:\n - \"8080:8080\"\n environment:\n PROCESS_EXECUTOR_AUTO_UNO_SERVER: \"false\"\n PROCESS_EXECUTOR_UNO_SERVER_ENDPOINTS_0_HOST: \"unoserver1\"\n PROCESS_EXECUTOR_UNO_SERVER_ENDPOINTS_0_PORT: \"2003\"\n PROCESS_EXECUTOR_UNO_SERVER_ENDPOINTS_0_HOST_LOCATION: \"remote\"\n PROCESS_EXECUTOR_UNO_SERVER_ENDPOINTS_1_HOST: \"unoserver2\"\n PROCESS_EXECUTOR_UNO_SERVER_ENDPOINTS_1_PORT: \"2003\"\n PROCESS_EXECUTOR_UNO_SERVER_ENDPOINTS_1_HOST_LOCATION: \"remote\"\n ```\n \n\n\nTo add more endpoints, add additional entries to the `unoServerEndpoints` list in settings.yml, or for environment variables, increment the index number (e.g. `_0_` for the first, `_1_` for the second, `_2_` for the third, and so on).\n\n> **💡 Tip**\n>\n> Set `libreOfficeSessionLimit` to match your endpoint count so the pool uses all of them concurrently. With 3 endpoints and a session limit of 1, you'll only ever use one at a time.\n\n\n#### Endpoint Configuration\n\nThe `host` field accepts a Docker service name (e.g. `unoserver1`), a DNS hostname (e.g. `uno.internal.example.com`), or an IP address (e.g. `192.168.1.50`). The default is `127.0.0.1`.\n\nThe `hostLocation` setting controls how files are transferred between Stirling PDF and the UNO server:\n\n| Value | When to Use | How It Works |\n|---|---|---|\n| `auto` | Default, detects automatically | Checks if the host is local or remote |\n| `local` | UNO server is on the same machine | Files are passed via filesystem paths (fastest) |\n| `remote` | UNO server is a separate container or machine | Files are transferred over HTTP |\n\n> **⚠️ Caution**\n>\n> Use `remote` when running UNO servers in separate Docker containers, even if the containers are on the same host machine. The containers don't share a filesystem, so `local` will not work.\n\n\n---\n\n## The `stirling-unoserver` Image\n\n`ghcr.io/stirling-tools/stirling-unoserver` is the official standalone worker image.\n\n> **⚠️ Caution: Alpha release**\n>\n> The `stirling-unoserver` image is currently in **alpha**. Only the `:alpha` tag is published today. `:latest` and versioned tags (`:1.0.0`, `:1.0.1`, etc.) will follow once we cut the first stable release. The compose examples on this page reference `:latest` for forward-compatibility, so for now substitute `:alpha` until the stable release is announced. Configuration variables and behaviour are not expected to change between alpha and 1.0.\n\n\n| Tag | Status | Use |\n|---|---|---|\n| `:alpha` | **Available now** | All deployments while the image is in alpha |\n| `:latest` | Coming soon | Production once 1.0 ships |\n| `:1.0.0`, `:1.0.1`, etc. | Coming soon | Pinned version once 1.0 ships |\n\nThe latest `stirling-unoserver` image is always compatible with the latest Stirling PDF, so if you track `:latest` (or `:alpha` today) on both you don't need to coordinate upgrades. The image will be versioned independently from Stirling PDF, so you can also pin a specific version and update it on its own cadence. Any compatibility breaks will be called out in release notes.\n\n### Configuration\n\n| Variable | Default | Purpose |\n|---|---|---|\n| `UNOSERVER_PORT` | `2003` | Listen port. |\n| `UNOSERVER_INTERFACE` | `0.0.0.0` | Listen address; use `127.0.0.1` to restrict to the same host. |\n| `UNOSERVER_CONVERSION_TIMEOUT` | `1800` (s) | Max time per conversion. Set ≥ `libreOfficeTimeoutMinutes`. |\n| `UNOSERVER_RECYCLE_INTERVAL_SECONDS` | `0` (off) | Periodic restart to bound LibreOffice memory growth. Minimum 60 s; e.g. `3600` for hourly. |\n\n### CPU allocation\n\nCore allocation between instances should be handled automatically by the Linux scheduler. However, if you see uneven core usage or want to cap how much CPU each worker can use, you have two options:\n\n**Soft cap (recommended).** Limit each container to a CPU budget. The kernel still picks which cores to use.\n\n```yaml\nservices:\n unoserver1:\n image: ghcr.io/stirling-tools/stirling-unoserver:alpha\n deploy:\n resources:\n limits:\n cpus: \"2.0\" # up to 2 cores worth of CPU time\n memory: 1g\n```\n\nFor `docker run`: `--cpus=\"2.0\"`.\n\n**Hard pinning.** Bind each container to specific cores. Use this only if the soft cap isn't enough.\n\n```yaml\nservices:\n unoserver1:\n image: ghcr.io/stirling-tools/stirling-unoserver:alpha\n cpuset: \"0,1\"\n unoserver2:\n image: ghcr.io/stirling-tools/stirling-unoserver:alpha\n cpuset: \"2,3\"\n```\n\nFor `docker run`: `--cpuset-cpus=\"0,1\"`. For systemd-managed unoservers, the equivalent is `CPUAffinity=0 1` in the service unit.\n\n### CJK fonts\n\nThe default image covers European languages with hyphenation for EN/FR/DE/ES/IT/PT/NL/PL/RU. For Chinese/Japanese/Korean, rebuild with `--build-arg INSTALL_CJK_FONTS=true` (~120 MB extra).\n\n---\n\n## Running UNO Servers Without Docker\n\nIf you are running Stirling PDF without Docker (bare metal or systemd), you can start additional UNO server instances manually using the `unoserver` Python package:\n\n```bash\n# Install unoserver (included in Docker images)\npip install unoserver\n\n# Start instances on different ports\nunoserver --port 2003 &\nunoserver --port 2004 &\nunoserver --port 2005 &\n```\n\nThen configure Stirling PDF to connect to these instances at `127.0.0.1` on the respective ports with `hostLocation: \"local\"`.\n\n---\n\n## Timeout Configuration\n\nLibreOffice conversion has a default timeout of **30 minutes**. For very large or complex documents, you may need to increase this:\n\n\n \n ```yaml\n processExecutor:\n timeoutMinutes:\n libreOfficetimeoutMinutes: 60\n ```\n \n \n ```bash\n PROCESS_EXECUTOR_TIMEOUT_MINUTES_LIBRE_OFFICETIMEOUT_MINUTES=60\n ```\n \n\n\nIf conversions are consistently timing out, this usually indicates the system is under-resourced rather than needing a longer timeout. Check CPU and memory usage first.\n\n---\n\n## Host resource requirements\n\n- **Memory** - ~70 MB idle, 140–250 MB during conversion, per worker. Add headroom for the OS and Stirling PDF itself.\n- **CPU** - each active conversion saturates roughly one CPU core (LibreOffice is single-threaded per document). Start with one worker per two cores; the kernel handles core distribution automatically. See [CPU allocation](#cpu-allocation) if you want to cap or pin workers explicitly.\n\n---\n\n## Related\n\n- [Process Limits](doc:configuration/operations/process-limits) - Configure session limits and timeouts for all external tools\n- [Production Deployment Guide](doc:server-admin-onboarding) - Sizing recommendations for different workloads\n- [Diagnostics](doc:configuration/operations/diagnostics) - Collect system and application diagnostics for troubleshooting",
|
||
"sourcePath": "docs/Configuration/Operations/LibreOffice-Parallel-Processing.md",
|
||
"editUrl": "https://github.com/Stirling-Tools/Stirling-Tools.github.io/blob/main/docs/Configuration/Operations/LibreOffice-Parallel-Processing.md"
|
||
},
|
||
"configuration/operations/ocr": {
|
||
"id": "configuration/operations/ocr",
|
||
"title": "OCR (Optical Character Recognition)",
|
||
"section": "configuration/operations",
|
||
"markdown": "## OCR Language Packs and Setup\nThis document provides instructions on how to add additional language packs for the OCR tab in Stirling PDF, both inside and outside of Docker.\n\n> **💡 Tip: Looking to use OCR?**\n>\n> This page covers server setup. For how the OCR tool works and its options, see [OCR (Functionality)](doc:functionality/ocr).\n\n\n## How does the OCR Work\nStirling PDF uses Tesseract for its text recognition. All credit goes to them for this awesome work! Note that OCR recognizes text only - it does not perform table-structure or formula recognition.\n\n> **📝 Note: Requires a server backend**\n>\n> OCR runs on a server-side backend with Tesseract installed. The desktop app cannot OCR in local-only mode - connect it to Stirling Cloud or a self-hosted server that has OCR available. To OCR non-English documents, install the matching language pack as described below.\n\n\n## Language Packs\n\nTesseract OCR supports a variety of languages. You can find additional language packs in the Tesseract GitHub repositories:\n\n- [tessdata_fast](https://github.com/tesseract-ocr/tessdata_fast): These language packs are smaller and faster to load but may provide lower recognition accuracy.\n- [tessdata](https://github.com/tesseract-ocr/tessdata): These language packs are larger and provide better recognition accuracy, but may take longer to load.\n\nDepending on your requirements, you can choose the appropriate language pack for your use case. By default, Stirling PDF uses `tessdata_fast` for English, but this can be replaced.\n\n### Installing Language Packs manually\n\n1. Download the desired language pack(s) by selecting the `.traineddata` file(s) for the language(s) you need.\n2. Place the `.traineddata` files in the Tesseract tessdata directory: `/usr/share/tessdata` (or equivalent)\n\n**DO NOT REMOVE EXISTING `eng.traineddata`, IT'S REQUIRED.**\n\n### Docker Setup\n\nIf you are using Docker, you need to expose the Tesseract tessdata directory as a volume in order to use the additional language packs.\n\n\n \n Modify your `docker-compose.yml` file to include the following volume configuration:\n\n ```yaml\n services:\n your_service_name:\n image: your_docker_image_name\n volumes:\n - /location/of/trainingData:/usr/share/tessdata\n ```\n \n \n Add the following to your existing Docker run command:\n\n ```bash\n -v /location/of/trainingData:/usr/share/tessdata\n ```\n \n\n\n### Non-Docker Setup\n\n\n \n For Debian-based systems, use the following commands to manage Tesseract languages:\n\n ```bash\n sudo apt update &&\\\n # All languages\n # sudo apt install -y 'tesseract-ocr-*'\n \n # Find available languages:\n apt search tesseract-ocr-\n \n # View installed languages:\n dpkg-query -W tesseract-ocr- | sed 's/tesseract-ocr-//g'\n ```\n \n \n For Fedora systems, use the following commands:\n\n ```bash\n # All languages\n # sudo dnf install -y tesseract-langpack-*\n \n # Find available languages:\n dnf search -C tesseract-langpack-\n \n # View installed languages:\n rpm -qa | grep tesseract-langpack | sed 's/tesseract-langpack-//g'\n ```\n \n \n Follow these steps to set up Tesseract languages on Windows:\n\n 1. Download desired `.traineddata` files from [tessdata](https://github.com/tesseract-ocr/tessdata) or [tessdata_fast](https://github.com/tesseract-ocr/tessdata_fast)\n \n 2. Place them in the tessdata folder within your Tesseract installation directory:\n ```\n C:\\Program Files\\Tesseract-OCR\\tessdata\n ```\n \n 3. Verify the installation by running:\n ```powershell\n tesseract --list-langs\n ```\n \n 4. Edit your `/configs/settings.yml` and update the `system.tessdataDir`:\n ```yaml\n system:\n tessdataDir: C:/Program Files/Tesseract-OCR/tessdata # path to Tessdata files\n ```",
|
||
"sourcePath": "docs/Configuration/Operations/OCR.md",
|
||
"editUrl": "https://github.com/Stirling-Tools/Stirling-Tools.github.io/blob/main/docs/Configuration/Operations/OCR.md"
|
||
},
|
||
"configuration/operations/performance-optimization": {
|
||
"id": "configuration/operations/performance-optimization",
|
||
"title": "Performance Optimization & Sizing",
|
||
"description": "Resource sizing and scaling guidance for Stirling PDF deployments",
|
||
"section": "configuration/operations",
|
||
"markdown": "PDF processing is memory-intensive - a single large PDF can expand to many times its file size in memory during processing. This guide helps you size your deployment correctly.\n\n---\n\n## How Stirling PDF Uses Memory\n\nStirling PDF loads PDFs into memory using a tiered strategy based on file size:\n\n| File Size | Strategy | Memory Impact |\n|---|---|---|\n| Up to 10 MB | Loaded entirely into memory | Fast, but consumes memory proportional to file size |\n| 10 MB to 50 MB | Partially in memory, remainder stored on disk | Moderate memory usage with disk spillover |\n| Over 50 MB | Fully stored on disk during processing | Minimal memory usage, but requires adequate disk space |\n\nThe application also monitors memory pressure. If available memory drops too low, all operations are forced into disk-backed mode regardless of file size.\n\n> **⚠️ Caution: Memory-Intensive Operations**\n>\n> A 50 MB PDF with complex vector graphics, embedded fonts, and many pages can expand to 200-500 MB in memory during processing. Operations that render pages (such as PDF-to-image conversion) and OCR are particularly memory-intensive. Plan for several times the maximum expected file size per concurrent operation.\n\n\n---\n\n## Resource Recommendations\n\n\n\n\n**Recommended specifications:**\n- **CPU:** 2 cores (4+ recommended)\n- **RAM:** 4 GB\n- **Disk:** 10 GB free space\n\n**Docker Compose:**\n```yaml\nservices:\n stirling-pdf:\n image: docker.stirlingpdf.com/stirlingtools/stirling-pdf:latest\n deploy:\n resources:\n limits:\n memory: 4G\n cpus: '2.0'\n```\n\n\n\n\n**Recommended specifications:**\n- **CPU:** 4-8 cores\n- **RAM:** 8-16 GB\n- **Disk:** 50 GB (SSD recommended)\n\n**Docker Compose:**\n```yaml\nservices:\n stirling-pdf:\n image: docker.stirlingpdf.com/stirlingtools/stirling-pdf:latest\n environment:\n PROCESS_EXECUTOR_SESSION_LIMIT_LIBRE_OFFICE_SESSION_LIMIT: 2\n deploy:\n resources:\n limits:\n memory: 8G\n cpus: '4.0'\n```\n\n**Consider:**\n- Increase LibreOffice session limit for faster document conversions - see [LibreOffice Parallel Processing](doc:configuration/operations/libreoffice-parallel-processing)\n- External PostgreSQL database for reliability\n\n\n\n\n**Recommended specifications:**\n- **CPU:** 8+ cores\n- **RAM:** 16-32 GB\n- **Disk:** 100+ GB, SSD strongly recommended\n\n**Docker Compose:**\n```yaml\nservices:\n stirling-pdf:\n image: docker.stirlingpdf.com/stirlingtools/stirling-pdf:latest\n environment:\n PROCESS_EXECUTOR_SESSION_LIMIT_LIBRE_OFFICE_SESSION_LIMIT: 4\n PROCESS_EXECUTOR_SESSION_LIMIT_TESSERACT_SESSION_LIMIT: 2\n deploy:\n resources:\n limits:\n memory: 16G\n cpus: '8.0'\n```\n\n**Architecture considerations:**\n- Multiple instances behind a load balancer with session affinity\n- Remote UNO servers for LibreOffice scaling - see [LibreOffice Parallel Processing](doc:configuration/operations/libreoffice-parallel-processing)\n- External PostgreSQL database (enterprise feature)\n- Shared `/configs` volume across instances for consistent settings\n\n> **💡 Tip: Server/Enterprise Recommended**\n>\n> For large organizations, **Server or Enterprise plans** provide SSO, external database support, advanced monitoring, and dedicated support.\n>\n> [Learn more](doc:server-admin-onboarding)\n\n\n\n\n\n---\n\n## Fine Tuning\n\nFor most deployments, Stirling PDF's defaults work well and no manual tuning is needed. If you are experiencing performance issues with large files or high concurrency, you can adjust the memory allocated to the application using the `JAVA_TOOL_OPTIONS` environment variable:\n\n```yaml\nservices:\n stirling-pdf:\n environment:\n JAVA_TOOL_OPTIONS: \"-Xms512m -Xmx4g\"\n```\n\n`-Xms` sets the initial memory allocation and `-Xmx` sets the maximum. If running in Docker or Kubernetes with memory limits, set the container limit to **at least 1.5x the `-Xmx` value** to leave room for background processes like LibreOffice and Tesseract.\n\n---\n\n## Resource-Intensive Operations\n\nSome operations require significantly more resources than others. If your organization primarily uses specific tools, you should size your deployment based on the most resource-heavy operations your users will perform.\n\n| Operation | CPU Impact | Memory Impact | Notes |\n|---|---|---|---|\n| Merge / Split | Low | Proportional to total file sizes | Lightweight file operations |\n| OCR (Tesseract) | Very High | High | CPU-bound image analysis |\n| File Conversion (LibreOffice) | High | High | Single-threaded per instance - see [LibreOffice Parallel Processing](doc:configuration/operations/libreoffice-parallel-processing) to scale. |\n| PDF-to-Image | Moderate | Very High | Page rendering expands memory significantly |\n| PDF/A Conversion | Moderate | High | Font embedding and color profiles |\n| Compression | Moderate | High | Rewriting internal PDF structures |\n\nFor example, if your team primarily uses OCR and document conversion, you will need significantly more resources than a team that mainly merges and splits PDFs. Adjust your [Process Limits](doc:configuration/operations/process-limits) and resource allocation accordingly.\n\n---\n\n## Related\n\n- [Process Limits](doc:configuration/operations/process-limits) - Configure session limits and timeouts for all external tools\n- [LibreOffice Parallel Processing](doc:configuration/operations/libreoffice-parallel-processing) - Scale document conversions with multiple instances\n- [Production Deployment Guide](doc:server-admin-onboarding) - Full production setup walkthrough\n- [Diagnostics](doc:configuration/operations/diagnostics) - Collect system and application diagnostics for troubleshooting",
|
||
"sourcePath": "docs/Configuration/Operations/Performance-Optimization.md",
|
||
"editUrl": "https://github.com/Stirling-Tools/Stirling-Tools.github.io/blob/main/docs/Configuration/Operations/Performance-Optimization.md"
|
||
},
|
||
"configuration/operations/process-limits": {
|
||
"id": "configuration/operations/process-limits",
|
||
"title": "Process Limits",
|
||
"section": "configuration/operations",
|
||
"markdown": "Stirling PDF sometimes runs external tools to handle tools such as conversions or advanced operations\nTools like LibreOffice, Tesseract, Ghostscript, and others. All these tools are optional to Stirling PDFs general operation.\n\n> Some tools listed here may not be actively used in the current version of Stirling PDF. Their configuration is kept in place for potential re-introduction in future updates.\n\nTwo types of limits are customised for every external tool:\n\n- **Session limits** - how many of a given process can run at the same time\n- **Timeouts** - how long a single process can run before it's killed\n\nBoth sit under `processExecutor` in `settings.yml`. A value of `0` means \"use the default.\"\n\n---\n\n## Session limits\n\nControls how many concurrent instances of each process are allowed. Extra requests queue up and wait.\n\n| Setting | Default | What it controls |\n|---|---|---|\n| `sessionLimit.libreOfficeSessionLimit` | `1` | Word/Excel/PowerPoint/HTML → PDF |\n| `sessionLimit.tesseractSessionLimit` | `1` | OCR (Tesseract is single-threaded) |\n| `sessionLimit.pdfToHtmlSessionLimit` | `1` | PDF → HTML |\n| `sessionLimit.ghostscriptSessionLimit` | `8` | PDF compression, repair, manipulation |\n| `sessionLimit.pythonOpenCvSessionLimit` | `8` | Image processing |\n| `sessionLimit.imageMagickSessionLimit` | `4` | Image conversion |\n| `sessionLimit.qpdfSessionLimit` | `4` | PDF/A conversion, repair, compression |\n| `sessionLimit.ocrMyPdfSessionLimit` | `2` | Add OCR overlay to existing PDFs |\n| `sessionLimit.weasyPrintSessionLimit` | `16` | HTML/CSS → PDF (WeasyPrint) |\n| `sessionLimit.calibreSessionLimit` | `1` | E-book conversions |\n| `sessionLimit.installAppSessionLimit` | `1` | Internal install tasks |\n\n**Increase** limits on a beefy server with concurrent users. **Decrease** them on low-RAM servers - LibreOffice in particular is memory-hungry.\n\nFor LibreOffice specifically, you can also scale by running multiple remote UNO server instances - see [LibreOffice Parallel Processing](doc:configuration/operations/libreoffice-parallel-processing) for details.\n\n> **ℹ️ Info**\n>\n> Be mindful of memory and CPU usage when raising session limits. Each concurrent process consumes resources, and setting limits too high can starve the host or cause out-of-memory issues possibly killing the instance. Start with the defaults and increase gradually while monitoring your server.\n\n\n---\n\n## Timeouts\n\nHow long (in minutes) a process can run before it's forcibly killed and an error is returned.\n\n| Setting | Default |\n|---|---|\n| `timeoutMinutes.libreOfficeTimeoutMinutes` | `30` |\n| `timeoutMinutes.tesseractTimeoutMinutes` | `30` |\n| `timeoutMinutes.ghostscriptTimeoutMinutes` | `30` |\n| `timeoutMinutes.pythonOpenCvTimeoutMinutes` | `30` |\n| `timeoutMinutes.imageMagickTimeoutMinutes` | `30` |\n| `timeoutMinutes.qpdfTimeoutMinutes` | `30` |\n| `timeoutMinutes.ocrMyPdfTimeoutMinutes` | `30` |\n| `timeoutMinutes.weasyPrintTimeoutMinutes` | `30` |\n| `timeoutMinutes.calibreTimeoutMinutes` | `30` |\n| `timeoutMinutes.pdfToHtmlTimeoutMinutes` | `20` |\n| `timeoutMinutes.installAppTimeoutMinutes` | `60` |\n\n**Increase** timeouts if users process very large files that legitimately take longer. **Decrease** them if you want faster failure and tighter resource control.\n\n---\n\n## Examples\n\n### Conservative - low-resource server\n\n\n \n ```yaml\n processExecutor:\n sessionLimit:\n libreOfficeSessionLimit: 1\n tesseractSessionLimit: 1\n ghostscriptSessionLimit: 2\n imageMagickSessionLimit: 2\n pythonOpenCvSessionLimit: 2\n weasyPrintSessionLimit: 4\n qpdfSessionLimit: 1\n ocrMyPdfSessionLimit: 1\n timeoutMinutes:\n libreOfficeTimeoutMinutes: 10\n tesseractTimeoutMinutes: 15\n ```\n \n \n ```bash\n PROCESSEXECUTOR_SESSIONLIMIT_LIBREOFFICESESSIONLIMIT=1\n PROCESSEXECUTOR_SESSIONLIMIT_TESSERACTSESSIONLIMIT=1\n PROCESSEXECUTOR_SESSIONLIMIT_GHOSTSCRIPTSESSIONLIMIT=2\n PROCESSEXECUTOR_TIMEOUTMINUTES_LIBREOFFICETIMEOUTMINUTES=10\n PROCESSEXECUTOR_TIMEOUTMINUTES_TESSERACTTIMEOUTMINUTES=15\n ```\n \n \n ```yaml\n services:\n stirling-pdf:\n image: docker.stirlingpdf.com/stirlingtools/stirling-pdf:latest\n environment:\n PROCESSEXECUTOR_SESSIONLIMIT_LIBREOFFICESESSIONLIMIT: 1\n PROCESSEXECUTOR_SESSIONLIMIT_TESSERACTSESSIONLIMIT: 1\n PROCESSEXECUTOR_TIMEOUTMINUTES_LIBREOFFICETIMEOUTMINUTES: 10\n ```\n \n\n\n### High-throughput - powerful server\n\n\n \n ```yaml\n processExecutor:\n sessionLimit:\n libreOfficeSessionLimit: 4\n tesseractSessionLimit: 4\n ghostscriptSessionLimit: 16\n imageMagickSessionLimit: 8\n pythonOpenCvSessionLimit: 16\n qpdfSessionLimit: 8\n ocrMyPdfSessionLimit: 4\n timeoutMinutes:\n libreOfficeTimeoutMinutes: 60\n tesseractTimeoutMinutes: 60\n ocrMyPdfTimeoutMinutes: 60\n ```\n \n \n ```bash\n PROCESSEXECUTOR_SESSIONLIMIT_LIBREOFFICESESSIONLIMIT=4\n PROCESSEXECUTOR_SESSIONLIMIT_TESSERACTSESSIONLIMIT=4\n PROCESSEXECUTOR_TIMEOUTMINUTES_LIBREOFFICETIMEOUTMINUTES=60\n ```",
|
||
"sourcePath": "docs/Configuration/Operations/Process-Limits.md",
|
||
"editUrl": "https://github.com/Stirling-Tools/Stirling-Tools.github.io/blob/main/docs/Configuration/Operations/Process-Limits.md"
|
||
},
|
||
"configuration/security/audit-logging": {
|
||
"id": "configuration/security/audit-logging",
|
||
"title": "Audit Logging",
|
||
"section": "configuration/security",
|
||
"markdown": "> **Tier**: Enterprise\n\nLogs every operation, who ran it, what tool, which files, when. All data is stored in the database.\nWe recommend external database setup when using this feature due to the potential volume.\nPlease note the data stored is customisable based on you and your organisations needs and legal requirements.\n\n\nSettings are under `premium.enterpriseFeatures.audit`.\n\n| Setting | Default | Description |\n|---|---|---|\n| `enabled` | `true` | Turn audit logging on or off |\n| `level` | `2` | Verbosity: `0` = off, `1` = basic, `2` = standard, `3` = verbose |\n| `retentionDays` | `90` | Days to keep audit records before purging (`0` = infinite retention) |\n| `captureFileHash` | `false` | Store a SHA-256 hash of each processed file |\n| `capturePdfAuthor` | `false` | Extract and store PDF author metadata |\n| `captureOperationResults` | `false` | Store operation return values - high volume, use sparingly |\n\n## Audit levels\n\n| Level | What's recorded |\n|---|---|\n| `0` - OFF | Nothing |\n| `1` - BASIC | File modifications only - PDF operations (compress, split, merge, etc.) and settings changes |\n| `2` - STANDARD | BASIC + user actions (login/logout, account changes, general GET requests) |\n| `3` - VERBOSE | STANDARD + continuous polling calls and all GET requests |\n\n## Example\n\n\n \n ```yaml\n premium:\n enabled: true\n key: your-enterprise-license-key\n enterpriseFeatures:\n audit:\n enabled: true\n level: 2\n retentionDays: 365\n captureFileHash: true\n capturePdfAuthor: false\n captureOperationResults: false\n ```\n \n \n ```bash\n PREMIUM_ENABLED=true\n PREMIUM_KEY=your-enterprise-license-key\n PREMIUM_ENTERPRISEFEATURES_AUDIT_ENABLED=true\n PREMIUM_ENTERPRISEFEATURES_AUDIT_LEVEL=2\n PREMIUM_ENTERPRISEFEATURES_AUDIT_RETENTIONDAYS=365\n PREMIUM_ENTERPRISEFEATURES_AUDIT_CAPTUREFILEHASH=true\n PREMIUM_ENTERPRISEFEATURES_AUDIT_CAPTUREPDFAUTHOR=false\n PREMIUM_ENTERPRISEFEATURES_AUDIT_CAPTUREOPERATIONRESULTS=false\n ```\n \n \n ```yaml\n services:\n stirling-pdf:\n image: docker.stirlingpdf.com/stirlingtools/stirling-pdf:latest\n environment:\n PREMIUM_ENABLED: true\n PREMIUM_KEY: your-enterprise-license-key\n PREMIUM_ENTERPRISEFEATURES_AUDIT_ENABLED: true\n PREMIUM_ENTERPRISEFEATURES_AUDIT_LEVEL: 2\n PREMIUM_ENTERPRISEFEATURES_AUDIT_RETENTIONDAYS: 365\n PREMIUM_ENTERPRISEFEATURES_AUDIT_CAPTUREFILEHASH: true\n ```\n \n\n\n> **Note on performance:** `captureFileHash` adds a SHA-256 calculation for every file processed - noticeable overhead at high volume. `captureOperationResults` stores full operation output in the database and can grow very large; only enable it when specifically needed.",
|
||
"sourcePath": "docs/Configuration/Security/Audit Logging.md",
|
||
"editUrl": "https://github.com/Stirling-Tools/Stirling-Tools.github.io/blob/main/docs/Configuration/Security/Audit Logging.md"
|
||
},
|
||
"configuration/security/fail2ban": {
|
||
"id": "configuration/security/fail2ban",
|
||
"title": "Fail2Ban Integration",
|
||
"section": "configuration/security",
|
||
"markdown": "## Fail2Ban Setup for Stirling PDF\nThis document provides instructions on how to set up Fail2Ban with Stirling PDF to protect against unauthorized login attempts. (Note Stirling PDF blocks IPs after a set retry count regardless of Fail2Ban, This configuration is only useful for users specifically wanting Fail2Ban configuration)\n\n## How does Fail2Ban Work with Stirling PDF\nStirling PDF logs failed authentication attempts to a log file which Fail2Ban monitors. When it detects multiple failed login attempts from the same IP address, Fail2Ban automatically blocks that IP address for a configured period of time.\n\n\n## Prerequisites\n- Fail2Ban installed on your system\n- Access to Stirling PDF log directory\n- Security settings configured:\n\n\n \n ```yaml\n security:\n enableLogin: true # Login must be enabled for Fail2Ban integration\n loginAttemptCount: -1 # Set to -1 when using Fail2Ban recommended but not required\n ```\n \n \n ```bash\n SECURITY_ENABLELOGIN=true\n SECURITY_LOGINATTEMPTCOUNT=-1\n ```\n \n \n ```yaml\n services:\n stirling-pdf:\n environment:\n SECURITY_ENABLELOGIN: true\n SECURITY_LOGINATTEMPTCOUNT: -1\n ```\n \n\n\n### Important Configuration Notes\n- The `enableLogin` setting must be set to `true` as Fail2Ban integration requires authentication to be active\n- When using Fail2Ban, set `loginAttemptCount` to `-1` to disable the built-in account locking mechanism and let Fail2Ban handle login attempt management\n- For more details on security configuration options, refer to the [System and Security](doc:configuration/security/system-and-security) documentation\n\n## Configuration\n\n### Log File Location\nThe log file location containing the failed authentication messages depends on your installation type:\n\n- **Default/Docker Installation**: ``./logs/invalid-auths.log``\n- **Windows Desktop**: ``%APPDATA%\\Stirling-PDF\\logs\\invalid-auths.log``\n- **MacOS Desktop**: ``~/Library/Application Support/Stirling-PDF/logs/invalid-auths.log``\n- **Linux Desktop**: ``~/.config/Stirling-PDF/logs/invalid-auths.log``\n\n### Example Fail2Ban Filter\n`/etc/fail2ban/filter.d/stirling-pdf.conf`\n```ini\n[Definition]\nfailregex = Failed login attempt from IP: \n```\n\n### Example Jail Configuration\n`/etc/fail2ban/jail.local`\n```ini\n[stirling-pdf]\nenabled = true\nfilter = stirling-pdf\nlogpath = /logs/invalid-auths.log\nmaxretry = 5\nfindtime = 300\nbantime = 3600\n```\n\nConfiguration parameters:\n- `maxretry`: Number of failed attempts before ban (default: 5)\n- `findtime`: Time window for failed attempts in seconds (default: 300 seconds / 5 minutes)\n- `bantime`: Duration of the ban in seconds (default: 3600 seconds / 1 hour)\n\n\n### Ensure access to Logs path\n\n \n Modify your `docker-compose.yml` to expose the log directory:\n ```yaml\n services:\n stirling-pdf:\n volumes:\n - ./logs:/logs\n ```\n \n \n Add the volume mount to your Docker run command:\n ```bash\n -v ./logs:/logs\n ```",
|
||
"sourcePath": "docs/Configuration/Security/Fail2Ban.md",
|
||
"editUrl": "https://github.com/Stirling-Tools/Stirling-Tools.github.io/blob/main/docs/Configuration/Security/Fail2Ban.md"
|
||
},
|
||
"configuration/security/oauth-sso-configuration": {
|
||
"id": "configuration/security/oauth-sso-configuration",
|
||
"title": "OAuth 2.0 Single Sign-On Configuration",
|
||
"section": "configuration/security",
|
||
"markdown": "> **Tier**: Server\n\nStirling PDF supports Single Sign-On (SSO) using OAuth 2.0 OpenID Connect (OIDC). This allows users to log in using accounts from external providers such as Google, GitHub, Keycloak, Authentik, and others.\n\n> **Looking for SAML 2.0 SSO?** See [SAML SSO Configuration](doc:configuration/security/saml-sso-configuration) (Enterprise tier).\n\n## Prerequisites\n\nBefore configuring OAuth 2.0 SSO, ensure you have:\n\n- [ ] Stirling PDF with login enabled (`security.enableLogin: true`)\n- [ ] Valid license for the Server tier or higher\n- [ ] An OAuth 2.0 provider account (Google, GitHub, Keycloak, etc.)\n- [ ] Registered OAuth application with your provider\n- [ ] OAuth Client ID and Client Secret from your provider\n- [ ] Public HTTPS URL configured with `system.backendUrl` set to your public backend API URL (often same as frontend, verify `https://your-domain.com/api/v1/info/status` is accessible)\n- [ ] Callback URL added to provider: `https://your-domain.com/login/oauth2/code/<provider>`\n\n> **Tip**: Start with `loginMethod: all` during initial setup to allow both username/password and OAuth login. This ensures you can always access the admin account if SSO configuration needs adjustment.\n\n## Setup Guide\n\n### Step 1: Configure Login Settings\n\nEnable login and set the login method to allow both standard and OAuth authentication during initial setup.\n\n\n \n ```yaml\n security:\n enableLogin: true\n loginMethod: all # Allows both username/password and OAuth login\n ```\n \n \n ```bash\n SECURITY_ENABLELOGIN=true\n SECURITY_LOGINMETHOD=all\n ```\n \n\n\n**Login Method Options:**\n- `all`: Enables all login methods (username/password + OAuth 2)\n- `normal`: Username/password only\n- `oauth2`: OAuth 2 SSO only (disables username/password login)\n- `saml2`: SAML 2 SSO only (Enterprise tier)\n\n### Step 2: Create Initial Admin Account\n\nBefore enabling OAuth, create an initial admin account using one of these methods:\n\n**Option A: Use initialLogin credentials** (recommended for first setup)\n\n\n \n ```yaml\n security:\n initialLogin:\n username: 'admin'\n password: 'yourSecurePassword123'\n ```\n \n \n ```bash\n SECURITY_INITIALLOGIN_USERNAME=admin\n SECURITY_INITIALLOGIN_PASSWORD=yourSecurePassword123\n ```\n \n\n\n**Option B: Create admin manually**\n1. Access Stirling PDF with OAuth disabled\n2. Create an admin user through the UI\n3. Then enable OAuth\n\n### Step 3: Configure OAuth Provider\n\nSet `security.oauth2.enabled` to `true` and configure your chosen provider.\n\n\n \n \n \n ```yaml\n security:\n oauth2:\n enabled: true\n client:\n google:\n clientId: <YOUR_CLIENT_ID>\n clientSecret: <YOUR_CLIENT_SECRET>\n scopes: email, profile\n useAsUsername: email\n provider: google\n autoCreateUser: true\n blockRegistration: false\n ```\n \n \n ```bash\n SECURITY_OAUTH2_ENABLED=true\n SECURITY_OAUTH2_CLIENT_GOOGLE_CLIENTID=<YOUR_CLIENT_ID>\n SECURITY_OAUTH2_CLIENT_GOOGLE_CLIENTSECRET=<YOUR_CLIENT_SECRET>\n SECURITY_OAUTH2_CLIENT_GOOGLE_SCOPES=email, profile\n SECURITY_OAUTH2_CLIENT_GOOGLE_USEASUSERNAME=email\n SECURITY_OAUTH2_PROVIDER=google\n SECURITY_OAUTH2_AUTOCREATEUSER=true\n SECURITY_OAUTH2_BLOCKREGISTRATION=false\n ```\n \n \n\n **Provider Setup:**\n 1. Go to [Google Cloud Console](https://console.cloud.google.com/)\n 2. Create a new project or select existing\n 3. Enable Google+ API\n 4. Create OAuth 2.0 credentials (Web application)\n 5. Add authorized redirect URI: `https://your-domain.com/login/oauth2/code/google`\n 6. Copy Client ID and Client Secret\n \n \n \n \n ```yaml\n security:\n oauth2:\n enabled: true\n client:\n github:\n clientId: <YOUR_CLIENT_ID>\n clientSecret: <YOUR_CLIENT_SECRET>\n scopes: read:user\n useAsUsername: login\n provider: github\n autoCreateUser: true\n blockRegistration: false\n ```\n \n \n ```bash\n SECURITY_OAUTH2_ENABLED=true\n SECURITY_OAUTH2_CLIENT_GITHUB_CLIENTID=<YOUR_CLIENT_ID>\n SECURITY_OAUTH2_CLIENT_GITHUB_CLIENTSECRET=<YOUR_CLIENT_SECRET>\n SECURITY_OAUTH2_CLIENT_GITHUB_SCOPES=read:user\n SECURITY_OAUTH2_CLIENT_GITHUB_USEASUSERNAME=login\n SECURITY_OAUTH2_PROVIDER=github\n SECURITY_OAUTH2_AUTOCREATEUSER=true\n SECURITY_OAUTH2_BLOCKREGISTRATION=false\n ```\n \n \n\n **Provider Setup:**\n 1. Go to [GitHub Developer Settings](https://github.com/settings/developers)\n 2. Create new OAuth App\n 3. Set Authorization callback URL: `https://your-domain.com/login/oauth2/code/github`\n 4. Copy Client ID and generate Client Secret\n \n \n \n \n ```yaml\n security:\n oauth2:\n enabled: true\n issuer: https://your-keycloak.com/realms/your-realm\n clientId: <YOUR_CLIENT_ID>\n clientSecret: <YOUR_CLIENT_SECRET>\n scopes: openid, profile, email\n useAsUsername: preferred_username\n provider: keycloak\n autoCreateUser: true\n blockRegistration: false\n ```\n \n \n ```bash\n SECURITY_OAUTH2_ENABLED=true\n SECURITY_OAUTH2_ISSUER=https://your-keycloak.com/realms/your-realm\n SECURITY_OAUTH2_CLIENTID=<YOUR_CLIENT_ID>\n SECURITY_OAUTH2_CLIENTSECRET=<YOUR_CLIENT_SECRET>\n SECURITY_OAUTH2_SCOPES=openid, profile, email\n SECURITY_OAUTH2_USEASUSERNAME=preferred_username\n SECURITY_OAUTH2_PROVIDER=keycloak\n SECURITY_OAUTH2_AUTOCREATEUSER=true\n SECURITY_OAUTH2_BLOCKREGISTRATION=false\n ```\n \n \n\n **Provider Setup:**\n 1. Access your Keycloak admin console\n 2. Select your realm\n 3. Create new client (OpenID Connect)\n 4. Set Valid Redirect URIs: `https://your-domain.com/login/oauth2/code/keycloak`\n 5. Enable \"Client authentication\" for confidential access\n 6. Copy Client ID and Client Secret from Credentials tab\n \n \n \n \n ```yaml\n security:\n oauth2:\n enabled: true\n issuer: https://your-authentik.com/application/o/stirling-pdf/\n clientId: <YOUR_CLIENT_ID>\n clientSecret: <YOUR_CLIENT_SECRET>\n scopes: openid, profile, email\n useAsUsername: preferred_username\n provider: authentik\n autoCreateUser: true\n blockRegistration: false\n ```\n \n \n ```bash\n SECURITY_OAUTH2_ENABLED=true\n SECURITY_OAUTH2_ISSUER=https://your-authentik.com/application/o/stirling-pdf/\n SECURITY_OAUTH2_CLIENTID=<YOUR_CLIENT_ID>\n SECURITY_OAUTH2_CLIENTSECRET=<YOUR_CLIENT_SECRET>\n SECURITY_OAUTH2_SCOPES=openid, profile, email\n SECURITY_OAUTH2_USEASUSERNAME=preferred_username\n SECURITY_OAUTH2_PROVIDER=authentik\n SECURITY_OAUTH2_AUTOCREATEUSER=true\n SECURITY_OAUTH2_BLOCKREGISTRATION=false\n ```\n \n \n\n **Provider Setup:**\n 1. Create new Provider (OAuth2/OpenID)\n 2. Create new Application\n 3. Set Redirect URIs: `https://your-domain.com/login/oauth2/code/authentik`\n 4. Copy Client ID and Client Secret\n \n \n \n \n ```yaml\n security:\n oauth2:\n enabled: true\n issuer: <YOUR_ISSUER_URI>\n clientId: <YOUR_CLIENT_ID>\n clientSecret: <YOUR_CLIENT_SECRET>\n scopes: openid, profile, email\n useAsUsername: email\n provider: <PROVIDER_NAME>\n autoCreateUser: true\n blockRegistration: false\n ```\n \n \n ```bash\n SECURITY_OAUTH2_ENABLED=true\n SECURITY_OAUTH2_ISSUER=<YOUR_ISSUER_URI>\n SECURITY_OAUTH2_CLIENTID=<YOUR_CLIENT_ID>\n SECURITY_OAUTH2_CLIENTSECRET=<YOUR_CLIENT_SECRET>\n SECURITY_OAUTH2_SCOPES=openid, profile, email\n SECURITY_OAUTH2_USEASUSERNAME=email\n SECURITY_OAUTH2_PROVIDER=<PROVIDER_NAME>\n SECURITY_OAUTH2_AUTOCREATEUSER=true\n SECURITY_OAUTH2_BLOCKREGISTRATION=false\n ```\n \n \n\n **Requirements:**\n - Provider must support OpenID Connect Discovery\n - Must expose `/.well-known/openid-configuration` endpoint\n \n\n\n### Step 4: Configure Callback URL\n\nWhen registering your application with the OAuth provider, use this callback URL format:\n\n```\nhttps://<your-domain>/login/oauth2/code/<provider>\n```\n\n**Understanding the Provider Slug:**\n\nThe `<provider>` portion of the callback URL must exactly match your `security.oauth2.provider` configuration value:\n\n```yaml\nsecurity:\n oauth2:\n provider: authentik # This becomes part of the callback URL\n```\n\nWith the above configuration, your callback URL becomes:\n```\nhttps://your-domain.com/login/oauth2/code/authentik\n```\n\n**Examples:**\n- Google: `https://stirling.example.com/login/oauth2/code/google`\n- GitHub: `https://stirling.example.com/login/oauth2/code/github`\n- Keycloak: `https://stirling.example.com/login/oauth2/code/keycloak`\n- Custom provider: `https://stirling.example.com/login/oauth2/code/mycompany`\n\n> **Important**: If the provider slug in the callback URL doesn't match your `security.oauth2.provider` value, OAuth login will fail with redirect errors.\n\n> **Tip**: For generic OIDC providers (not Google/GitHub/Keycloak), you can set `provider` to any lowercase alphanumeric value that makes sense for your organization.\n\n### Step 5: Test OAuth Login and Promote User\n\n1. Restart Stirling PDF\n2. Test OAuth login in an incognito/private browser window\n3. Verify you can log in with your OAuth provider\n4. Log in with your initial admin account (username/password)\n5. Go to **Settings** → **User Management**\n6. Find the OAuth user account (created during test login)\n7. Change role to **Admin**\n\n### Step 6: (Optional) Switch to SSO-Only Mode\n\nOnce you've verified OAuth works and promoted an OAuth user to admin, you can disable username/password login:\n\n\n \n ```yaml\n security:\n loginMethod: oauth2 # Disables username/password login\n ```\n \n \n ```bash\n SECURITY_LOGINMETHOD=oauth2\n ```\n \n\n\n> **Important**: If you set `loginMethod: oauth2` before creating an OAuth admin user, you will only be able to log in via OAuth, and all new OAuth users will have regular user permissions. Keep `loginMethod: all` until you have at least one OAuth user with admin privileges.\n\n## Configuration Reference\n\n### Required Properties\n\n| Property | Description | Example |\n|----------|-------------|---------|\n| `security.oauth2.enabled` | Enable OAuth 2 login | `true` |\n| `security.oauth2.clientId` | Client ID from your OAuth provider | `stirling-pdf-client` |\n| `security.oauth2.clientSecret` | Client Secret from your OAuth provider | `your-secret-key` |\n| `security.oauth2.provider` | Provider name | `google`, `github`, `keycloak`, `authentik` |\n\n### Optional Properties\n\n| Property | Description | Default | Example |\n|----------|-------------|---------|---------|\n| `security.oauth2.issuer` | OIDC issuer URL (required for generic providers, must support `/.well-known/openid-configuration`) | - | `https://keycloak.example.com/realms/myrealm` |\n| `security.oauth2.autoCreateUser` | Auto-create users on first login | `true` | `false` |\n| `security.oauth2.blockRegistration` | Block new user registration, only allow pre-registered users | `false` | `true` |\n| `security.oauth2.scopes` | Space or comma-separated list of OAuth scopes | Provider-specific | `openid, profile, email` |\n| `security.oauth2.useAsUsername` | Claim to use as username (options depend on provider) | Provider-specific | `email`, `preferred_username`, `login` |\n\n### Provider-Specific Configuration\n\n**Named providers** (Google, GitHub, Keycloak):\n```yaml\noauth2:\n client:\n google: # or github, keycloak\n clientId: ...\n clientSecret: ...\n```\n\n**Generic providers** (Authentik, custom OIDC):\n```yaml\noauth2:\n issuer: <ISSUER_URI> # Must support OIDC discovery\n clientId: ...\n clientSecret: ...\n```\n\n### Username Claim Options\n\n**Google:**\n- `email`, `name`, `given_name`, `family_name`\n- See [Google OAuth Scopes](https://developers.google.com/identity/protocols/oauth2/scopes)\n\n**GitHub:**\n- `login`, `email`, `name`\n- See [GitHub OAuth Scopes](https://docs.github.com/en/apps/oauth-apps/building-oauth-apps/scopes-for-oauth-apps)\n\n**Keycloak/Generic OIDC:**\n- `email`, `preferred_username`, `nickname`, `name`\n\n## Advanced Configuration\n\n### Backend URL Configuration\n\nIf your Stirling PDF backend is accessible at a different URL than the frontend, configure the backend URL:\n\n\n \n ```yaml\n system:\n backendUrl: https://stirling-api.example.com\n ```\n \n \n ```bash\n SYSTEM_BACKENDURL=https://stirling-api.example.com\n ```\n \n\n\nVerify the backend URL is correct by checking that `https://your-domain.com/api/v1/info/status` is accessible.\n\n### Auto-Login Feature\n> **Tier**: Server\n\nAutomatically redirect users to OAuth login page, bypassing the Stirling PDF login screen.\n\n\n \n ```yaml\n premium:\n proFeatures:\n ssoAutoLogin: true\n ```\n \n \n ```bash\n PREMIUM_PROFEATURES_SSOAUTOLOGIN=true\n ```\n \n\n\n**Auto-login Activation Requirements:**\n\nAuto-login only triggers when **ALL** of the following conditions are met:\n\n1. `ssoAutoLogin` is enabled (as configured above)\n2. `loginMethod` is NOT `'all'` and NOT `'normal'` (i.e., SSO-only mode required)\n3. Exactly one OAuth provider is configured\n\n**Behavior:**\n- When all conditions are met: Users are automatically redirected to OAuth provider login\n- When conditions are not met: Standard login page is displayed\n- If the SSO redirect fails, the browser stops auto-redirecting for the current session so the login page stays reachable\n- After logging out, auto-redirect is suppressed for that session so you can sign in as a different user\n\n### User Interface\n\nOnce OAuth is configured, users will see the SSO login button:\n\n|  |  |\n|----------------------------------------|---------------------------------------------------|\n\n## Troubleshooting\n\n### Common Issues\n\n**\"OAuth2 authentication error\"**\n- Verify callback URL matches exactly (including provider slug)\n- Check client ID and secret are correct\n- Ensure provider allows the configured redirect URI\n- Confirm `security.oauth2.provider` matches the provider slug in callback URL\n\n**\"Invalid issuer\"**\n- Confirm issuer URL is correct\n- Test `https://your-issuer/.well-known/openid-configuration` returns valid JSON\n- Check network connectivity from Stirling PDF container to provider\n\n**\"User not created\"**\n- Set `autoCreateUser: true`\n- Check `blockRegistration` is `false` or user is pre-registered\n- Verify license allows user count\n\n**Users redirected to wrong URL**\n- Verify `system.backendUrl` is configured correctly\n- Test that `https://your-domain.com/api/v1/info/status` is accessible\n- Check provider's registered redirect URIs match your domain\n\n### Debug Logging\n\nEnable OAuth debug logging to troubleshoot authentication issues.\n\n\n \n ```yaml\n logging:\n level:\n org.springframework.security.oauth2: DEBUG\n ```\n \n \n ```bash\n LOGGING_LEVEL_ORG_SPRINGFRAMEWORK_SECURITY_OAUTH2=DEBUG\n ```\n \n\n\n### Logging the Provider's Claims (\"Attribute value for email cannot be null\")\n\nIf login fails with **\"Attribute value for email cannot be null\"** (common with ADFS and Azure AD), the provider is not returning the claim named by `useAsUsername`. Enable `security.oauth2.debugLogging` to log the full ID-token / UserInfo claim set and the resolved username, so you can see exactly which claims the provider sends and pick the right `useAsUsername` value.\n\n\n \n ```yaml\n security:\n oauth2:\n debugLogging: true\n ```\n \n \n ```bash\n SECURITY_OAUTH2_DEBUGLOGGING=true\n ```\n \n\n\nThe claims are logged at `INFO` level on each login (and again at `ERROR` level when the username attribute cannot be resolved).\n\n**⚠️ Disable `debugLogging` again as soon as you are done.** It writes personally identifiable information (such as `sub`, `email`, and `name`) to the application logs.\n\n## Known Limitations\n\n- OAuth users must be manually promoted to admin role after first login\n- Provider discovery requires `/.well-known/openid-configuration` endpoint support\n- Auto-login feature requires the Server tier (or higher)\n\n## See Also\n\n- [SAML SSO Configuration](doc:configuration/security/saml-sso-configuration) - Enterprise SAML 2.0 setup\n- [System and Security](doc:configuration/security/system-and-security) - Additional security settings\n- [External Database](doc:configuration/storage/external-database) - User storage configuration",
|
||
"sourcePath": "docs/Configuration/Security/OAuth SSO Configuration.md",
|
||
"editUrl": "https://github.com/Stirling-Tools/Stirling-Tools.github.io/blob/main/docs/Configuration/Security/OAuth SSO Configuration.md"
|
||
},
|
||
"configuration/security/saml-sso-configuration": {
|
||
"id": "configuration/security/saml-sso-configuration",
|
||
"title": "SAML 2.0 Single Sign-On Configuration",
|
||
"section": "configuration/security",
|
||
"markdown": "> **Tier**: Enterprise\n\nStirling PDF supports SAML 2.0 Single Sign-On for enterprise deployments. This allows integration with Identity Providers (IdP) like Okta, Azure AD, Google Workspace, OneLogin, Authentik, and others.\n\n> **Looking for OAuth 2.0 SSO?** See [OAuth SSO Configuration](doc:configuration/security/oauth-sso-configuration) (Server tier).\n\n## Prerequisites\n\nBefore starting, ensure you have:\n\n- [ ] **Enterprise license active** - SAML requires Enterprise tier\n- [ ] **Configs directory mounted** - Docker volume mounted (e.g., `./configs:/configs:ro`)\n- [ ] **Public backend URL configured** - Set `system.backendUrl` to your public backend API URL (often same as frontend, verify `https://your-domain.com/api/v1/info/status` is accessible)\n- [ ] **Reverse proxy configured** - Nginx/Traefik/Caddy with X-Forwarded-* headers forwarding\n- [ ] **Login enabled** - `security.enableLogin: true` in settings\n- [ ] **Admin account ready** - Either existing admin or plan to use `security.initialLogin` credentials\n- [ ] **IdP admin access** - Access to your SAML Identity Provider (Okta, Azure AD, etc.)\n\n> ⚠️ **License Requirement**: SAML 2.0 authentication requires an **ENTERPRISE** license. Existing users created before SAML was license-gated are grandfathered and can continue using SAML with any license tier.\n\n> 💡 **Tip**: Start with `loginMethod: all` during initial setup to allow both username/password and SAML login. This ensures you can always access the admin account if SAML configuration needs adjustment.\n\n## Setup Guide\n\nFollow these steps in order to configure SAML SSO:\n\n### Step 1: Setup Certificates\n\nSAML requires 3 certificate files for mutual trust:\n\n| Certificate | Purpose | Action |\n|-------------|---------|--------|\n| **SP Private Key** | Sign SAML requests to IdP | Generate with OpenSSL |\n| **SP Certificate** | Prove identity to IdP | Generate with OpenSSL, upload to IdP |\n| **IdP Certificate** | Verify SAML responses from IdP | Download from your IdP |\n\n#### 1a. Generate Service Provider (SP) Keypair\n\nStirling PDF needs a keypair to sign SAML requests and verify responses.\n\n> ℹ️ **If you don't have a keypair**, generate one using OpenSSL:\n>\n> ```bash\n> openssl req -newkey rsa:2048 -nodes \\\n> -keyout private_key.key \\\n> -x509 -days 365 \\\n> -out certificate.crt \\\n> -subj \"/C=US/ST=State/L=City/O=Stirling-PDF/CN=your-domain.com\"\n> ```\n>\n> **Command explanation:**\n> - `rsa:2048`: Generates 2048-bit RSA key (secure standard)\n> - `-nodes`: No passphrase (required for automated systems)\n> - `-days 365`: Certificate valid for 1 year\n> - Creates two files: `private_key.key` (private) and `certificate.crt` (public)\n\nIf you already have a keypair, ensure you have both the private key and certificate files ready.\n\n#### 1b. Download IdP Certificate\n\n1. Go to your IdP admin panel\n2. Find SAML app/provider settings\n3. Download signing certificate (PEM format)\n4. Save as `idp-certificate.pem`\n\n#### 1c. Place Certificates in Mounted Directory\n\nPlace all 3 certificates inside your mounted configs directory:\n\n```\n./configs/\n ├── private_key.key ← SP private key (keep secure!)\n ├── certificate.crt ← SP certificate (will upload to IdP)\n └── idp-certificate.pem ← IdP certificate (downloaded)\n```\n\n> ⚠️ **Critical**: Use absolute paths in configuration: `/configs/filename.pem` (no `file:` or `classpath:` prefix for Docker)\n\n### Step 2: Configure Stirling PDF\n\nConfigure SAML authentication by providing:\n- **IdP URLs and certificate** - Get these from your Identity Provider (obtained from IdP admin panel)\n- **SP certificates** - Point to the certificate files created in Step 1\n- **Backend URL** - Your public backend API URL for SAML callbacks (often same as frontend, e.g., `https://stirling.example.com`)\n- **Login settings** - Enable login and set method to `all` (allows both username/password and SAML during setup)\n\n**Key configuration options:**\n- `autoCreateUser: true` - Automatically create user accounts on first SAML login\n- `blockRegistration: false` - Allow new SAML users (set to `true` to require admin pre-approval)\n- `registrationId: stirling` - Identifier used in SAML URLs (must match across all URLs)\n\n\n \n Edit `/configs/settings.yml`:\n\n ```yaml\n security:\n enableLogin: true\n loginMethod: all # Keep 'all' during initial setup\n\n saml2:\n enabled: true\n autoCreateUser: true\n blockRegistration: false\n registrationId: stirling\n\n # Identity Provider (IdP) URLs (get from your IdP)\n idpSingleLoginUrl: https://idp.example.com/saml/login\n idpSingleLogoutUrl: https://idp.example.com/saml/logout\n idpIssuer: https://idp.example.com/entityid\n idpCert: /configs/idp-certificate.pem\n\n # Service Provider (SP) Certificates\n privateKey: /configs/private_key.key\n spCert: /configs/certificate.crt\n\n # Required for SAML callback URLs\n system:\n backendUrl: https://stirling.example.com\n ```\n \n \n Add to your `docker-compose.yml` or Docker run command:\n\n ```yaml\n environment:\n SYSTEM_BACKENDURL: https://stirling.example.com\n SECURITY_ENABLELOGIN: true\n SECURITY_LOGINMETHOD: all\n SECURITY_SAML2_ENABLED: true\n SECURITY_SAML2_AUTOCREATEUSER: true\n SECURITY_SAML2_BLOCKREGISTRATION: false\n SECURITY_SAML2_REGISTRATIONID: stirling\n SECURITY_SAML2_IDPSINGLELOGINURL: https://idp.example.com/saml/login\n SECURITY_SAML2_IDPSINGLELOGOUTURL: https://idp.example.com/saml/logout\n SECURITY_SAML2_IDPISSUER: https://idp.example.com/entityid\n SECURITY_SAML2_IDPCERT: /configs/idp-certificate.pem\n SECURITY_SAML2_PRIVATEKEY: /configs/private_key.key\n SECURITY_SAML2_SPCERT: /configs/certificate.crt\n ```\n \n\n\n> 💡 **Tip**: Replace the example URLs (`idp.example.com`) with actual values from your Identity Provider.\n\n#### Public URL for SAML SLO\n\nFor Single Logout (SLO) to work correctly in production, Stirling PDF uses your `system.backendUrl` setting to tell the Identity Provider where to send the logout response. Make sure that value is set to your public-facing URL (the same setting used for the SAML callbacks above):\n\n\n \n Set in `/configs/settings.yml`:\n\n ```yaml\n system:\n backendUrl: https://your-domain.com\n ```\n \n \n Set in your Docker Compose environment variables:\n\n ```yaml\n environment:\n SYSTEM_BACKENDURL: https://your-domain.com\n ```\n \n\n\n> ⚠️ **Important**: `system.backendUrl` must be set to your public-facing URL for SAML (including Single Logout) to work correctly in production.\n\n### Step 3: Configure Your Identity Provider\n\nProvide your IdP with these Service Provider details:\n\n**Entity ID / SP Metadata URL:**\n```\nhttps://your-domain.com/saml2/service-provider-metadata/stirling\n```\n\n**Assertion Consumer Service (ACS) URL:**\n```\nhttps://your-domain.com/login/saml2/sso/stirling\n```\n\n**Single Logout (SLO) URL:**\n```\nhttps://your-domain.com/logout\n```\n\n> 📌 **Important**: Replace `stirling` with your `registrationId` value if you changed it. The registration ID must match in all URLs.\n\n**Upload SP Certificate to IdP** (Critical Step):\n1. Open `certificate.crt` (your SP public certificate)\n2. In your IdP's SAML app configuration, find \"Verification Certificate\" or \"SP Certificate\" field\n3. Upload or paste `certificate.crt` contents\n4. Save IdP configuration\n\n> Without uploading the SP certificate, your IdP cannot verify requests from Stirling PDF.\n\n**Configure NameID and Attributes:**\n- NameID format: `email` or `unspecified`\n- Ensure at least one username attribute is sent: `username`, `emailaddress`, `name`, `upn`, or `uid`\n\n### Step 4: Test SAML Login\n\n1. Open an incognito/private browser window\n2. Navigate to `https://your-domain.com`\n3. Click \"Login via Single Sign-On\" button\n4. You'll be redirected to your IdP login page\n5. Enter your IdP credentials\n6. You'll be redirected back to Stirling PDF\n7. A new user account is automatically created (if `autoCreateUser: true`)\n\n> ⚠️ **If login fails**, check application logs for SAML errors. See [Troubleshooting](#troubleshooting) section.\n\n### Step 5: Promote SAML User to Admin\n\n1. Log in with your initial admin account (username/password)\n2. Go to **Settings** → **User Management**\n3. Find the SAML user account (created during test login)\n4. Change **Role** to **Admin**\n5. **Save**\n\n> ⚠️ **Important**: Keep at least one SAML user with admin privileges before switching to SSO-only mode.\n\n### Step 6 (Optional): Switch to SSO-Only Mode\n\nOnce you've verified SAML works and have a SAML admin user:\n\n```yaml\nsecurity:\n loginMethod: saml2 # Disables username/password login\n```\n\nRestart Stirling PDF.\n\n## Configuration Reference\n\n### Required Properties\n\n| Property | Description | Example |\n|----------|-------------|---------|\n| `security.saml2.enabled` | Enable SAML 2 authentication | `true` |\n| `security.saml2.idpSingleLoginUrl` | IdP's Single Sign-On URL | `https://idp.example.com/sso` |\n| `security.saml2.idpSingleLogoutUrl` | IdP's Single Logout URL | `https://idp.example.com/slo` |\n| `security.saml2.idpIssuer` | IdP's Entity ID / Issuer | `https://idp.example.com` |\n| `security.saml2.idpCert` | IdP's signing certificate (PEM format) | `/configs/idp-cert.pem` |\n| `security.saml2.privateKey` | Your SP private key | `/configs/private_key.key` |\n| `security.saml2.spCert` | Your SP certificate | `/configs/certificate.crt` |\n| `system.backendUrl` | Public HTTPS URL for callbacks | `https://stirling.example.com` |\n\n### Optional Properties\n\n| Property | Default | Description |\n|----------|---------|-------------|\n| `security.saml2.autoCreateUser` | `true` | Auto-create users on first SAML login |\n| `security.saml2.blockRegistration` | `false` | Block new users (only allow pre-registered) |\n| `security.saml2.registrationId` | `stirling` | Registration ID (must match ACS URL path) |\n| `security.saml2.provider` | `null` | Optional provider name for logging |\n| `security.loginMethod` | `all` | Login method: `all`, `normal`, `oauth2`, `saml2` |\n\n## Advanced Configuration\n\n### SAML Attribute Mapping\n\nStirling PDF attempts to determine the username in the following priority order:\n\n1. **`username`** attribute\n2. **`emailaddress`** attribute (or full URI: `http://schemas.xmlsoap.org/ws/2005/05/identity/claims/emailaddress`)\n3. **`name`** attribute (or full URI: `http://schemas.xmlsoap.org/ws/2005/05/identity/claims/name`)\n4. **`upn`** attribute (User Principal Name - often used in Active Directory)\n5. **`uid`** attribute (Unix user ID)\n6. **NameID** from SAML Subject (fallback if no attributes provided)\n\n**Minimum requirement:** NameID in the SAML Subject (used as fallback identifier)\n\n**Recommended:** At least one username attribute from the priority list above\n\n#### Attribute Debugging\n\nEnable debug logging to see what attributes your IdP is sending:\n\n\n \n Add to `/configs/custom_settings.yml`:\n\n ```yaml\n logging:\n level:\n stirling.software.proprietary.security.saml2: DEBUG\n ```\n \n \n ```bash\n LOGGING_LEVEL_STIRLING_SOFTWARE_PROPRIETARY_SECURITY_SAML2=DEBUG\n ```\n \n\n\nCheck logs for:\n```\nExtracted SAML Attributes: {username=[john.doe], emailaddress=[john.doe@example.com], ...}\n```\n\n> 💡 **Note**: Currently, Stirling PDF only uses attributes for username identification. Other attributes (first name, last name, groups, roles) are extracted but not used.\n\n### Understanding Registration ID\n\nThe `registrationId` is a critical configuration value that becomes part of your SAML URLs:\n\n```yaml\nsecurity:\n saml2:\n registrationId: stirling # Default value\n```\n\nWith `registrationId: stirling`, your URLs are:\n- Metadata: `https://your-domain.com/saml2/service-provider-metadata/stirling`\n- ACS: `https://your-domain.com/login/saml2/sso/stirling`\n\n**If you change the registration ID:**\n```yaml\nsecurity:\n saml2:\n registrationId: mycompany # Custom value\n```\n\nYour URLs become:\n- Metadata: `https://your-domain.com/saml2/service-provider-metadata/mycompany`\n- ACS: `https://your-domain.com/login/saml2/sso/mycompany`\n\n> ⚠️ **Critical**: If you change `registrationId` after configuring your IdP, you must update ALL URLs in your IdP configuration. The registration ID must match exactly in all places, or SAML login will fail.\n\n> 💡 **Recommendation**: Keep the default `stirling` value unless you have a specific reason to change it (e.g., running multiple Stirling PDF instances with the same IdP).\n\n### Auto-Login Feature\n> **Tier**: Enterprise\n\nAutomatically redirect users to SAML login, bypassing the Stirling PDF login screen:\n\n```yaml\npremium:\n proFeatures:\n ssoAutoLogin: true\n```\n\n**Auto-login Activation Requirements:**\n\nAuto-login only triggers when **ALL** of the following conditions are met:\n\n1. `ssoAutoLogin` is enabled (as configured above)\n2. `loginMethod` is NOT `'all'` and NOT `'normal'` (i.e., SSO-only mode required)\n3. Exactly one SAML provider is configured\n\n**Behavior:**\n- When all conditions are met: Users are automatically redirected to IdP\n- When conditions are not met: Standard login page is displayed\n- If a single sign-on attempt fails, the automatic redirect is suppressed for the rest of that browser session so the login page stays visible (this is separate from the `security.loginAttemptCount` account-lockout setting, which locks the user account after repeated failures)\n- Users can still manually access `/login` for form login if `loginMethod: all`\n\n## Troubleshooting\n\n### \"SAML requires Enterprise license\"\n**Cause**: SAML authentication requires Enterprise tier license.\n\n**Solution**:\n- Verify valid Enterprise license is configured\n- Check `premium.enabled=true` in settings\n- Existing users created before license enforcement are grandfathered\n\n### \"Invalid SAML response signature\"\n**Cause**: IdP certificate mismatch or incorrect format.\n\n**Solution**:\n- Verify `idpCert` file matches certificate from IdP\n- Ensure certificate is in PEM format (starts with `-----BEGIN CERTIFICATE-----`)\n- Re-download certificate from IdP\n- Check certificate hasn't expired\n\n### \"ACS URL mismatch\"\n**Cause**: Redirect URL doesn't match IdP configuration.\n\n**Solution**:\n- Verify `SYSTEM_BACKENDURL` is set to public HTTPS URL\n- Check reverse proxy sends X-Forwarded-Proto, X-Forwarded-Host, X-Forwarded-Port headers\n- Ensure `registrationId` matches in both URL and configuration\n- Update ACS URL in IdP to match: `https://your-domain.com/login/saml2/sso/stirling`\n\n### \"File not found: idp-certificate.pem\"\n**Cause**: Certificate file path is incorrect.\n\n**Solution**:\n- Verify file exists at specified path\n- For Docker: ensure volume is mounted correctly\n- Use absolute paths like `/configs/filename.pem` (no `file:` prefix)\n- Check file permissions (must be readable by application)\n\n### \"Cannot auto-create user\"\n**Cause**: User doesn't exist and auto-creation is disabled.\n\n**Solution**:\n- Set `autoCreateUser: true` to allow new users\n- Or pre-create user accounts as admin\n- Check license allows additional users\n\n### \"Redirect loop after SAML login\"\n**Cause**: Session or cookie issues.\n\n**Solution**:\n- Clear browser cookies\n- Check `SYSTEM_BACKENDURL` matches actual access URL\n- Verify cookies are allowed for domain\n- Ensure SameSite cookie settings are compatible\n\n### \"Invalid username\" error\n**Cause**: No valid username found in assertion.\n\n**Solution**:\n1. Enable debug logging to see what attributes are received\n2. Ensure IdP sends at least one of: `username`, `emailaddress`, `name`, `upn`, `uid`\n3. Verify NameID is present in SAML Subject as fallback\n4. Check attribute name format (short name vs full URI)\n\n### Debug Logging\n\nEnable SAML debug logging to see detailed authentication flow:\n\n\n \n Add to `/configs/custom_settings.yml`:\n\n ```yaml\n logging:\n level:\n org.springframework.security.saml2: DEBUG\n org.opensaml: DEBUG\n stirling.software.proprietary.security: DEBUG\n ```\n \n \n ```bash\n LOGGING_LEVEL_ORG_SPRINGFRAMEWORK_SECURITY_SAML2=DEBUG\n LOGGING_LEVEL_ORG_OPENSAML=DEBUG\n LOGGING_LEVEL_STIRLING_SOFTWARE_PROPRIETARY_SECURITY=DEBUG\n ```\n \n\n\nCheck logs for SAML attribute information:\n```\nExtracted SAML Attributes: {username=[john.doe], emailaddress=[john.doe@example.com], ...}\n```\n\n### Inspect SAML Assertions\n\nUse browser developer tools:\n1. Open Network tab\n2. Clear network log\n3. Attempt SAML login\n4. Look for POST to `/login/saml2/sso/stirling`\n5. Decode SAMLResponse parameter (Base64 + inflate)\n\n**Tools:**\n- [SAML-tracer](https://addons.mozilla.org/en-US/firefox/addon/saml-tracer/) (Firefox/Chrome extension)\n- [SAML Decoder](https://www.samltool.com/decode.php) (online tool)\n\n## Known Limitations\n\n### idpMetadataUri Not Auto-Populating\n\nThe `idpMetadataUri` configuration field exists but is **not currently used** to auto-populate IdP settings. You must manually configure:\n- `idpSingleLoginUrl`\n- `idpSingleLogoutUrl`\n- `idpIssuer`\n- `idpCert`\n\n**Workaround**: Manually extract values from IdP metadata XML.\n\n> 💡 **Note**: Auto-populating IdP settings from metadata URI is a planned enhancement coming soon.\n\n## See Also\n\n- [OAuth SSO Configuration](doc:configuration/security/oauth-sso-configuration) - OAuth 2.0 / OIDC setup\n- [System and Security](doc:configuration/security/system-and-security) - Additional security settings\n- [External Database](doc:configuration/storage/external-database) - User storage configuration\n- [Paid Offerings](doc:paid-offerings) - Enterprise tier and licensing information",
|
||
"sourcePath": "docs/Configuration/Security/SAML SSO Configuration.md",
|
||
"editUrl": "https://github.com/Stirling-Tools/Stirling-Tools.github.io/blob/main/docs/Configuration/Security/SAML SSO Configuration.md"
|
||
},
|
||
"configuration/security/ssrf-protection": {
|
||
"id": "configuration/security/ssrf-protection",
|
||
"title": "SSRF Protection",
|
||
"section": "configuration/security",
|
||
"markdown": "## What is SSRF and why does it matter?\n\nSSRF (Server-Side Request Forgery) is when someone tricks your server into making HTTP requests on their behalf - to your internal network, cloud metadata endpoints, or other places they shouldn't be able to reach.\n\nIn Stirling PDF, the risk is tools like **URL to PDF**: a user could supply `http://192.168.1.1/admin` or `http://169.254.169.254/` and your server would fetch it. For self-hosted deployments on a private network, that's a real concern.\n\nSSRF protection is **enabled by default** at `MEDIUM` level. For most deployments, you don't need to touch it.\n\n> **⚠️ Warning**\n>\n> The URL to PDF feature is **disabled by default** (`system.enableUrlToPDF: false`) due to the SSRF risks described above. It is intended for internal use only and should not be exposed externally. If you enable it, make sure SSRF protection is properly configured.\n\n\n---\n\n## Settings\n\nAll settings are under `system.html.urlSecurity` in `settings.yml`.\n\n| Setting | Default | Description |\n|---|---|---|\n| `enabled` | `true` | Master on/off switch |\n| `level` | `MEDIUM` | `OFF`, `MEDIUM`, or `MAX` - see below |\n| `allowedDomains` | `[]` | Domains to always allow |\n| `blockedDomains` | `[]` | Domains to always block |\n| `internalTlds` | `.local`, `.internal`, `.corp`, `.home` | TLD suffixes treated as internal |\n| `blockPrivateNetworks` | `true` | Block RFC1918 private IP ranges |\n| `blockLocalhost` | `true` | Block 127.x / ::1 |\n| `blockLinkLocal` | `true` | Block 169.254.x.x / fe80:: |\n| `blockCloudMetadata` | `true` | Block AWS/GCP/Azure/Oracle/IBM metadata IPs |\n\n### Protection levels\n\n**`MEDIUM`** (default) - Blocks private IPs, localhost, cloud metadata, and internal TLDs. Public internet URLs are allowed by default.\n\n**`MAX`** - Only URLs explicitly listed in `allowedDomains` are allowed. Everything else is blocked. Unlike MEDIUM, subdomain matching is not supported in MAX mode - each domain and subdomain must be listed individually. Use this if you know exactly which external domains your users need.\n\n**`OFF`** - No SSRF checking at all. Only appropriate if you have network-level controls elsewhere.\n\n### Domain allow and block lists\n\nThe `allowedDomains` and `blockedDomains` settings work alongside whichever protection level you choose.\n\n- **`allowedDomains`** - When set at MEDIUM level, only these domains (and their subdomains) are permitted in addition to the default public-internet access. At MAX level, this is the exclusive list of permitted domains (no subdomain matching).\n- **`blockedDomains`** - Domains to always deny, regardless of level. Uses exact matching - blocking `example.com` will not block `sub.example.com`.",
|
||
"sourcePath": "docs/Configuration/Security/SSRF-Protection.md",
|
||
"editUrl": "https://github.com/Stirling-Tools/Stirling-Tools.github.io/blob/main/docs/Configuration/Security/SSRF-Protection.md"
|
||
},
|
||
"configuration/security/sign-with-custom-files": {
|
||
"id": "configuration/security/sign-with-custom-files",
|
||
"title": "Visual Sign with Custom File Storage",
|
||
"section": "configuration/security",
|
||
"markdown": "Stirling PDF provides functionality to store and reuse files across sessions, particularly useful for features like signatures and commonly used assets. This guide explains how to set up and use custom file storage.\n\n## Overview\n\nThe custom file storage system allows you to:\n- Store files persistently across sessions\n- Share files between all users or restrict them to specific users\n- Access stored files through the web UI\n- Organize files in a structured way\n\n## Storage Location\n\nAll custom files should be stored in the `/customFiles/` directory. For features like signatures, the specific path is:\n\n```\n/customFiles/signatures/\n```\n\n## Access Levels\n\nThe system supports two types of access levels for stored files:\n\n### 1. All Users Access\nFiles that should be accessible to all users should be placed in:\n```\n/customFiles/signatures/ALL_USERS/\n```\nThis is useful for:\n- Organization-wide templates\n- Shared assets\n- Default signatures or watermarks\n- Environments where authentication isn't used\n\n### 2. User-Specific Access\nFiles that should only be accessible to specific users should be placed in user-specific directories:\n```\n/customFiles/signatures/{username}/\n```\nFor example:\n```\n/customFiles/signatures/john_doe/\n```\nThese files will only be accessible to the specified user when logged in.\n\n## Usage in Docker\n\nWhen using Docker, make sure to mount the customFiles directory as a volume to persist the files:\n\n```yaml\nvolumes:\n - ./customFiles:/customFiles/\n```\n\n## Best Practices\n\n1. File Organization:\n - Keep files organized in appropriate subdirectories\n - Use clear, descriptive filenames\n - Consider using date-based or category-based organization for large numbers of files\n\n2. Security:\n - Only place files in ALL_USERS if they truly need to be accessible to everyone\n - Regularly review and clean up unused files\n - Monitor storage usage to prevent excessive accumulation of files\n\n3. Supported File Types:\n - For signatures: common image formats (PNG, JPG, SVG)\n - Ensure files are of appropriate size and format for their intended use\n\n## Example Structure\n\nHere's an example of how your custom files directory might look:\n\n```\n/customFiles/\n├── signatures/\n│ ├── ALL_USERS/\n│ │ ├── company-logo.png\n│ │ └── default-signature.png\n│ ├── john_doe/\n│ │ ├── personal-signature.png\n│ │ └── department-stamp.png\n│ └── jane_smith/\n│ └── signature-2024.png\n```\n\n## Accessing Files\n\nFiles stored in these locations will automatically be available in the relevant features of the Stirling PDF web interface. For example, saved signatures will appear in the signature selection interface when using the Sign feature.",
|
||
"sourcePath": "docs/Configuration/Security/Sign with custom files.md",
|
||
"editUrl": "https://github.com/Stirling-Tools/Stirling-Tools.github.io/blob/main/docs/Configuration/Security/Sign with custom files.md"
|
||
},
|
||
"configuration/security/single-sign-on-configuration": {
|
||
"id": "configuration/security/single-sign-on-configuration",
|
||
"title": "Single Sign-On (SSO) Overview",
|
||
"section": "configuration/security",
|
||
"markdown": "Stirling PDF supports Single Sign-On (SSO) authentication through two protocols:\n\n## OAuth 2.0 / OpenID Connect (OIDC)\n> **Tier**: Server\n\nOAuth 2.0 SSO allows login via popular identity providers like:\n- Google\n- GitHub\n- Keycloak\n- Authentik\n- Any OIDC-compliant provider\n\n**[→ Configure OAuth 2.0 SSO](doc:configuration/security/oauth-sso-configuration)**\n\n**Key Features:**\n- Easy setup with major providers\n- Auto-discovery via `.well-known/openid-configuration`\n- Social login support\n- Suitable for small to medium organizations\n\n---\n\n## SAML 2.0\n> **Tier**: Enterprise\n\nSAML 2.0 SSO provides enterprise-grade authentication with:\n- Okta\n- Azure AD (Entra ID)\n- Google Workspace\n- OneLogin\n- Any SAML 2.0-compliant IdP\n\n**[→ Configure SAML 2.0 SSO](doc:configuration/security/saml-sso-configuration)**\n\n**Key Features:**\n- Enterprise identity provider integration\n- Advanced security controls\n- Single Logout (SLO) support\n- Suitable for large organizations",
|
||
"sourcePath": "docs/Configuration/Security/Single Sign-On Configuration.md",
|
||
"editUrl": "https://github.com/Stirling-Tools/Stirling-Tools.github.io/blob/main/docs/Configuration/Security/Single Sign-On Configuration.md"
|
||
},
|
||
"configuration/security/system-and-security": {
|
||
"id": "configuration/security/system-and-security",
|
||
"title": "Login, System and Security",
|
||
"section": "configuration/security",
|
||
"markdown": "Stirling PDF allows customization of system and security settings. For security features to be enabled, you must use the security jar. For Docker users, this means setting `DISABLE_ADDITIONAL_FEATURES` to `false` via an environment variable.\n\n## Basic Security Settings\n\n- `enableLogin`: Enables or disables the login functionality (only available in Stirling-PDF-with-login.jar or when `DISABLE_ADDITIONAL_FEATURES=false`)\n- `defaultLocale`: Set the default language (e.g. 'de-DE', 'fr-FR', etc)\n- `googlevisibility`: 'true' to allow Google visibility (via robots.txt), 'false' to disallow\n- `xFrameOptions`: Controls whether your instance can be embedded in an iframe. Set to `DENY` to prevent clickjacking. Use `SAMEORIGIN` only if you embed the UI in your own application.\n- `loginAttemptCount`: Number of failed login attempts before an account is locked (e.g. `5`)\n- `loginResetTimeMinutes`: Minutes before a locked account is automatically unlocked (e.g. `10`)\n\n## Authentication Setup\n\n**Important:** Authentication and additional features are included by default in:\n- **Docker**: All images except ultra-lite (authentication is **enabled by default**)\n- **JAR files**: Use [Stirling-PDF-with-login.jar](https://files.stirlingpdf.com/Stirling-PDF-with-login.jar) **(Recommended)**\n\n**Not included in:**\n- **Docker ultra-lite**: Minimal build without authentication (set `DISABLE_ADDITIONAL_FEATURES=false` to enable)\n- **Plain JAR**: [Stirling-PDF.jar](https://files.stirlingpdf.com/Stirling-PDF.jar) - Basic build without authentication or additional features\n\n### Prerequisites\n1. Ensure the `/configs` directory is mounted as a volume in Docker for persistence across updates\n2. Use the appropriate build:\n - **JAR**: Download Stirling-PDF-with-login.jar\n - **Docker**: Set `DISABLE_ADDITIONAL_FEATURES=false` in environment variables\n\n### Initial Login Credentials\n- Default Username: `admin`\n- Default Password: `stirling`\n- Note: Users will be forced to change their password on first login\n- Custom initial credentials can be set using:\n - `SECURITY_INITIALLOGIN_USERNAME`\n - `SECURITY_INITIALLOGIN_PASSWORD`\n\n### Database Location\nUpon successful setup, a new `stirling-pdf-DB-<version>.mv.db` file (the version number is part of the filename, e.g. `stirling-pdf-DB-2.3.232.mv.db`) will be created in your configured storage location. This file contains user data and should be backed up regularly.\n\n### Account Management\n1. Access Account Settings:\n - Click the settings cog menu in the top right navbar\n - Select \"Account Settings\"\n - Here you can manage your profile and find your API key\n\n2. Adding New Users:\n - Navigate to Account Settings\n - Scroll to bottom and click 'Admin Settings'\n - Use the user management interface to add new users\n\n### Role-Based Access Control\nCurrently, roles are primarily used for rate limiting purposes. The role system is under active development and will be expanded with additional features in future updates.\n\n### API Authentication\nWhen using the API:\n- Each user has a unique API key found in their Account Settings\n- Include the API key in requests using the `X-API-KEY` header\n- Example:\n ```\n X-API-KEY: your-api-key-here\n ```\n\n## Running Without Authentication\n\nIf you need to run without authentication (note: this also disables additional features), you have two options:\n\n### Option 1: Disable Login in With-Login Version (Recommended)\n\nDisable authentication while keeping additional features:\n\n\n \n ```yaml\n security:\n enableLogin: false\n ```\n \n \n ```bash\n SECURITY_ENABLELOGIN=false\n ```\n \n \n ```bash\n docker run -d \\\n -p 8080:8080 \\\n -e SECURITY_ENABLELOGIN=false \\\n -e DISABLE_ADDITIONAL_FEATURES=false \\\n docker.stirlingpdf.com/stirlingtools/stirling-pdf:latest\n ```\n \n \n ```yaml\n services:\n stirling-pdf:\n image: docker.stirlingpdf.com/stirlingtools/stirling-pdf:latest\n environment:\n SECURITY_ENABLELOGIN: false\n DISABLE_ADDITIONAL_FEATURES: false\n ```\n \n \n ```bash\n java -jar Stirling-PDF-with-login.jar -DSECURITY_ENABLELOGIN=false\n ```\n \n \n ```bash\n export SECURITY_ENABLELOGIN=false\n java -jar Stirling-PDF-with-login.jar\n ```\n \n\n\n### Option 2: Use Open Source JAR\n\nUse [Stirling-PDF.jar](https://files.stirlingpdf.com/Stirling-PDF.jar) which has no authentication (note: also excludes additional features):\n\n```bash\njava -jar Stirling-PDF.jar\n```\n\n### Recommendation\n\n**We recommend Stirling-PDF-with-login.jar for all deployments** because it includes additional features beyond just authentication. You can always disable authentication if needed while keeping the extra functionality.\n\n---\n\n## Login Agreement / Disclaimer\n\nShow a disclaimer that users must accept before they can use the app. It appears as a blocking dialog after a successful login (or on launch when login is disabled), and works on every edition.\n\n```yaml\nlegal:\n loginAgreement:\n enabled: false # Master on/off switch\n showInAnonymousMode: true # When login is disabled, set false to hide the dialog\n fallbackText: \"\" # Markdown shown when no per-language file is found\n```\n\n**Environment Variables:**\n```bash\nLEGAL_LOGINAGREEMENT_ENABLED=true\nLEGAL_LOGINAGREEMENT_SHOWINANONYMOUSMODE=true\nLEGAL_LOGINAGREEMENT_FALLBACKTEXT=\"By signing in you agree to the terms...\"\n```\n\nThe disclaimer is written in **Markdown**. Provide per-language versions as files at `customFiles/disclaimer/<locale>.md` (for example `en-US.md` or `de-DE.md`); the text shown follows each user's interface language and falls back to `fallbackText` when no matching file exists. If no text resolves at all (no files and no `fallbackText`), the dialog is not shown even when `enabled` is `true`. For a single-language or headless install, set `fallbackText` (env `LEGAL_LOGINAGREEMENT_FALLBACKTEXT`) and skip the per-language files. Editing the text takes effect on the next login with no restart; turning `enabled` on or off requires a restart.\n\nAdmins can also edit the text in-app from **Admin Settings → Legal**, which writes the same per-language files.\n\nIn the desktop app, the dialog can be enabled per machine through MDM - see [Managed Desktop Deployment](doc:installation/managed-deployment).\n\n---\n\n## Server Certificates\n\nStirling PDF can auto-generate certificates for the \"Sign with Stirling PDF\" feature.\n\n### Configuration\n\n```yaml\nsystem:\n serverCertificate:\n enabled: true # Enable auto-generation\n organizationName: Stirling-PDF # Certificate organization name\n validity: 365 # Days until expiration\n regenerateOnStartup: false # Keep same cert across restarts\n```\n\n**Environment Variables:**\n```bash\nSYSTEM_SERVERCERTIFICATE_ENABLED=true\nSYSTEM_SERVERCERTIFICATE_ORGANIZATIONNAME=\"My Company\"\nSYSTEM_SERVERCERTIFICATE_VALIDITY=365\nSYSTEM_SERVERCERTIFICATE_REGENERATEONSTARTUP=false\n```\n\n### How It Works\n\n1. **First Startup:** Server generates a self-signed certificate, stored as `/configs/server-certificate.p12`\n2. **Subsequent Startups:** Reuses existing certificate (unless `regenerateOnStartup: true`)\n3. **User Signs:** PDFs signed using this certificate via \"Sign with Stirling-PDF\" option\n\n---\n\n## Signature Validation\n\nConfigure how PDF certificate signatures are validated.\n\n### Trust Sources\n\n```yaml\nsecurity:\n validation:\n trust:\n serverAsAnchor: true # Trust server-generated certificates\n useSystemTrust: true # Use OS certificate store\n useMozillaBundle: true # Mozilla CA bundle\n useAATL: false # Adobe Approved Trust List\n useEUTL: false # EU Trusted List (eIDAS)\n```\n\n**Environment Variables:**\n```bash\nSECURITY_VALIDATION_TRUST_SERVERASANCHOR=true\nSECURITY_VALIDATION_TRUST_USESYSTEMTRUST=true\nSECURITY_VALIDATION_TRUST_USEMOZILLABUNDLE=true\nSECURITY_VALIDATION_TRUST_USEAATL=false\nSECURITY_VALIDATION_TRUST_USEEUTL=false\n```\n\n### Trust List URLs\n\nConfigure external trust list locations:\n\n```yaml\nsecurity:\n validation:\n aatl:\n url: https://trustlist.adobe.com/tl.pdf\n eutl:\n lotlUrl: https://ec.europa.eu/tools/lotl/eu-lotl.xml\n acceptTransitional: false\n```\n\n### Revocation Checking\n\nVerify certificates haven't been revoked:\n\n```yaml\nsecurity:\n validation:\n revocation:\n mode: none # Options: none, ocsp, crl, ocsp+crl\n hardFail: false # Fail validation if revocation check fails\n```\n\n**Revocation Modes:**\n- `none`: No revocation checking (not recommended for production)\n- `ocsp`: Online Certificate Status Protocol (fast, requires network)\n- `crl`: Certificate Revocation Lists (slower, works offline)\n- `ocsp+crl`: Try OCSP first, fall back to CRL (recommended)\n\n**Environment Variables:**\n```bash\nSECURITY_VALIDATION_REVOCATION_MODE=ocsp+crl\nSECURITY_VALIDATION_REVOCATION_HARDFAIL=false\n```\n\n### Authority Information Access (AIA)\n\nAllow automatic fetching of intermediate certificates:\n\n```yaml\nsecurity:\n validation:\n allowAIA: false # Set true to enable (requires network access)\n```\n\n**⚠️ Security Note:** Disabled by default. Only enable in controlled environments where outbound HTTPS is secure.\n\n**Learn more:** [Certificate Signing - Validation](doc:functionality/security/certificate-signing)\n\n---\n\n## JWT Authentication\n\nLogins use JSON Web Tokens. The main thing to configure is how long a session lasts before a user has to sign in again.\n\n```yaml\nsecurity:\n jwt:\n tokenExpiryMinutes: 1440 # Web login lifetime (default 24 hours)\n desktopTokenExpiryMinutes: 43200 # Desktop login lifetime (default 30 days)\n```\n\nEnvironment variables: `SECURITY_JWT_TOKENEXPIRYMINUTES` and `SECURITY_JWT_DESKTOPTOKENEXPIRYMINUTES`.\n\nLower these for tighter security (users sign in more often) or raise them for convenience.\n\n---\n\n## Email Configuration\n\nConfigure SMTP for sending email invitations and notifications. Enable `mail.enableInvites` to allow invitation links.\n\n> 💡 **When is email configuration required?**\n>\n> Email configuration is **OPTIONAL** and only needed for:\n> - **Email invitations**: Admins can send invite links to users via email\n> - **Password reset emails**: Users can reset forgotten passwords (if implemented)\n>\n> Email is **NOT required** for:\n> - Basic username/password login\n> - SSO authentication (OAuth 2.0 or SAML 2.0)\n> - Manual user creation by admins\n> - Normal application operation\n>\n> You can run Stirling PDF without any email configuration if you create users manually or use SSO.\n\n### Email Invites\n\nEnable email-based user invitations:\n\n```yaml\nmail:\n enabled: true\n enableInvites: true\n host: smtp.example.com\n port: 587\n username: noreply@example.com\n password: ${MAIL_PASSWORD}\n from: noreply@example.com\n startTlsEnable: true\n```\n\n**Environment Variables:**\n```bash\nMAIL_ENABLED=true\nMAIL_ENABLEINVITES=true\nMAIL_HOST=smtp.gmail.com\nMAIL_PORT=587\nMAIL_USERNAME=your-email@gmail.com\nMAIL_PASSWORD=your-app-password\nMAIL_FROM=noreply@example.com\nMAIL_STARTTLSENABLE=true\n```\n\n**Requirements:**\n- `mail.enabled: true`\n- `mail.enableInvites: true` for invitation flows\n- `security.enableLogin: true`\n- Valid SMTP configuration\n- `system.frontendUrl` configured (for invite links)\n\n---\n\n## UI Customization\n\n### Logo Style\n\nChoose between logo styles:\n\n```yaml\nui:\n logoStyle: classic # Options: 'classic' or 'modern'\n```\n\n**Environment Variable:**\n```bash\nUI_LOGOSTYLE=modern\n```\n\n**Styles:**\n- `classic`: Traditional \"S\" icon logo\n- `modern`: Minimalist design\n\n### Custom Logo\n\nYou can also override the bundled logo by dropping your own files into the matching style subdirectory:\n\n```bash\ncustomFiles/\n └── static/\n ├── classic-logo/\n │ └── logo.svg # Overrides the classic logo\n └── modern-logo/\n └── logo.svg # Overrides the modern logo\n```\n\n**Learn more:** [UI Customisation](doc:configuration/customisation/ui-customisation)\n\n---\n\n## Configuration Examples\n\n\n \n ```yaml\n security:\n enableLogin: true # Only works with Stirling-PDF-with-login.jar or DISABLE_ADDITIONAL_FEATURES=false\n jwt:\n tokenExpiryMinutes: 1440\n validation:\n trust:\n serverAsAnchor: true\n useSystemTrust: true\n useMozillaBundle: true\n revocation:\n mode: ocsp\n hardFail: false\n\n system:\n defaultLocale: 'en-US' # Set the default language (e.g. 'de-DE', 'fr-FR', etc)\n googlevisibility: false # 'true' to allow Google visibility (via robots.txt), 'false' to disallow\n serverCertificate:\n enabled: true\n organizationName: Stirling-PDF\n validity: 365\n\n mail:\n enabled: false\n enableInvites: false\n\n ui:\n logoStyle: classic\n ```\n \n \n You can configure these settings in two ways when running locally:\n\n **Option 1: Using Java Properties**\n ```bash\n java -jar Stirling-PDF.jar -DDISABLE_ADDITIONAL_FEATURES=false -DSECURITY_ENABLELOGIN=true\n ```\n\n **Option 2: Using Environment Variables**\n ```bash\n export DISABLE_ADDITIONAL_FEATURES=false\n export SECURITY_ENABLELOGIN=true\n ```\n \n \n ```bash\n -e DISABLE_ADDITIONAL_FEATURES=false \\\n -e SECURITY_ENABLELOGIN=true \\\n -e SYSTEM_CORSALLOWEDORIGINS=https://pdf.example.com \\\n -e SYSTEM_FRONTENDURL=https://pdf.example.com \\\n -e SECURITY_JWT_ENABLEKEYSTORE=true \\\n ```\n \n \n ```yaml\n environment:\n DISABLE_ADDITIONAL_FEATURES: false\n SECURITY_ENABLELOGIN: true\n SECURITY_JWT_ENABLEKEYSTORE: true\n SYSTEM_SERVERCERTIFICATE_ENABLED: true\n ```\n \n\n\n---\n\n## Related Documentation\n\n- **[Security Features](doc:functionality/security/security)** - PDF security tools, CORS, signature validation\n- **[Certificate Signing](doc:functionality/security/certificate-signing)** - Comprehensive signing and validation guide\n- **[Single Sign-On](doc:configuration/security/single-sign-on-configuration)** - Enterprise authentication\n- **[UI Customisation](doc:configuration/customisation/ui-customisation)** - Branding and appearance\n- **[Migration Guide](doc:migration/settings-changes)** - Upgrading from V1",
|
||
"sourcePath": "docs/Configuration/Security/System and Security.md",
|
||
"editUrl": "https://github.com/Stirling-Tools/Stirling-Tools.github.io/blob/main/docs/Configuration/Security/System and Security.md"
|
||
},
|
||
"configuration/storage/database": {
|
||
"id": "configuration/storage/database",
|
||
"title": "Database Backups",
|
||
"section": "configuration/storage",
|
||
"markdown": "> **Tier**: Server\n\n## Functionality Overview\n\nThe newly introduced feature enhances the application with robust database backup and import capabilities. This feature is designed to ensure data integrity and provide a straightforward way to manage database backups. Here's how it works:\n\n1. Automatic Backup Creation\n - The system automatically creates a database backup every day at midnight. This ensures that there is always a recent backup available, minimizing the risk of data loss.\n2. Manual Backup Export\n - Admin actions that modify the user database trigger a manual export of the database. This keeps the backup up-to-date with the latest changes and provides an extra layer of data security.\n3. Importing Database Backups\n - Admin users can import a database backup either via the web interface or API endpoints. This allows for easy restoration of the database to a previous state in case of data corruption or other issues.\n - The import process ensures that the database structure and data are correctly restored, maintaining the integrity of the application.\n4. Managing Backup Files\n - Admins can view a list of all existing backup files, along with their creation dates and sizes. This helps in managing storage and identifying the most recent or relevant backups.\n - Backup files can be downloaded for offline storage or transferred to other environments, providing flexibility in database management.\n - Unnecessary backup files can be deleted through the interface to free up storage space and maintain an organized backup directory.\n\n## User Interface\n\n### Web Interface\n\n1. Upload SQL files to import database backups.\n2. View details of existing backups, such as file names, creation dates, and sizes.\n3. Download backup files for offline storage.\n4. Delete outdated or unnecessary backup files.\n\n### API Endpoints\n\n1. Import database backups by uploading SQL files.\n2. Download backup files.\n3. Delete backup files.\n\nThis new functionality streamlines database management, ensuring that backups are always available and easy to manage, thus improving the reliability and resilience of the application.",
|
||
"sourcePath": "docs/Configuration/Storage/DATABASE.md",
|
||
"editUrl": "https://github.com/Stirling-Tools/Stirling-Tools.github.io/blob/main/docs/Configuration/Storage/DATABASE.md"
|
||
},
|
||
"configuration/storage/external-database": {
|
||
"id": "configuration/storage/external-database",
|
||
"title": "External Database",
|
||
"section": "configuration/storage",
|
||
"markdown": "## Using an External Database\n> **Tier**: Server\n\nIt is possible to use your own external database with Stirling PDF rather than the default H2 database if you wish.\nPostgreSQL is currently the only supported variant, others will be added on request.\n\n### Setting Up External Database Configuration\nYou can configure the new `Datasource` property in your `settings.yml` to connect to your external database:\n\n> **⚠️ Warning: Note**\n>\n> To use the external database feature, you will need to have a valid enterprise license and set the environment variable `DISABLE_ADDITIONAL_FEATURES` to `false`.\n\n\n\n \n\n```yaml\n datasource:\n enableCustomDatabase: false\n customDatabaseUrl: jdbc:postgresql://localhost:5432/postgres\n username: postgres\n password: postgres\n type: postgresql\n hostName: localhost\n port: 5432\n name: postgres\n```\n\n- `enableCustomDatabase`: Set this property to `true` to enable use of the custom database **Note: An enterprise license to use this feature**\n- `customDatabaseUrl`: Enter the database connection url for the database here. **Note: If you set the `customDatabaseUrl` you do not need to set the type, hostName, port and name, they will all be automatically derived from the url.**\n- `username`: The username for the database\n- `password`: The password for the database\n\nIf you would like more fine-grained control of the database connection, you can also use the following properties:\n\n#### Fine-grained Database Configuration\n- `type`: The database type. Available options are `h2` and `postgresql`\n- `hostName`: The host name of the database connection url (e.g. 'localhost')\n- `port`: The port number of the database connection url (e.g. 8080)\n- `name`: The name of the custom database. This should match the name you have set for your database\n\n\n \n\n```yaml\nservices:\n db:\n image: 'postgres:17.2-alpine'\n container_name: db\n ports:\n - \"5432:5432\"\n environment:\n POSTGRES_DB: \"stirling_pdf\"\n POSTGRES_USER: \"admin\"\n POSTGRES_PASSWORD: \"stirling\"\n```\n\n- `container_name`: This is the name of your database container. This should match the name of the container under `services` as this is what Docker will use to refer to your database\n- `ports`: Specify the port number for your database. The number on the left is the port number the container will access the database internally. The number on the right is the port number the Stirling PDF app will use to connect to the database externally. Ensure this matches the port number in the connection url for your database otherwise the app will not be able to access it.\n- `POSTGRES_DB`: An environment variable for the database container. Specify the name of the custom database here\n- `POSTGRES_USER`: An environment variable for the database container. Specify the username for the database\n- `POSTGRES_PASSWORD`: An environment variable for the database container. Specify the password for the database\n\nYou will also need to update the Docker configuration in your app in order to connect to the database:\n\n```yaml\nservices:\n stirling-pdf:\n depends_on:\n - db\n environment:\n DISABLE_ADDITIONAL_FEATURES: \"false\" \"true\"\n SYSTEM_DATASOURCE_ENABLECUSTOMDATABASE: \"true\"\n SYSTEM_DATASOURCE_CUSTOMDATABASEURL: \"jdbc:postgresql://db:5432/stirling_pdf\"\n SYSTEM_DATASOURCE_USERNAME: \"admin\"\n SYSTEM_DATASOURCE_PASSWORD: \"stirling\"\n # further configuration\n```\n\n- `depends_on`: This specifies any services that your app will need in order to run. Ensure the name matches the container name for your database\n- `DISABLE_ADDITIONAL_FEATURES`: Set this to `false` to enable security features\n- `SYSTEM_DATASOURCE_ENABLECUSTOMDATABASE`: An environment variable to connect to the database container. Set this to `true` to enable use of the external database\n- `SYSTEM_DATASOURCE_CUSTOMDATABASEURL`: An environment variable to connect to the database container. Set the connection url for the database here. **Note: If you set this url you do not need to set the type, hostName, port and name (namely `SYSTEM_DATASOURCE_TYPE`, `SYSTEM_DATASOURCE_HOSTNAME`, `SYSTEM_DATASOURCE_PORT`, `SYSTEM_DATASOURCE_NAME`), they will all be automatically derived from the url.**\n- `SYSTEM_DATASOURCE_USERNAME`: An environment variable to connect to the database container. Set the username for the database. Ensure this matches the corresponding property in your database container\n- `SYSTEM_DATASOURCE_PASSWORD`: An environment variable to connect to the database container. Set the password for the database. Ensure this matches the corresponding property in your database container\n\nBelow is an example of what your configuration should look like after configuring the custom database:\n\n```yaml\nservices:\n stirling-pdf:\n depends_on:\n - db\n environment:\n DISABLE_ADDITIONAL_FEATURES: \"false\" \"true\"\n SYSTEM_DATASOURCE_ENABLECUSTOMDATABASE: \"true\"\n SYSTEM_DATASOURCE_CUSTOMDATABASEURL: \"jdbc:postgresql://db:5432/stirling_pdf\"\n SYSTEM_DATASOURCE_USERNAME: \"admin\"\n SYSTEM_DATASOURCE_PASSWORD: \"stirling\"\n # further configuration\n\n db:\n image: 'postgres:17.2-alpine'\n container_name: db\n ports:\n - \"5432:5432\"\n environment:\n POSTGRES_DB: \"stirling_pdf\"\n POSTGRES_USER: \"admin\"\n POSTGRES_PASSWORD: \"stirling\"\n```\n\n \n\n\n*Example configuration can be found in [exampleYmlFiles/docker-compose-latest-fat-security-postgres.yml](https://github.com/Stirling-Tools/Stirling-PDF/blob/428b4238e3a7280d71697d994a66174a250387a7/exampleYmlFiles/docker-compose-latest-fat-security-postgres.yml)*",
|
||
"sourcePath": "docs/Configuration/Storage/External Database.md",
|
||
"editUrl": "https://github.com/Stirling-Tools/Stirling-Tools.github.io/blob/main/docs/Configuration/Storage/External Database.md"
|
||
},
|
||
"configuration/storage/file-sharing-and-storage": {
|
||
"id": "configuration/storage/file-sharing-and-storage",
|
||
"title": "File Sharing and Storage",
|
||
"description": "Configure server-side file storage, sharing, and storage quotas",
|
||
"section": "configuration/storage",
|
||
"markdown": "> **⚠️ Warning: [Alpha Feature]**\n>\n> File Sharing and Storage is currently in **alpha**. Functionality may change, and some features are incomplete. Use in production at your own risk.\n\n\nStirling PDF can store files on the server and let users share them with each other. Files can be shared directly with specific users or via shareable links. Admins can set storage quotas to control disk usage.\n\nBasic local-disk storage and sharing need **no license** - just turn on `security.enableLogin` and `storage.enabled`. Only the **database** and **s3** storage providers require a Pro/Enterprise license. See [Modes](doc:modes-and-licensing) for what each deploy mode includes; self-hosted instances never use credits.\n\n> **💡 Tip: Already set up?**\n>\n> If your admin has turned storage on and you just want to use it, skip ahead to [The My Files Page](#the-my-files-page) and [Sharing Files](#sharing-files). The setup sections in between (storage providers, S3, quotas) are for whoever runs the server.\n\n\n---\n\n## What You Can Do\n\n- **Store files server-side** -- upload PDFs and other files that persist across sessions\n- **Share with specific users** -- grant other registered users access to your files with configurable permissions\n- **Share via link** -- generate a shareable link that any logged-in user with the link can access\n- **Control access levels** -- assign Editor, Commenter, or Viewer roles to shared users\n- **Set storage quotas** -- limit storage per user, per file, or system-wide\n- **Audit access** -- see who accessed your shared links and when\n- **Automatic cleanup** -- expired share links and orphaned files are cleaned up daily\n\n---\n\n## Prerequisites\n\n- **Authentication must be enabled** (`security.enableLogin: true`)\n- For share links: `system.frontendUrl` must be set to your instance URL\n- For email notifications when sharing: `mail.enabled: true` with valid SMTP configuration\n\n---\n\n## Enabling File Storage\n\n\n \n ```yaml\n storage:\n enabled: true\n provider: local # 'local', 'database', or 's3'\n local:\n basePath: './storage' # Filesystem path (local provider only)\n ```\n \n \n ```bash\n STORAGE_ENABLED=true\n STORAGE_PROVIDER=local\n STORAGE_LOCAL_BASEPATH=./storage\n ```\n \n\n\n### Storage Providers\n\n| Provider | Config Value | License | Description | Best For |\n|----------|-------------|---------|-------------|----------|\n| **Local Filesystem** | `local` | Free | Files stored on disk under `basePath` | Most deployments, large files |\n| **Database** | `database` | Pro/Enterprise | Files stored as BLOBs in the database | Simple setups where you want everything in one place |\n| **S3-Compatible** | `s3` | Pro/Enterprise | Files stored in an S3-compatible object store | Multi-node clusters, cloud object storage |\n\n> **💡 Tip**\n>\n> The **local** provider is recommended for most deployments and requires no license. It handles large files well and keeps database size manageable. The **database** provider is convenient but uses more memory with large files. The **s3** provider is for object-storage and multi-node deployments. The **database** and **s3** providers require a Pro/Enterprise license.\n\n\n### Docker Volume Mount\n\nWhen using the local provider with Docker, mount the storage directory so files persist across container restarts:\n\n```yaml\nvolumes:\n - ./stirling-storage:/storage\n```\n\n---\n\n## S3-Compatible Object Storage\n\n> **ℹ️ Info: [Pro/Enterprise]**\n>\n> The **s3** storage provider requires a valid Pro or Enterprise license.\n\n\nSet `storage.provider: s3` to store user uploads in any S3-compatible object store. The same `storage.s3.*` block is also used by the cluster artifact store (see below).\n\n\n \n ```yaml\n storage:\n enabled: true\n provider: s3\n s3:\n endpoint: \"\" # blank = AWS regional default; otherwise full URL incl. https://\n bucket: my-bucket # required\n region: us-east-1\n accessKey: \"\" # blank = fall back to AWS DefaultCredentialsProvider (env / profile / IMDS)\n secretKey: \"\"\n pathStyleAccess: false # true for MinIO and Supabase; false for AWS/R2/most CDNs\n allowPrivateEndpoints: false # SSRF guard - see below\n requestChecksumCalculation: WHEN_SUPPORTED # WHEN_SUPPORTED | WHEN_REQUIRED | DISABLED\n responseChecksumValidation: WHEN_SUPPORTED # WHEN_SUPPORTED | WHEN_REQUIRED | DISABLED\n ```\n \n \n ```bash\n STORAGE_ENABLED=true\n STORAGE_PROVIDER=s3\n STORAGE_S3_ENDPOINT=\n STORAGE_S3_BUCKET=my-bucket\n STORAGE_S3_REGION=us-east-1\n STORAGE_S3_ACCESSKEY=\n STORAGE_S3_SECRETKEY=\n STORAGE_S3_PATHSTYLEACCESS=false\n STORAGE_S3_ALLOWPRIVATEENDPOINTS=false\n STORAGE_S3_REQUESTCHECKSUMCALCULATION=WHEN_SUPPORTED\n STORAGE_S3_RESPONSECHECKSUMVALIDATION=WHEN_SUPPORTED\n ```\n \n\n\n### S3 Configuration Keys\n\n| Key | Default | Description |\n|-----|---------|-------------|\n| `endpoint` | _(blank)_ | Blank uses the AWS regional default. For other vendors, the full URL including `https://`. |\n| `bucket` | _(blank)_ | Required. The bucket that holds the stored files. |\n| `region` | `us-east-1` | Region of the bucket. |\n| `accessKey` | _(blank)_ | Static access key. Blank falls back to the AWS `DefaultCredentialsProvider` (env vars, profile, or IMDS). |\n| `secretKey` | _(blank)_ | Static secret key. Used together with `accessKey`. |\n| `pathStyleAccess` | `false` | Use path-style (`endpoint/bucket/key`) instead of virtual-host addressing. `true` for MinIO and Supabase. |\n| `allowPrivateEndpoints` | `false` | SSRF guard. When `false`, an endpoint that resolves to a loopback, link-local, or private (RFC1918) address is rejected at startup. Set `true` to opt in (for example in-cluster MinIO). Leave `false` for any internet-facing vendor. |\n| `requestChecksumCalculation` | `WHEN_SUPPORTED` | `WHEN_SUPPORTED`, `WHEN_REQUIRED`, or `DISABLED`. Set `WHEN_REQUIRED` if your vendor rejects auto-added `x-amz-checksum-*` headers (older Backblaze B2, some R2 corner cases). |\n| `responseChecksumValidation` | `WHEN_SUPPORTED` | `WHEN_SUPPORTED`, `WHEN_REQUIRED`, or `DISABLED`. Set `WHEN_REQUIRED` if you see false-positive checksum-mismatch errors on GET from a vendor that never returns checksum headers. |\n\n> **⚠️ Warning: [SSRF guard]**\n>\n> `allowPrivateEndpoints` defaults to `false`. The server resolves the configured `endpoint` host and refuses to start if it points at a loopback, link-local, or private IP. This blocks an admin-supplied endpoint from being pointed at the cloud metadata service (for example `http://169.254.169.254/`) to exfiltrate instance-role credentials. Only set it to `true` for a trusted in-cluster store such as MinIO.\n\n\n### Per-Vendor Cheat Sheet\n\n| Vendor | `endpoint` | `region` | `pathStyleAccess` | Notes |\n|--------|-----------|----------|-------------------|-------|\n| **AWS S3** | _(blank)_ | your region | `false` | Uses the AWS regional default. |\n| **MinIO** (in-cluster) | `http://minio:9000` | `us-east-1` | `true` | Also set `allowPrivateEndpoints: true`. |\n| **Cloudflare R2** | `https://<acct>.r2.cloudflarestorage.com` | `auto` | `false` | If uploads fail with `unsupported header x-amz-checksum-*`, set `requestChecksumCalculation: WHEN_REQUIRED`. |\n| **Supabase Storage** | `https://<project>.supabase.co/storage/v1/s3` | your project region | `true` | Non-ASCII display filenames are fine - the storage key is opaque. |\n| **Backblaze B2** | `https://s3.<region>.backblazeb2.com` | your region | `false` | On B2 deployments older than July 2025, if uploads return `Unsupported header x-amz-checksum-crc32`, set `requestChecksumCalculation: WHEN_REQUIRED`. |\n| **DigitalOcean Spaces** | `https://<region>.digitaloceanspaces.com` | your region | `false` | 5 GB per-object cap (regardless of multipart). |\n\n### Sharing Credentials with the Cluster Artifact Store\n\nThe `storage.s3.*` block is used in two places: the **s3** storage provider (persistent user uploads) and the cluster artifact store when `cluster.artifactStore: s3` (transient multi-node job artifacts). When both use S3 they reuse the same credentials and bucket. The cluster store writes under a separate key prefix (`cluster.s3.keyPrefix`, default `transient/`) so a single bucket can host both persistent uploads and transient artifacts without collisions. Multi-node deployments must set `cluster.artifactStore: s3`.\n\n---\n\n## Enabling File Sharing\n\n\n \n ```yaml\n storage:\n enabled: true\n sharing:\n enabled: true # Master switch for all sharing\n linkEnabled: true # Enable shareable links\n emailEnabled: true # Send email notifications when sharing\n linkExpirationDays: 3 # Days until share links expire\n ```\n \n \n ```bash\n STORAGE_SHARING_ENABLED=true\n STORAGE_SHARING_LINKENABLED=true\n STORAGE_SHARING_EMAILENABLED=true\n STORAGE_SHARING_LINKEXPIRATIONDAYS=3\n ```\n \n\n\n### Feature Dependencies\n\n| Feature | What It Needs |\n|---------|---------------|\n| File Storage | `security.enableLogin: true` |\n| File Sharing | Storage enabled |\n| Shareable Links | Sharing enabled + `system.frontendUrl` set |\n| Email Notifications | Sharing enabled + `mail.enabled: true` |\n| Shared Signing | Storage enabled + `storage.signing.enabled: true` |\n\n---\n\n## Storage Quotas\n\nControl how much storage space is available.\n\n\n \n ```yaml\n storage:\n quotas:\n maxStorageMbPerUser: -1 # Per-user cap in MB (-1 = unlimited)\n maxStorageMbTotal: -1 # Total system cap in MB (-1 = unlimited)\n maxFileMb: -1 # Max size per upload in MB (-1 = unlimited)\n ```\n \n \n ```bash\n STORAGE_QUOTAS_MAXSTORAGEMBPERUSER=500\n STORAGE_QUOTAS_MAXSTORAGEMBTOTAL=10000\n STORAGE_QUOTAS_MAXFILEMB=100\n ```\n \n\n\nQuotas are checked before a file is stored. When replacing an existing file, only the size difference counts against the quota.\n\n---\n\n## Access Roles\n\nWhen sharing a file, you choose what level of access to grant:\n\n| Role | Can View/Download | Can Replace File | In Signing Workflows |\n|------|-------------------|-----------------|---------------------|\n| **Editor** | Yes | Yes | Can sign |\n| **Commenter** | Yes | No | Can sign |\n| **Viewer** | Yes | No | Read-only |\n\nThe file **owner** always has full access. The default role is **Editor**.\n\nThe difference between Commenter and Viewer only matters in [Shared Signing](doc:functionality/security/shared-signing) workflows -- both are read-only for regular file sharing.\n\n---\n\n## The My Files Page\n\nWhen your admin has turned storage on, you get a **My Files** page (find it at `/files` once you are logged in). It is your personal space on the server for keeping documents that stick around between sessions, instead of living only in your browser tab.\n\nOn the My Files page you can:\n\n- **Upload** documents to keep them on the server\n- **Organize them into folders**, including folders inside folders, and drag files between them\n- **Preview** a stored file right in the browser without downloading it\n- **Rename, move, and delete** files and folders\n- **Jump around quickly** using the folder sidebar on the left\n- **Personalize folders** with colors and thumbnails so they are easy to spot\n- **See where each file lives** - every item shows a small badge telling you whether it is in your current browser session or saved on the server\n\nYour folders are private to you. Folders themselves are not shared; you share individual files instead (see [Sharing Files](#sharing-files) below).\n\n---\n\n## Sharing Files\n\nYou can share a file from the **My Files** page, or from the **Share** button in the top bar of the editor workbench while a file is open.\n\n### Share with a Specific User\n\nFrom the file manager, select a file and share it with another user by their username or email address. You can choose the access role when sharing.\n\nIf you enter an email address for someone who doesn't have an account, the system will create a share link and email it to them (if email notifications are enabled).\n\n### Share via Link\n\nGenerate a shareable link for any file you own. Anyone who is logged in and has the link can access the file. Links expire automatically based on your `linkExpirationDays` setting (default: 3 days).\n\nYou can revoke a share link at any time, which immediately removes access and deletes all access records for that link.\n\nThe share link URL follows the format:\n```\nhttps://your-stirling-instance.com/share/{token}\n```\n\n> **ℹ️ Info**\n>\n> Share links require the recipient to be logged in. There is no anonymous or public access -- the link is an additional credential on top of authentication.\n\n\n### Access History\n\nFor any share link you've created, you can view who accessed it, whether they viewed or downloaded the file, and when.\n\n---\n\n## Security\n\n- **All endpoints require authentication** -- there is no anonymous file access\n- **Owner-only controls** -- only the file owner can update, delete, or manage sharing\n- **Random tokens** -- share link tokens are cryptographically random UUIDs\n- **Automatic expiration** -- expired links return an error and are cleaned up daily\n- **Revocation** -- owners can revoke any share link immediately\n- **Access auditing** -- every share link access is recorded with user, action type, and timestamp\n\n---\n\n## Known Limitations\n\n- Share links require `system.frontendUrl` to be configured\n- Share links require the user to be logged in -- there is no public/anonymous access\n- The database storage provider uses more memory with large files (use the local provider for large deployments)\n\n---\n\n## Troubleshooting\n\n### \"Storage is disabled\"\n- Verify `storage.enabled: true` in your settings\n- Verify `security.enableLogin: true`\n\n### \"Share links are disabled\"\n- Verify `storage.sharing.linkEnabled: true`\n- Verify `system.frontendUrl` is set to your instance URL\n\n### \"Email sharing is disabled\"\n- Verify `storage.sharing.emailEnabled: true`\n- Verify `mail.enabled: true` with valid SMTP settings\n\n### Share link returns 404 Not Found\n- The link has expired or does not exist. Expired and missing links both return **404 Not Found**. The file owner needs to create a new one.\n\n### Quota exceeded (HTTP 413)\n- A file or upload that exceeds a configured quota is rejected with **413 Payload Too Large** (per-file, per-user, and total-storage caps all use this status)\n- Increase `maxStorageMbPerUser`, `maxStorageMbTotal`, or `maxFileMb`, or delete unused files to free up space\n\n---\n\n## Developer Reference: Storage API\n\nThis section is for developers and admins automating storage outside the web app. If you just want to upload, organize, and share files, everything above is done from the **My Files** page - you do not need any of this.\n\nThe full storage and sharing endpoints are listed below. See [API Documentation](doc:api) for authentication and general usage.\n\n| Method | Endpoint | Description |\n|--------|----------|-------------|\n| POST | `/api/v1/storage/files` | Upload file |\n| PUT | `/api/v1/storage/files/{id}` | Update file (owner only) |\n| GET | `/api/v1/storage/files` | List accessible files |\n| GET | `/api/v1/storage/files/{id}` | Get file metadata |\n| GET | `/api/v1/storage/files/{id}/download` | Download file |\n| DELETE | `/api/v1/storage/files/{id}` | Delete file (owner only) |\n| POST | `/api/v1/storage/files/{id}/shares/users` | Share with user |\n| DELETE | `/api/v1/storage/files/{id}/shares/users/{username}` | Revoke user share |\n| DELETE | `/api/v1/storage/files/{id}/shares/self` | Leave shared file |\n| POST | `/api/v1/storage/files/{id}/shares/links` | Create share link |\n| DELETE | `/api/v1/storage/files/{id}/shares/links/{token}` | Revoke share link |\n| GET | `/api/v1/storage/share-links/{token}` | Access via share link |\n| GET | `/api/v1/storage/share-links/{token}/metadata` | Get share link info |\n| GET | `/api/v1/storage/share-links/accessed` | List your accessed links |\n| GET | `/api/v1/storage/files/{id}/shares/links/{token}/accesses` | Access history (owner only) |\n\n### Folder Endpoints\n\nThese are the endpoints behind the folders on the **My Files** page. All operations are scoped to the authenticated user.\n\n| Method | Endpoint | Description |\n|--------|----------|-------------|\n| GET | `/api/v1/storage/folders` | List your folders |\n| POST | `/api/v1/storage/folders` | Create a folder |\n| PATCH | `/api/v1/storage/folders/{folderId}` | Update a folder (name, appearance) |\n| DELETE | `/api/v1/storage/folders/{folderId}` | Delete a folder |\n| PATCH | `/api/v1/storage/files/{fileId}/folder` | Move a single file to a folder (or to root when `folderId` is null) |\n| PATCH | `/api/v1/storage/files/folder` | Bulk-move files to a folder (up to 1000 per request) |\n\n---\n\n## Related\n\n- [Shared Signing](doc:functionality/security/shared-signing) -- Collaborative multi-participant document signing\n- [Certificate Signing](doc:functionality/security/certificate-signing) -- Individual certificate signing\n- [System and Security Settings](doc:configuration/security/system-and-security) -- JWT, sessions, server certificates",
|
||
"sourcePath": "docs/Configuration/Storage/File Sharing and Storage.md",
|
||
"editUrl": "https://github.com/Stirling-Tools/Stirling-Tools.github.io/blob/main/docs/Configuration/Storage/File Sharing and Storage.md"
|
||
},
|
||
"configuration/storage/folderscanning": {
|
||
"id": "configuration/storage/folderscanning",
|
||
"title": "Folder Scanning",
|
||
"section": "configuration/storage",
|
||
"markdown": "## User Guide for Local Directory Scanning and File Processing\n\nFolder scanning uses settings configured from our pipeline tool, it is advised you first read the [Pipeline Guide](doc:configuration/automation/pipeline)\n### Setting Up Watched Folders\n\n- Create a folder where you want your files to be monitored. This is your 'watched folder'.\n- The default directory for this is `./pipeline/watchedFolders/`.\n- Place any directories you want to be scanned into this folder. This folder should contain multiple folders, each for their own tasks and pipelines.\n\n### Configuring Processing with JSON Files\n\n- In each directory you want processed (e.g., `./pipeline/watchedFolders/officePrinter`), include a JSON configuration file.\n- This JSON file should specify how you want the files in the directory to be handled (e.g., what operations to perform on them). This can be made, configured, and downloaded from the Stirling PDF Pipeline interface. For JSON creation guide please see [Pipeline setup](doc:configuration/automation/pipeline)\n\n### Automatic Scanning and Processing\n\n- The system automatically checks the watched folder every minute for new directories and files to process.\n- When a directory with a valid JSON configuration file is found, it begins processing the files inside according to the configuration.\n\n### Processing Steps\n\n- Files in each directory are processed according to the instructions in the JSON file.\n- This might involve file conversions, data filtering, renaming files, etc. If the output of a step is a zip, this zip will be automatically unzipped as it passes to the next process.\n\n### Results and Output\n\n- After processing, the results are saved in a specified output location. This could be a different folder or location as defined in the JSON file or the default location `./pipeline/finishedFolders/`.\n- Each processed file is named and organized according to the rules set in the JSON configuration.\n\n### Completion and Cleanup\n\n- Once processing is complete, the original files in the watched folder's directory are removed.\n- You can find the processed files in the designated output location.\n\n### Error Handling\n\n- If there's an error during processing, the system will not delete the original files, allowing you to check and retry if necessary.\n\n### User Interaction\n\n- As a user, your main tasks are to set up the watched folders, place directories with files for processing, and create the corresponding JSON configuration files.\n- The system handles the rest, including scanning, processing, and outputting results.",
|
||
"sourcePath": "docs/Configuration/Storage/FolderScanning.md",
|
||
"editUrl": "https://github.com/Stirling-Tools/Stirling-Tools.github.io/blob/main/docs/Configuration/Storage/FolderScanning.md"
|
||
},
|
||
"configuration/storage/google-drive-file-picker": {
|
||
"id": "configuration/storage/google-drive-file-picker",
|
||
"title": "Google Drive File Picker",
|
||
"section": "configuration/storage",
|
||
"markdown": "> **Tier**: Server\n\nStirling PDF allows users to select Files for processing through tools via google drive.\n\n## Google Api Access\nTo enable this features for your users, you must first set up your Google environment. This includes creating a Google Cloud project. Follow the **Setting up your environment** section of [this guide](https://developers.google.com/workspace/drive/picker/guides/overview#setup) to do so.\n\n## Stirling PDF configuration\n\n```yaml\npremium:\n ...\n enabled: true # Enable license key checks for pro/enterprise features\n proFeatures:\n ...\n googleDrive:\n enabled: true\n clientId: <YOUR_CLIENT_ID>\n apiKey: <YOUR_API_KEY>\n appId: <YOUR_APP_ID>\n```\n- `premium.enabled`: Set to `true` to enable premium features. \n- `googleDrive.enabled`: Set to `true` to enable google drive file picker features. \n- `googleDrive.clientId`: Your Google web app's client ID. [Go to Credentials](https://console.cloud.google.com/apis/credentials) and Click **Create credentials > OAuth client ID**.\n- `googleDrive.apiKey`: API key for google api access. [Go to Credentials](https://console.cloud.google.com/apis/credentials) and Click **Create credentials > API key**.\n- `googleDrive.appId`: Google drive app ID also known as your Project Number Found in your [IAM&Admin Project Settings](https://console.cloud.google.com/iam-admin/settings)\n\n\n > #### ⚠️ Note\n> _You must set the Authorized Javascript origins for your OAuth client ID to include your Stirling PDF host domain or IP address._\n\n## Configurations Examples\nBelow are examples of the full configuration for enabling the google Drive Picker:\n\n\n \n ```yaml\n premium:\n enabled: true # Enable license key checks for pro/enterprise features\n proFeatures:\n googleDrive:\n enabled: true\n clientId: <YOUR_CLIENT_ID>\n apiKey: <YOUR_API_KEY>\n appId: <YOUR_APP_ID>\n ```\n \n \n ```bash\n export PREMIUM_ENABLED=true\n export PREMIUM_PRO_FEATURES_GOOGLE_DRIVE_ENABLED=true\n export PREMIUM_PRO_FEATURES_GOOGLE_DRIVE_CLIENT_ID=\"<YOUR_CLIENT_ID>\"\n export PREMIUM_PRO_FEATURES_GOOGLE_DRIVE_API_KEY=\"<YOUR_API_KEY>\"\n export PREMIUM_PRO_FEATURES_GOOGLE_DRIVE_APP_ID=\"<YOUR_APP_ID>\"\n ```\n \n \n ```bash\n -e PREMIUM_ENABLED=true \\\n -e PREMIUM_PRO_FEATURES_GOOGLE_DRIVE_ENABLED=true \\\n -e PREMIUM_PRO_FEATURES_GOOGLE_DRIVE_CLIENT_ID=\"<YOUR_CLIENT_ID>\" \\\n -e PREMIUM_PRO_FEATURES_GOOGLE_DRIVE_API_KEY=\"<YOUR_API_KEY>\" \\\n -e PREMIUM_PRO_FEATURES_GOOGLE_DRIVE_APP_ID=\"<YOUR_APP_ID>\" \\\n ```\n \n \n ```yaml\n environment:\n PREMIUM_ENABLED: true\n PREMIUM_PRO_FEATURES_GOOGLE_DRIVE_ENABLED: true\n PREMIUM_PRO_FEATURES_GOOGLE_DRIVE_CLIENT_ID: <YOUR_CLIENT_ID>\n PREMIUM_PRO_FEATURES_GOOGLE_DRIVE_API_KEY: <YOUR_API_KEY>\n PREMIUM_PRO_FEATURES_GOOGLE_DRIVE_APP_ID: <YOUR_APP_ID>\n ```",
|
||
"sourcePath": "docs/Configuration/Storage/Google Drive File Picker.md",
|
||
"editUrl": "https://github.com/Stirling-Tools/Stirling-Tools.github.io/blob/main/docs/Configuration/Storage/Google Drive File Picker.md"
|
||
},
|
||
"contribute": {
|
||
"id": "contribute",
|
||
"title": "Contribution guidelines",
|
||
"section": "overview",
|
||
"markdown": "Thanks for taking a look at how to contribute to Stirling PDFs open-source codebase!\n\n## Development Setup\n\n### Prerequisites\n- Java 25 (JDK 25)\n- Node.js 18+\n- Docker (for testing)\n- Gradle (included in repository)\n\n### Getting Started\n\n1. **Clone the repository**\n ```bash\n git clone https://github.com/Stirling-Tools/Stirling-PDF.git\n cd Stirling-PDF\n ```\n\n2. **Install dependencies**\n\n The repository uses [Task](https://taskfile.dev/) as a unified command runner. Install the `task` CLI, then from the repository root:\n ```bash\n task install\n ```\n\n3. **Backend Development**\n ```bash\n # Build and run the Spring Boot backend\n task backend:dev\n # Backend runs on localhost:8080\n ```\n\n4. **Frontend Development (V2.0+)**\n ```bash\n # Start the Vite dev server (run from the repository root)\n task frontend:dev\n # Frontend runs on localhost:5173, proxies API calls to backend (localhost:8080)\n ```\n\n To run the backend and frontend together, use `task dev` from the repository root.\n\n## Contributing to Code\n\n### Backend Contributions\n- See our [CONTRIBUTING guidelines](https://github.com/Stirling-Tools/Stirling-PDF/blob/main/CONTRIBUTING.md)\n- Backend uses Spring Boot + Java\n- Code formatting: Run `./gradlew spotlessApply` before committing\n\n### Frontend Contributions (V2.0+)\n- Frontend is a React + TypeScript application\n- Uses Vite for build tooling\n- UI components: Mantine UI + TailwindCSS\n- Adding new tools: See [ADDING_TOOLS.md](https://github.com/Stirling-Tools/Stirling-PDF/blob/main/ADDING_TOOLS.md)\n- Tool architecture: Uses `useToolOperation` hook pattern\n\n## Translation Contributions\n\n### Translations (TOML)\nTranslation files are located at `frontend/editor/public/locales/<lang>/translation.toml`\n- **CRITICAL**: Only edit `en-US/translation.toml`. `en-US` is the source/primary locale and the i18n fallback (`fallbackLng: \"en-US\"`); other languages are managed separately.\n- Each locale is a single TOML file (`translation.toml`), keyed by feature/tool.\n- For counts, use ICU-style plural suffixes on the key (`_one`, `_other`, and `_zero` where needed), for example `opCount_one`/`opCount_other`.\n\n## Development Resources\n- **API Documentation**: Access at `/swagger-ui/index.html` on your local instance\n- **Developer Guide**: See `DeveloperGuide.md` in the repository\n- **Claude Code Guide**: See `CLAUDE.md` for detailed architecture and patterns",
|
||
"sourcePath": "docs/Contribute.md",
|
||
"editUrl": "https://github.com/Stirling-Tools/Stirling-Tools.github.io/blob/main/docs/Contribute.md"
|
||
},
|
||
"faq": {
|
||
"id": "faq",
|
||
"title": "FAQ",
|
||
"section": "overview",
|
||
"markdown": "## Frequently Asked Questions\n\n### Q1: Why are .htm files being downloaded when I use the application?\nThis is often caused by your NGINX configuration. NGINX's default file upload size is 1MB, and any file larger than this will cause an .htm file to be downloaded instead. To fix this issue, you should modify your NGINX configuration to increase the maximum file upload size.\n\n### Q2: Can I customize the appearance and language of the Stirling PDF application?\nYes, Stirling PDF provides several environment variables to allow customization of the application, custom HTML, CSS and other settings such as the visibility to search engines. Please refer to the [UI Customisation](doc:configuration/customisation/ui-customisation) section for more details.\n\n### Q3: I want to add a new feature to Stirling PDF. How can I contribute?\nWe welcome contributions from the community! Please open an issue on our GitHub page to discuss any large features before making any changes. Any small changes are fully welcome without discussion! After the feature has been discussed and approved, you can make the changes and submit a pull request.\n\n### Q4: I have a cool idea can you add it?\nAll feedback and suggestions are appreciated. It is best to submit these via a Github issue ticket with [Feature Request] in the title.\nYou can also reach out in discord but without a ticket to track it the request can often get lost!\n\n### Q5: I found a bug in Stirling PDF. Where can I report it?\nPlease report any bugs or issues you encounter through our [GitHub Issues page](https://github.com/Stirling-Tools/Stirling-PDF/issues). Be sure to include as much detail as possible so we can diagnose and resolve the issue quickly. If you're running Docker, use the built-in [diagnostics tool](doc:configuration/operations/diagnostics) to collect logs, configuration, and system information into a shareable archive.\n\n### Q6: My Stirling PDF is using high RAM at idle. How can I optimize memory usage?\nStirling PDF's memory usage can be optimized in several ways:\n\n- **Use the Ultra Lite version:** Pull the `latest-ultra-lite` tag from Docker Hub or GitHub, which is specifically designed for lower-end hardware.\n- **Tune memory allocation:** See the [Fine Tuning](doc:configuration/operations/performance-optimization) section of the Performance Optimization guide for how to adjust memory limits.\n- **Reduce LibreOffice instances:** Each idle LibreOffice UNO server instance uses approximately 50 MB. The default session limit is 1. See [LibreOffice Parallel Processing](doc:configuration/operations/libreoffice-parallel-processing) for details.\n\nFor detailed sizing recommendations, see the [Performance Optimization](doc:configuration/operations/performance-optimization) guide.\n\n### Q7: I'm experiencing connection errors when pulling from docker.stirlingpdf.com\n\nIf you experience connection issues, use these alternative endpoints:\n\n- Docker Hub: `docker pull docker.stirlingpdf.com/stirlingtools/stirling-pdf:latest`\n- GitHub: `docker pull ghcr.io/stirling-tools/stirling-pdf:latest`\n\nAll endpoints provide the same functionality.\n\n### Q8: Does Stirling PDF track my data?\n\nNo, we track no data without your explicit consent. You can see how, when, and why at our [Analytics and Telemetry](https://docs.stirlingpdf.com/analytics-telemetry) page.\n\n### Q9: When I upload a file, where is it processed?\n\nUploads go to the server or desktop instance you're using, not to Stirling servers. The macOS/Windows desktop apps process files locally - even when you pick the Stirling Cloud sign-in today - so your PDFs stay on your device unless you point the app to a remote self-hosted server. Planned SaaS-assisted features (for desktop app) will be opt-in when they arrive.\n\n### Q10: What are the different JAR files and which should I use?\n\nStirling PDF comes in three different JAR files:\n\n**Stirling-PDF-with-login.jar** (Recommended - Full Features):\n- Bundles frontend UI + backend server\n- **Includes authentication and additional features** - requires user login\n- **Recommended for all users** - personal, shared, or enterprise deployments\n\n**Stirling-PDF.jar** (Plain JAR - Basic Features):\n- Bundles frontend UI + backend server\n- **Basic version** - no authentication, core features only\n- Only use if you require no login at all and don't mind missing certain features\n\n**Stirling-PDF-server.jar** (Backend Only - **Advanced**):\n- Backend server only (no bundled frontend UI)\n- **No authentication** - API access only\n- Use for API access, desktop app backend, or custom frontend\n\n### Q11: How do I enable or disable authentication?\n\n**Default JAR (Stirling-PDF.jar)**: Authentication is **not available** (security module not included at build time).\n\n**With-Login JAR (Stirling-PDF-with-login.jar)**: Authentication is **enabled by default**.\n\nTo disable authentication in the with-login version:\n\n\n \n ```yaml\n security:\n enableLogin: false\n ```\n \n \n ```bash\n docker run -d \\\n -p 8080:8080 \\\n -e SECURITY_ENABLELOGIN=false \\\n docker.stirlingpdf.com/stirlingtools/stirling-pdf:latest\n ```\n \n \n ```yaml\n environment:\n SECURITY_ENABLELOGIN: false\n ```\n \n \n ```bash\n java -jar Stirling-PDF-with-login.jar -DSECURITY_ENABLELOGIN=false\n ```\n \n \n ```bash\n export SECURITY_ENABLELOGIN=false\n java -jar Stirling-PDF-with-login.jar\n ```\n \n\n\nFor more details, see the [System and Security Configuration](doc:configuration/security/system-and-security) documentation.\n\n### Q12: Where do my files go on the desktop app, and what does \"uploading to server\" mean?\n\nThe desktop app runs a small Stirling PDF backend **inside the app on your own computer** (localhost). The Connection mode you pick (Settings -> Connection) decides where each tool runs:\n\n- **Local-only** (default; not signed in, no server connected): every tool runs on the local backend and your files never leave your device. If you use a tool the local backend can't perform (OCR, Office conversions, and similar), the file is **not** sent anywhere - the app stops and asks you to sign in to Stirling Cloud or connect to a self-hosted server.\n- **Signed in to Stirling Cloud**: server-side tools are processed on Stirling's cloud (transient, not stored).\n- **Connected to a self-hosted server**: server-side tools go only to your own server.\n\nBottom line: in local-only mode a server-side tool is either run locally or blocked with a prompt - it is never silently uploaded anywhere.\n\n### Q13: Can I remove an existing watermark from a PDF?\n\nThere is no dedicated watermark-removal tool. Stirling PDF can **add** watermarks (Add Watermark) but cannot automatically strip existing ones.\n\n### Q14: Can I add multi-line text or line breaks with Add Text, Stamp, or Watermark?\n\nYes. Put a literal `\\n` in the text field to force a line break; each line is rendered separately.\n\n### Q15: Why does my self-hosted instance make requests to js.stripe.com?\n\nStripe's script loads only for the in-app purchase / billing UI. No PDF or document data is sent to Stripe. Fully offline/air-gapped instances are unaffected in normal use - the request only matters if you open the billing/upgrade screen.\n\n### Q16: Is a specific feature supported?\n\nWe are continuously improving Stirling PDF, and the exact feature you're looking for might not be available yet - for example, a native Android app or in-app PDF translation. You can raise a feature request for any and all features on our [GitHub issues page](https://github.com/Stirling-Tools/Stirling-PDF/issues) with `[Feature Request]` in the title.",
|
||
"sourcePath": "docs/FAQ.md",
|
||
"editUrl": "https://github.com/Stirling-Tools/Stirling-Tools.github.io/blob/main/docs/FAQ.md"
|
||
},
|
||
"functionality/advanced-tools": {
|
||
"id": "functionality/advanced-tools",
|
||
"title": "Advanced Tools",
|
||
"description": "Power user features for automation and complex PDF operations",
|
||
"section": "functionality",
|
||
"markdown": "Advanced tools for automation workflows and complex PDF operations.\n\n---\n\n## Automation Tools\n\n### Automate (Pipeline)\n\n**Tool ID:** `automate`\n\nChain multiple operations into automated workflows. Save and reuse pipeline configurations, process files automatically with predefined steps, and set up folder watching for automatic processing.\n\n**[Read the complete Pipeline Automation Guide →](doc:configuration/automation/pipeline)**\n\n---\n\n### Auto Rename\n\n**Tool ID:** `autoRename`\n\nAutomatically rename PDF files based on their content. Analyzes each PDF and suggests filenames using this priority:\n1. PDF metadata title (if present)\n2. Largest font text on first page\n3. First heading or prominent text\n4. First line of readable text\n\nWorks best with documents that have clear titles. Scanned documents may need [OCR](doc:functionality/ocr) first.\n\n---\n\n## Formatting Tools\n\n### Adjust Contrast\n\n**Tool ID:** `adjustContrast`\n\nAdjust brightness, contrast, and saturation of PDF content. Useful for improving readability of faded scans or creating high-contrast versions.\n\n---\n\n### Repair\n\n**Tool ID:** `repair`\n\nAttempt to repair corrupted or damaged PDF files. Can fix broken cross-reference tables, corrupted object streams, missing headers, and encoding errors.\n\nCannot recover physically deleted data. Success depends on extent of corruption.\n\n---\n\n### Scanner Image Split\n\n**Tool ID:** `scannerImageSplit`\n\nAutomatically detect and split individual scanned photos from multi-image PDF scans. Useful for batch-scanned photo collections.\n\n---\n\n### Overlay PDFs\n\n**Tool ID:** `overlayPdfs`\n\nLayer one PDF on top of another. Control position, opacity, and whether the overlay appears in the foreground or background. Apply to specific pages or all pages.\n\n---\n\n### Replace Color\n\n**Tool ID:** `replaceColor`\n\nReplace specific colors in a PDF or invert all colors. Options include full color inversion, targeted color replacement, and adjustable matching threshold.\n\n---\n\n### Add Image\n\n**Tool ID:** `addImage`\n\nInsert images into PDF pages with precise positioning and sizing. Supports common image formats.\n\n---\n\n### Scanner Effect\n\n**Tool ID:** `scannerEffect`\n\nApply realistic scanner-like effects to digital PDFs - slight rotation/skew and scan artifacts to make documents appear physically scanned.\n\n---\n\n## Developer Tools\n\n### Show JavaScript\n\n**Tool ID:** `showJS`\n\nDisplay any embedded JavaScript code within a PDF document. Useful for security auditing and understanding PDF form logic.\n\n---\n\n### Quick Links\n\n- **[API Documentation](doc:api)**\n- **[Folder Scanning Setup](doc:configuration/storage/folderscanning)**\n- **[SSO Configuration](doc:configuration/security/single-sign-on-configuration)**\n- **[General Configuration](doc:configuration/configuration)**",
|
||
"sourcePath": "docs/Functionality/Advanced-Tools.md",
|
||
"editUrl": "https://github.com/Stirling-Tools/Stirling-Tools.github.io/blob/main/docs/Functionality/Advanced-Tools.md"
|
||
},
|
||
"functionality/compare": {
|
||
"id": "functionality/compare",
|
||
"title": "Compare PDFs",
|
||
"description": "Compare two PDF documents and highlight differences",
|
||
"section": "functionality",
|
||
"markdown": "Compare two PDF documents and highlight their differences. Runs entirely in your browser, so your files never leave your computer.\n\nComparison is text-based (word-level): the tool extracts the text from both PDFs and highlights what changed, with removed words in red and added words in green. It works best on digital PDFs where you care about wording changes. For scanned documents, run [OCR](doc:functionality/ocr) first to make the text selectable.\n\n---\n\n## How to Use\n\n1. **Select Original PDF** - Choose the original/older version\n2. **Select Edited PDF** - Choose the new/revised version\n3. **Compare** - Process the documents\n4. **Review Differences** - View highlighted changes\n\n---\n\n## Features\n\n- **Side-by-side or stacked layout** - Toggle between horizontal and vertical views\n- **Word-level diff** - Removed words highlighted in red, added words highlighted in green\n- **Change navigation** - Dropdown selectors to jump between deletions and additions\n- **Synchronized scrolling** - Optional linked scrolling between the two panes\n- **Zoom and pan** - Scroll-wheel zoom, pinch-to-zoom, and drag to pan\n\n---\n\n## Limitations\n\n- Works best with digital PDFs (not scanned). It compares extracted text only, so layout-only or image-only changes are not detected. For scanned documents, run [OCR](doc:functionality/ocr) first\n- Documents with no extractable text cannot be compared\n- Very large or highly dissimilar documents may be stopped early with a warning\n\n---\n\n## Related Tools\n\n- **[OCR](doc:functionality/ocr)** - Make scanned PDFs searchable before comparing",
|
||
"sourcePath": "docs/Functionality/Compare.md",
|
||
"editUrl": "https://github.com/Stirling-Tools/Stirling-Tools.github.io/blob/main/docs/Functionality/Compare.md"
|
||
},
|
||
"functionality/compress": {
|
||
"id": "functionality/compress",
|
||
"title": "Compress PDF",
|
||
"description": "Reduce PDF file size while maintaining quality",
|
||
"section": "functionality",
|
||
"markdown": "Reduce PDF file size by compressing images, optimizing structure, and removing unnecessary data.\n\n**Important:** Compression is permanent. Always keep a backup of the original if you might need maximum quality later.\n\n---\n\n## How to Use\n\n1. **Upload Your PDF** - Select one or more PDFs\n2. **Choose Compression Level** - Select quality vs. size balance\n3. **Configure Options** - Enable grayscale, line art, etc. (optional)\n4. **Compress** - Process the files\n5. **Download** - Get your compressed PDFs\n\n---\n\n## Options\n\n| Option | Description |\n|--------|-------------|\n| **Optimize Level** (1-9) | Controls compression aggressiveness. Higher = smaller file, lower quality. Levels 1-3 are light, 4-5 are moderate, 6+ trigger additional compression passes |\n| **Expected Output Size** | Set a target file size (e.g. `25MB`) and the tool will automatically adjust the optimize level to hit it |\n| **Grayscale** | Convert all images to grayscale. Can significantly reduce size for color documents where color isn't needed |\n| **Linearize** | Optimize PDF for fast web viewing - reorders the file so the first page loads before the entire file is downloaded |\n| **Normalize** | Normalize internal PDF structure for better compatibility |\n| **Line Art** | Convert images to high-contrast line art. Useful for documents with diagrams, sketches, or black-and-white illustrations |\n| **Line Art Threshold** (0-100) | Controls sensitivity of line art conversion. Default: 55. Only used when Line Art is enabled |\n| **Line Art Edge Level** (1-3) | Edge detection strength for line art. 1 = light, 3 = strong. Only used when Line Art is enabled |\n\n---\n\n## What Happens at Each Level\n\n- **Levels 1-3** - Basic optimization, preserves quality\n- **Levels 4-5** - Image recompression enabled, moderate quality reduction\n- **Levels 6+** - Aggressive compression with additional processing passes\n- **Levels 8+** - Uses Zopfli compression on supported systems for maximum reduction\n\n---\n\n## API Usage\n\n```bash\ncurl -X POST http://stirling-pdf:8080/api/v1/misc/compress-pdf \\\n -F \"fileInput=@document.pdf\" \\\n -F \"optimizeLevel=5\" \\\n -F \"grayscale=false\" \\\n -F \"linearize=false\" \\\n -F \"lineArt=false\" \\\n -o compressed.pdf\n```\n\nWith target size:\n```bash\ncurl -X POST http://stirling-pdf:8080/api/v1/misc/compress-pdf \\\n -F \"fileInput=@document.pdf\" \\\n -F \"expectedOutputSize=10MB\" \\\n -o compressed.pdf\n```\n\nSee [API Documentation](doc:api) for complete endpoint reference.\n\n---\n\n## Decompress PDF\n\n> **📝 Note: Automation / API**\n>\n> There is also an automation option that does the opposite: it fully expands a compressed PDF so its contents are readable as plain text, which is handy for troubleshooting or editing a PDF by hand (the file gets larger). It runs through automation rather than a tool in the web app - see the [API reference](doc:api).\n\n\n---\n\n## Related Tools\n\n- **[OCR](doc:functionality/ocr)** - Make searchable before compressing\n- **[Convert](doc:functionality/convert/convert)** - Convert formats before compressing\n- **[Merge](doc:functionality/page-operations/page-operations)** - Combine then compress",
|
||
"sourcePath": "docs/Functionality/Compress.md",
|
||
"editUrl": "https://github.com/Stirling-Tools/Stirling-Tools.github.io/blob/main/docs/Functionality/Compress.md"
|
||
},
|
||
"functionality/content-editing/content-editing": {
|
||
"id": "functionality/content-editing/content-editing",
|
||
"title": "Content & Editing",
|
||
"description": "Add, extract, and modify PDF content",
|
||
"section": "functionality/content-editing",
|
||
"markdown": "## Features - Content & Editing\n\nTools for adding, extracting, and modifying content within PDF documents.\n\n---\n\n## Images\n\n- **Add Image**: Drop a logo, photo, or graphic onto your PDF. Choose where it sits on the page and resize it to fit.\n\n- **Extract Images**: Pull every image out of a PDF and download them as separate files (PNG, JPG, and other common formats).\n\n- **Remove Images**: Strip all images out of a PDF to shrink the file size. Use this when you want the pictures gone rather than saved (use **Extract Images** if you want to keep them).\n\n- **Detect & Split Scanned Photos**: Automatically detect individual scanned photos on a page and split them out into separate images.\n\n---\n\n## Stamps & Annotations\n\n- **Add Text**: Place custom text anywhere on your PDF. Pick the spot, then type a label, caption, or note directly onto the page. Multi-line text is supported: enter a literal `\\n` in the text field to add a line break.\n\n- **Add Stamp**: Stamp your pages with your own text or an image. Set the position, size, rotation, and opacity, and apply it to one page or all of them.\n\n- **Remove Annotations**: Clear out every comment, highlight, and markup while leaving the rest of the document untouched.\n\n---\n\n## Visual Editing\n\n- **Replace & Invert Color**: Recolor a PDF for better contrast or readability. Pick a high-contrast preset (such as white text on black), set your own text and background colors, invert every color at once, or convert to CMYK for printing.\n\n---\n\n## Metadata & Information\n\n- **Change Metadata**: Edit a PDF's document details such as author, title, subject, keywords, and creation date. You can also add or remove these fields.\n\n- **Get ALL Info on PDF**: See everything there is to know about a PDF, including:\n - PDF version and file size\n - Page count and dimensions\n - Fonts used\n - Security settings and permissions\n - Complete metadata\n - Export all information in JSON format\n\n---\n\n## Related Tools\n\n- **[OCR](doc:functionality/ocr)** - Make scanned images searchable before extracting text\n- **[Compress](doc:functionality/compress)** - Reduce file size after adding images\n- **[Security](doc:functionality/security/security)** - Add watermarks or sanitize metadata",
|
||
"sourcePath": "docs/Functionality/Content-Editing/Content-Editing.md",
|
||
"editUrl": "https://github.com/Stirling-Tools/Stirling-Tools.github.io/blob/main/docs/Functionality/Content-Editing/Content-Editing.md"
|
||
},
|
||
"functionality/convert/convert": {
|
||
"id": "functionality/convert/convert",
|
||
"title": "Convert",
|
||
"description": "Convert files to and from PDF format",
|
||
"section": "functionality/convert",
|
||
"markdown": "Convert between PDF and 50+ file formats including documents, images, web pages, and more.\n\n---\n\n## How to Use\n\n1. **Select conversion type** - Choose what you're converting from and to\n2. **Upload files** - Add one or multiple files\n3. **Configure options** - Adjust quality, DPI, layout (optional)\n4. **Convert** - Process and download\n\n---\n\n## Supported Conversions\n\n### Convert TO PDF\n\n| Category | Formats |\n|----------|---------|\n| **Office** | DOCX, DOC, ODT, XLSX, XLS, ODS, PPTX, PPT, ODP, TXT, RTF |\n| **Images** | JPG, JPEG, PNG, GIF, BMP, TIFF, WEBP, SVG |\n| **Web** | HTML (with CSS/images via ZIP), URL, Markdown |\n| **Email** | EML, MSG (Outlook) |\n| **eBook** | EPUB, MOBI, AZW3, FB2 |\n| **Comics** | CBZ, CBR |\n\neBook and Outlook (MSG) inputs are converted to PDF on the self-hosted server (eBook conversion uses the bundled Calibre runtime; enable the Calibre group if your image excludes it).\n\n### Convert FROM PDF\n\n| Category | Formats |\n|----------|---------|\n| **Office** | DOCX, ODT, PPTX, ODP, XLSX, TXT, RTF, Markdown |\n| **Images** | PNG, JPG, GIF, TIFF, BMP, WEBP |\n| **Data** | CSV, HTML, XML |\n| **Archival / Print** | PDF/A, PDF/X |\n| **eBook** | EPUB, AZW3 |\n| **Comics** | CBZ, CBR |\n\nPDF to Excel extracts tabular data and writes one worksheet per detected table. PDF to eBook (EPUB/AZW3) uses the bundled Calibre runtime. PDF/X is the print-optimized variant of PDF/A and is chosen from the same Archive / Print option (it needs Ghostscript, which is in the standard Docker image).\n\n---\n\n## Conversion Options\n\n### Image Settings (when converting to/from images)\n- **DPI:** 72 (screen), 150 (standard), 300 (print)\n- **Color Mode:** Color, Grayscale, Black & White\n- **Layout:** Fit to page, maintain aspect ratio, fill page\n- **Output:** Single PDF or separate files\n\n### PDF to Word / Office\n- Works best with digital PDFs (not scanned images)\n- For scanned PDFs, run [OCR](doc:functionality/ocr) first\n- Complex layouts may need manual adjustment after conversion\n\n### PDF to CSV\n- Works best with simple, well-structured tables in digital PDFs\n- Not reliable for scanned documents\n\n### PDF to Markdown\n- Table-aware converter that runs locally on your server\n- Turns larger text into Markdown headings based on font size\n- Rebuilds detected tables as Markdown tables, joining tables that split across a page break\n- Works best with digital PDFs; run [OCR](doc:functionality/ocr) first for scanned input\n\n---\n\n## Automation and API conversions\n\nA few conversions have no button in the Convert tool. They run only through the [API](doc:api) and the [Automate / pipeline](doc:configuration/automation/pipeline) workflow.\n\n- **PDF to vector / page-description formats** - export a PDF as EPS, PS, PCL, or XPS for print and publishing workflows.\n- **PostScript to PDF** - turn PostScript files (PS, EPS, EPSF) into PDF, with an optional print-oriented (prepress) profile.\n\nThe vector and PostScript conversions need the **Ghostscript** group, which is included in the standard Docker image.\n\nSee the [API reference](doc:api) for the exact parameters of these conversions.\n\n---\n\n## API Usage\n\n\n \n ```bash\n curl -X POST http://stirling-pdf:8080/api/v1/convert/img/pdf \\\n -F \"fileInput=@image.jpg\" \\\n -F \"colorType=color\" \\\n -F \"fitOption=maintainAspectRatio\" \\\n -o output.pdf\n ```\n \n \n ```bash\n curl -X POST http://stirling-pdf:8080/api/v1/convert/pdf/word \\\n -F \"fileInput=@document.pdf\" \\\n -o output.docx\n ```\n \n\n\nSee [API Documentation](doc:api) for complete endpoint reference.\n\n---\n\n## Related Tools\n\n- **[Compress](doc:functionality/compress)** - Reduce file size after conversion\n- **[OCR](doc:functionality/ocr)** - Make scanned PDFs searchable before converting\n- **[Merge](doc:functionality/page-operations/page-operations)** - Combine multiple converted PDFs",
|
||
"sourcePath": "docs/Functionality/Convert/Convert.md",
|
||
"editUrl": "https://github.com/Stirling-Tools/Stirling-Tools.github.io/blob/main/docs/Functionality/Convert/Convert.md"
|
||
},
|
||
"functionality/features-pipeline": {
|
||
"id": "functionality/features-pipeline",
|
||
"title": "Features - Pipeline / Automate",
|
||
"description": "Pipeline and Automate Feature overview",
|
||
"section": "functionality",
|
||
"markdown": "> **ℹ️ Info: V2.0 Update**\n>\n> In V2.0, the pipeline feature's frontend interface has been renamed to **\"Automate\"** with an improved user experience. All backend functionality remains the same - existing pipeline JSON files work without changes.\n\n\nThe Pipeline/Automate feature in Stirling PDF enables automated, sequential processing of PDFs through multiple operations. This powerful automation tool allows you to:\n\n- `create-pipeline`: Create custom workflows combining multiple PDF operations into a single automated process. For example, you could create a pipeline that:\n - Splits a PDF\n - Adds watermarks to each part\n - Compresses the results\n - All in one automated sequence\n\n- `save-pipeline`: Save pipeline configurations for future use, share them with others, or use them in automated folder scanning processes\n\n- `folder-scanning`: Set up automated processing of files in watched folders using your pipeline configurations. The system will automatically process any files placed in these folders according to your pipeline rules\n\n## Additional Features\n\n- Web UI configuration interface for easy pipeline setup\n- JSON-based configuration for advanced users\n- Support for multiple pipeline configurations\n- Automatic unzipping of intermediate results\n- Error handling and validation\n- Ability to save and load pipeline configurations\n\nFor detailed information on setting up and using pipelines, see:\n- [Pipeline Configuration Guide](doc:configuration/automation/pipeline)\n- [Folder Scanning Guide](doc:configuration/storage/folderscanning)\n\n## Current Limitations\n\n- Cannot have multiple instances of the same operation in a single pipeline\n- Web UI does not support operations requiring multiple different types of inputs\n- Files and operations run in serial mode\n- Additional file inputs during processing are not supported via UI",
|
||
"sourcePath": "docs/Functionality/Features Pipeline.md",
|
||
"editUrl": "https://github.com/Stirling-Tools/Stirling-Tools.github.io/blob/main/docs/Functionality/Features Pipeline.md"
|
||
},
|
||
"functionality/fill-form": {
|
||
"id": "functionality/fill-form",
|
||
"title": "Fill Form",
|
||
"description": "Fill in a PDF's form fields right in the viewer and download the completed PDF",
|
||
"section": "functionality",
|
||
"markdown": "Fill Form lets you complete a PDF's interactive form fields directly in the viewer and download the filled result. Open a PDF that already contains form fields - text boxes, checkboxes, radio buttons, dropdowns - type your answers into the fields shown on the page, and save the completed document.\n\nFill Form works with fields that are already in the PDF; it does not add new fields. If a form has no fillable fields, there is nothing to type into.\n\n---\n\n## How to Use\n\n1. **Open the tool** - Select Fill Form from the tools list. It opens in the viewer workbench.\n2. **Load a PDF** - Upload a PDF that contains form fields. Stirling PDF reads the fields and overlays them on the page.\n3. **Fill the fields** - Click each field and enter its value. Checkboxes, radio buttons, and dropdowns can be toggled or selected.\n4. **Download** - Save to export the filled PDF.\n\n---\n\n## How It Differs from Other Form Tools\n\n- **Fill Form** keeps the fields editable - it just populates their values, so the form can still be changed later.\n- **Flatten** merges form fields into the page so they become part of the static document and can no longer be edited. Use it when you want to lock in answers before sending a final copy. See [Flatten](doc:functionality/security/security).\n- **Unlock PDF Forms** removes read-only restrictions from fields so locked fields can be edited again. Use it when a form refuses input because its fields are marked read-only. See [Unlock PDF Forms](doc:functionality/security/security).\n\n---\n\n## Notes\n\n- Runs in your self-hosted Stirling PDF instance with no external service or credits required. See [Modes](doc:modes-and-licensing).\n- The PDF must already contain fillable form fields. PDFs with no fields, or scanned image-only forms, have nothing to fill.\n- Automating form filling? You can do the same thing in a pipeline or script. See the [API reference](doc:api) for details.\n\n---\n\n## Related Tools\n\n- **[Multi-Tool Workbench](doc:functionality/multi-tool)** - Visual page editing\n- **[Complete Tool Reference](doc:functionality/functionality)** - All available tools",
|
||
"sourcePath": "docs/Functionality/Fill-Form.md",
|
||
"editUrl": "https://github.com/Stirling-Tools/Stirling-Tools.github.io/blob/main/docs/Functionality/Fill-Form.md"
|
||
},
|
||
"functionality/functionality": {
|
||
"id": "functionality/functionality",
|
||
"title": "PDF Tools",
|
||
"description": "All PDF tools organized by category",
|
||
"section": "functionality",
|
||
"markdown": "All tools organized by category.\n\n---\n\n## Most Popular\n\n- **[PDF Text Editor](doc:functionality/recommended-tools)** *(Alpha)* - Edit text and images in the browser\n- **[Multi-Tool](doc:functionality/multi-tool)** - Upload once, chain operations\n- **[Read & Annotate](doc:functionality/read-and-annotate)** - PDF viewer with annotations\n- **Merge** - Combine multiple PDFs\n- **[Convert](doc:functionality/convert/convert)** - 50+ format conversions\n- **[Compress](doc:functionality/compress)** - Reduce file size\n- **[OCR](doc:functionality/ocr)** - Make scanned PDFs searchable\n- **[Compare](doc:functionality/compare)** - See differences between PDFs\n- **Redact** - Remove sensitive content\n\n---\n\n## [Security](doc:functionality/security/security)\n\n- Add/Remove Password\n- Change Permissions\n- **[Sign](doc:functionality/security/sign)** - Handwritten signatures\n- **[Certificate Sign](doc:functionality/security/certificate-signing)** - Digital signatures\n- Validate Signature\n- Add Watermark\n- Sanitize PDF\n- Redact\n\n---\n\n## [Page Operations](doc:functionality/page-operations/page-operations)\n\n- Split PDF\n- Merge PDFs\n- Rotate Pages\n- Extract Pages\n- Reorganize Pages\n- Add Page Numbers\n- Remove Pages/Blank Pages\n\n**Detailed Guide:** [Redaction](doc:functionality/page-operations/redact)\n\n---\n\n## [Convert](doc:functionality/convert/convert)\n\n**To PDF:** Word, Excel, PowerPoint, Images, HTML, Markdown, Email, and more\n\n**From PDF:** Word, PowerPoint, Text, Images, CSV, HTML, XML, PDF/A, and more\n\n---\n\n## [Content & Editing](doc:functionality/content-editing/content-editing)\n\n- Add/Extract Images\n- Add Stamp\n- Edit Metadata\n- Remove Annotations\n- Replace Colors\n- Get PDF Info\n\n---\n\n## [Advanced Tools](doc:functionality/advanced-tools)\n\n- Overlay PDFs\n- Booklet Imposition\n- Multi-Page Layout\n- Scale Pages\n- Auto Rename\n- Show JavaScript\n- Scanner Effect\n\n---\n\n## Quick Tool Finder\n\n**I want to...**\n- Reduce file size → **[Compress](doc:functionality/compress)**\n- Make searchable → **[OCR](doc:functionality/ocr)**\n- Combine files → **Merge**\n- Split into parts → **Split**\n- Convert format → **[Convert](doc:functionality/convert/convert)**\n- Add signature → **[Sign](doc:functionality/security/sign)** or **[Certificate Sign](doc:functionality/security/certificate-signing)**\n- Remove content → **Redact** or **Sanitize**\n- Edit pages → **Reorganize Pages** or **[Multi-Tool](doc:functionality/multi-tool)**\n- Automate workflow → **[Automate](doc:configuration/automation/pipeline)**",
|
||
"sourcePath": "docs/Functionality/Functionality.md",
|
||
"editUrl": "https://github.com/Stirling-Tools/Stirling-Tools.github.io/blob/main/docs/Functionality/Functionality.md"
|
||
},
|
||
"functionality/mobile-scanner": {
|
||
"id": "functionality/mobile-scanner",
|
||
"title": "Mobile Scanner",
|
||
"description": "Scan documents from your mobile phone and upload them directly to your desktop or server",
|
||
"section": "functionality",
|
||
"markdown": "## Mobile Scanner (Phone Upload)\n\nThe Mobile Scanner lets you scan documents with your phone camera and upload them straight to your Stirling PDF instance. Show a QR code on your desktop, scan it with your phone, and your photos transfer automatically - no cables, no cloud services, no manual file handling.\n\nDepending on your [server settings](doc:configuration/customisation/mobile-scanner), uploaded images can be automatically converted to PDF with configurable page format, resolution, and scaling options.\n\n## How It Works\n\n1. Desktop generates a QR code with a unique session ID\n2. Mobile device scans the QR code\n3. Mobile uploads photos or images\n4. Desktop retrieves files\n5. Files auto-delete after 10 minutes of inactivity or upon download\n\n## Using Mobile Scanner in the desktop app\n\nMobile Scanner also works in the Stirling PDF desktop app. A couple of things are worth knowing:\n\n- Your phone and the desktop must be on the **same local network (Wi-Fi)**.\n- The QR code points to your desktop's address on that network, so your phone connects straight to it. Nothing leaves your local network.\n- The desktop upload page is a simple capture-and-send page. It does **not** do the automatic page edge detection and auto-cropping that the browser-based Mobile Scanner offers, so line up and crop your photos before uploading.\n\n## Privacy & Security\n\n- Files stored temporarily in system temp directory only\n- No permanent storage on server\n- Auto-deleted after 10 minutes\n- Works on local network or HTTPS tunnel\n- No cloud storage involved\n\n## Configuration\n\nSee [Mobile Scanner Configuration](doc:configuration/customisation/mobile-scanner) for enable/disable and PDF conversion settings.",
|
||
"sourcePath": "docs/Functionality/Mobile-Scanner.md",
|
||
"editUrl": "https://github.com/Stirling-Tools/Stirling-Tools.github.io/blob/main/docs/Functionality/Mobile-Scanner.md"
|
||
},
|
||
"functionality/multi-tool": {
|
||
"id": "functionality/multi-tool",
|
||
"title": "Multi-Tool Workbench",
|
||
"description": "Visual page editor for PDF manipulation",
|
||
"section": "functionality",
|
||
"markdown": "**Tool ID:** `multiTool`\n\nMulti-Tool is Stirling PDF's visual page editor. Upload PDFs and manipulate pages directly - rotate, reorder, delete, split, and insert pages or files.\n\n> **💡 Tip**\n>\n> Multi-Tool uses browser file storage so you can upload files once and work with them without re-uploading.\n\n\n---\n\n## Features\n\n- **Thumbnail grid** - See every page at a glance with zoomable previews\n- **Rotate** pages left/right, individually or in bulk\n- **Reorder** pages by dragging and dropping\n- **Delete** unwanted pages\n- **Split** PDFs by toggling split positions between pages\n- **Insert page breaks** - add blank pages at any position\n- **Insert files** - add entire PDFs into the document at any point\n- **Select pages** individually, select all, or by page number range\n- **Export selected** pages or save the full document\n- **Undo/redo** all changes\n\n---\n\n## How to Use\n\n1. **Upload** - Drag and drop one or more PDFs into the workspace\n2. **Select pages** - Click thumbnails or use select all / page number input\n3. **Edit** - Rotate, reorder, delete, split, or insert as needed\n4. **Export** - Save changes to download the full PDF, or export selected pages only\n\n---\n\n## Multi-Tool vs. Individual Tools vs. Automate\n\n| | Multi-Tool | Individual Tools | Automate |\n|---|---|---|---|\n| Multiple operations | Yes | No | Yes |\n| Visual feedback | Yes | Limited | No |\n| Repeatable workflow | No | No | Yes |\n| Folder watching | No | No | Yes |\n\n---\n\n## Related Documentation\n\n- **[Automate (Pipeline)](doc:functionality/features-pipeline)** - Automated workflows\n- **[Complete Tool Reference](doc:functionality/functionality)** - All available tools",
|
||
"sourcePath": "docs/Functionality/Multi-Tool.md",
|
||
"editUrl": "https://github.com/Stirling-Tools/Stirling-Tools.github.io/blob/main/docs/Functionality/Multi-Tool.md"
|
||
},
|
||
"functionality/ocr": {
|
||
"id": "functionality/ocr",
|
||
"title": "OCR (Optical Character Recognition)",
|
||
"description": "Make scanned PDFs searchable and editable with OCR",
|
||
"section": "functionality",
|
||
"markdown": "Make scanned PDFs searchable and selectable by recognizing text in images. Uses the Tesseract OCR engine.\n\n> **📝 Note: Requires a server backend**\n>\n> OCR needs a server-side backend with Tesseract installed. The desktop app cannot OCR in local-only mode - connect it to Stirling Cloud or a self-hosted server that has OCR available.\n\n\n---\n\n## When You Need OCR\n\n- Scanned paper documents (no text layer)\n- Photos of documents or whiteboards\n- Image-only PDFs where you can't select or search text\n\n---\n\n## How to Use\n\n1. **Upload Your PDF** - Select a scanned or image-based PDF\n2. **Select Language(s)** - Choose the language(s) in your document\n3. **Configure Options** - Adjust OCR mode and preprocessing (optional)\n4. **Process** - Run OCR\n5. **Download** - Get your searchable PDF\n\n---\n\n## Options\n\n| Option | Values | Description |\n|--------|--------|-------------|\n| **Languages** | Select from installed packs | Must match the languages in your document. Select multiple if needed |\n| **OCR Mode** | Auto (default), Force, Strict | Auto skips pages that already have text. Force re-OCRs everything. Strict aborts if any text is found |\n| **Compatibility Mode** | On/Off | Uses sandwich PDF format for better compatibility with older software (larger files) |\n\n### Advanced Options\n\n| Option | Description |\n|--------|-------------|\n| **Deskew** | Automatically straighten tilted/skewed pages |\n| **Clean Input** | Preprocess by removing noise and enhancing contrast for better recognition |\n| **Clean Final Output** | Post-process the final PDF to remove OCR artifacts |\n| **Create Text File** | Generate a separate .txt file with the extracted text (output as ZIP) |\n\nAdvanced options require OCRmyPDF. With Tesseract only, they are ignored.\n\n---\n\n## Language Packs\n\nAvailable languages depend on which Tesseract language packs are installed. The default Docker image includes English, German, French, Portuguese, and Chinese Simplified. To add more languages, see the **[OCR Configuration Guide](doc:configuration/operations/ocr)**.\n\n---\n\n## Limitations\n\n- Tesseract recognizes text only - it does not do table-structure or formula recognition\n- Handwritten text has limited accuracy\n- Stylized/decorative fonts and very small text (< 8pt) are challenging\n- For best results, use 300 DPI or higher scans with good contrast\n- To OCR non-English documents, install the matching Tesseract language pack (see [Language Packs](#language-packs))\n\n---\n\n## API Usage\n\n```bash\ncurl -X POST http://stirling-pdf:8080/api/v1/misc/ocr-pdf \\\n -F \"fileInput=@scanned.pdf\" \\\n -F \"languages=eng\" \\\n -F \"languages=spa\" \\\n -F \"ocrType=skip-text\" \\\n -F \"ocrRenderType=hocr\" \\\n -F \"deskew=true\" \\\n -F \"clean=true\" \\\n -F \"cleanFinal=true\" \\\n -F \"sidecar=false\" \\\n -o searchable.pdf\n```\n\nSee [API Documentation](doc:api) for complete endpoint reference.\n\n---\n\n## Related Tools\n\n- **[Convert](doc:functionality/convert/convert)** - Convert OCR'd PDFs to Word, text, or other formats\n- **[Compress](doc:functionality/compress)** - Reduce file size after OCR\n- **[Auto-Rename](doc:functionality/advanced-tools)** - Rename files based on OCR'd content",
|
||
"sourcePath": "docs/Functionality/OCR.md",
|
||
"editUrl": "https://github.com/Stirling-Tools/Stirling-Tools.github.io/blob/main/docs/Functionality/OCR.md"
|
||
},
|
||
"functionality/page-operations/page-operations": {
|
||
"id": "functionality/page-operations/page-operations",
|
||
"title": "Page Operations",
|
||
"description": "List of all Page related features",
|
||
"section": "functionality/page-operations",
|
||
"markdown": "## Features - Page Operations\n\nTools for combining, splitting, rearranging, and reshaping the pages of your PDFs.\n\n---\n\n## Combine & Arrange\n\n- **Merge**: Join several PDFs together into one document.\n\n- **Reorganize Pages**: Rearrange, duplicate, or delete pages within a PDF.\n\n- **Extract Pages**: Pull out the pages you choose and save them as a new PDF.\n\n- **Remove Pages**: Delete the pages you don't want from a PDF.\n\n- **Rotate**: Turn pages to the orientation you want.\n\n- **Overlay PDFs**: Lay one PDF over another (on top, behind, and other arrangements) to combine their content.\n\n- **Add Attachments**: Embed files inside a PDF so they travel with it. Readers that support attachments can pull the files back out later.\n\n- **Add Page Numbers**: Stamp page numbers and custom text around the edges of your pages, with control over position, format, and which pages to number.\n\n- **Edit Table of Contents**: Add, edit, or rework a PDF's bookmarks so readers can navigate the document more easily.\n\n---\n\n## Split\n\nThe **Split** tool breaks one PDF into several files. Pick a method when you open it:\n\n- **Split at Page Numbers**: Cut the document at the page numbers you enter (for example `1,3-5,7`).\n\n- **Split by Chapters**: Create a separate file for each bookmarked section, using the document's table of contents to decide where each one starts.\n\n- **Split by Sections**: Slice each page into a grid of horizontal and vertical pieces - handy for splitting a page in half or quarters.\n\n- **Split by File Size**: Break a PDF into parts that each stay under a maximum file size you set.\n\n- **Split by Page Count** / **Split by Document Count**: Split into files of a set number of pages each, or into a set number of files.\n\n- **Split by Page Divider**: Separate scanned batches automatically using QR code divider sheets placed between documents - built for bulk scanning workflows.\n\n- **Split into Printable Chunks** (poster print): Tile each oversized page into a grid of standard-size sheets (A4, Letter, and so on) so you can print a large page across several sheets and tape them into a poster.\n\n---\n\n## Resize & Reshape\n\n- **Adjust Page Size/Scale**: Change the page size and how big the content sits on it. Choose a target size (A0-A6, Letter, Legal, or Keep Original Size) and a scale factor for the content. The **Page orientation** option (Portrait or Landscape) lets you apply the chosen size either way - for example A4 turned to landscape. Orientation has no effect when you keep the original size.\n\n- **Crop**: Trim pages down to the area you want.\n\n- **Multi-Page Layout**: Place several PDF pages together onto each output page.\n\n- **PDF to Single Large Page**: Stack every page into one tall, continuous page.\n\n- **Booklet Imposition**: Reorder pages for booklet printing so that, once folded and bound, they read in the right sequence. Produces printer-ready booklets.\n\n- **Adjust Colours/Contrast**: Tune the contrast, brightness, and saturation of the pages.\n\n---\n\n## Clean Up\n\n- **Remove Blank Pages**: Automatically find and drop pages with little or no content.\n\n---\n\n## Related Tools\n\n- **[Redaction](doc:functionality/page-operations/redact)** - Permanently remove sensitive content from pages",
|
||
"sourcePath": "docs/Functionality/Page-Operations/Page-Operations.md",
|
||
"editUrl": "https://github.com/Stirling-Tools/Stirling-Tools.github.io/blob/main/docs/Functionality/Page-Operations/Page-Operations.md"
|
||
},
|
||
"functionality/page-operations/redact": {
|
||
"id": "functionality/page-operations/redact",
|
||
"title": "Redaction",
|
||
"section": "functionality/page-operations",
|
||
"markdown": "## Redaction Tool User Guide\n\n## Overview\nThe Redaction tool permanently removes sensitive information from PDFs. It offers two modes:\n\n- **Automatic** - Type the words or regex patterns to remove and let the tool find and redact every match across the document.\n- **Manual** - Open the PDF in the viewer and draw redactions over specific text, areas, or whole pages.\n\nUnlike a simple black box drawn on top of the page, automatic redaction deletes the matching text from the file so the underlying text is genuinely removed - not merely hidden. You can also flatten the result to an image to guarantee nothing recoverable is left behind.\n\n## Choosing a mode\nAt the top of the Redact panel, the **Redaction Method** selector switches between **Automatic** and **Manual**. Selecting **Manual** opens the document in the viewer, where the drawing controls described below appear.\n\n---\n\n## Automatic redaction\nAutomatic redaction searches the document for the text you specify and removes every match.\n\n**How to use:**\n1. Choose **Automatic** as the redaction method.\n2. Under **Redaction Settings**, add each **word or pattern** to redact. Add as many as you need - the tool scans for all of them in a single pass, and matches are found across multiple columns and text lines.\n3. (Optional) Open **Advanced Settings** to adjust:\n - **Use Regex** - Treat each entry as a regular expression rather than a literal word.\n - **Whole Word Search** - Match only complete words, not substrings.\n - **Box Colour** and **Custom Extra Padding** - Style the redaction boxes.\n - **Convert PDF to PDF-Image** - Flatten the redacted PDF to an image so no text remains behind the boxes (enabled by default).\n4. Click **Redact**.\n\n### Redacting PII with patterns\nWith **Use Regex** enabled you can target common personally identifiable information (PII) by entering the matching pattern. For example:\n\n| Type | Example pattern |\n| --- | --- |\n| Social Security number (SSN) | `\\d{3}-\\d{2}-\\d{4}` |\n| Credit / debit card | `\\d{4}[ -]?\\d{4}[ -]?\\d{4}[ -]?\\d{4}` |\n| IBAN | `[A-Z]{2}\\d{2}[A-Z0-9]{1,30}` |\n| US routing number (ABA) | `\\b\\d{9}\\b` |\n| Account number (labelled) | `[Aa]ccount\\s*#?\\s*\\d{6,}` |\n| Email address | `[\\w.-]+@[\\w.-]+\\.\\w+` |\n| Phone number | `\\(\\d{3}\\)\\s*\\d{3}-\\d{4}` |\n\nAdd one pattern per entry; refine them to suit your documents to keep false positives down.\n\n### How text is removed\nAutomatic redaction deletes the matching text from the file rather than just covering it. For maximum safety, keep **Convert PDF to PDF-Image** enabled so no recoverable text can remain under the boxes.\n\n---\n\n## Manual redaction\nManual redaction lets you mark sensitive content visually in the viewer using three methods: text selection, area drawing, or entire page redaction.\n\n### 1. Text Selection Redaction\nPerfect for redacting specific words, sentences, or paragraphs.\n\n**How to use:**\n1. Click the text selection icon in the toolbar\n\n \n\n2. Select the text you want to redact\n3. Apply the redaction by either:\n - Pressing `Ctrl + S`\n - Clicking the save icon in the toolbar\n \n \n\n### 2. Area Drawing Redaction\nIdeal for redacting images, tables, or irregular content blocks.\n\n**How to use:**\n1. Click the drawing tool icon in the toolbar\n\n \n\n2. Click and hold at your starting point\n3. Drag to create a rectangle over the area\n4. Click again to confirm and apply the redaction\n - A red border means unsaved\n\n \n\n - A green border means saved and active\n \n \n\n### 3. Page Redaction\nUsed when you need to redact entire pages.\n\n**How to use:**\n1. Open the page redaction dialog\n \n \n\n \n\n3. Enter page numbers or ranges (e.g., \"1,3-5,7\")\n4. Select your preferred color\n5. Click \"Apply\" to save changes\n\n## Customizing Redactions\n\n### Changing Colors\n\n**For new redactions:**\n1. Click the color palette icon in the toolbar\n \n \n\n2. Select your preferred color\n3. Any new redactions will use this color\n\n**For existing redactions:**\n1. Click the redacted area\n2. Click the color palette icon that appears\n3. Choose your new color\n \n\n\n### Removing Redactions\n1. Click the redacted area you want to remove\n2. Either:\n - Click the trash icon that appears\n - Press the `Delete` key\n\n\n\n### Converting PDF to PDF-image (Used in removing text behind the box)\nTo enable PDF to PDF-image option:\n 1. Click on the image icon\n \n \n\nTo disable PDF to PDF-image option:\n 1. Click on the image icon\n \n \n\n- If the image icon is green, then the option is enabled, if it is red then it is disabled.\n\n## Keyboard Shortcuts\n- `Ctrl + S`: Save/apply redaction\n- `Delete`: Remove selected redaction\n- `Escape`: Cancel unsaved area drawing\n\n## Tips\n- If you're in drawing mode and need to delete a redaction, temporarily disable drawing mode first\n- You can combine different redaction methods in the same document\n- Always review your redactions before finalizing the document\n- Redaction colors can be changed at any time, even after applying",
|
||
"sourcePath": "docs/Functionality/Page-Operations/redact.md",
|
||
"editUrl": "https://github.com/Stirling-Tools/Stirling-Tools.github.io/blob/main/docs/Functionality/Page-Operations/redact.md"
|
||
},
|
||
"functionality/read-and-annotate": {
|
||
"id": "functionality/read-and-annotate",
|
||
"title": "Read & Annotate PDFs",
|
||
"description": "Interactive PDF viewer with annotation tools for reading and markup",
|
||
"section": "functionality",
|
||
"markdown": "Read PDFs directly in your browser while adding comments, highlights, drawings, shapes, and other markup - all in one interactive viewer.\n\n> **💡 Tip**\n>\n> Built with **[EmbedPDF](https://www.embedpdf.com/)**, an advanced open-source PDF viewer with full support for PDF annotation standards.\n\n\n---\n\n## Annotation Tools\n\n### Text Markup\n- **Highlight**, **Underline**, **Strikeout**, **Squiggly underline**\n- Full color picker and opacity control (10-100%)\n\n### Drawing\n- **Pen** - Freehand drawing with adjustable width (1-12px)\n- **Freehand Highlighter** - Width (1-20px) and opacity control\n\n### Shapes\n- **Square**, **Circle**, **Line**, **Polygon**\n- Independent stroke and fill color, border width (0-12px), opacity\n\n### Comments & Text\n- **Comment** - Attach comments to any location\n- **Insert Text** / **Replace Text** - Mark text insertions and replacements\n- **Text box** - Free text with font size, alignment, and background color\n- **Note** - Sticky notes with background color\n\n### Images\n- **Add Image** - Place images or photos anywhere on the page\n\nFor adding signatures (typed, drawn, or uploaded), use the dedicated [Sign PDFs](doc:functionality/security/sign) tool.\n\n### Comment Threads\n- Reply threads on any annotation\n- Author attribution and timestamps\n- Comments sidebar listing all comments grouped by page; within each page, comments appear in visual reading order (top-to-bottom, left-to-right)\n- Click to navigate to the source annotation\n\n### Side Panels\n- Dedicated side panels for **comments**, **annotations**, and **attachments**, each with quick controls for adding items\n- A **clear all** button removes every comment or annotation in one action\n\n---\n\n## Viewer Features\n\n- Page navigation (first/prev/next/last, direct page jump)\n- Zoom in/out with manual percentage entry\n- Single page and dual-page spread modes\n- Thumbnail sidebar, bookmark sidebar, attachment sidebar\n- Full-text search (Ctrl+F) with result highlighting and navigation\n- Text selection with select-all (Ctrl+A) and a floating Copy button that appears over the selection\n- Print (Ctrl+P)\n\n---\n\n## Keyboard Shortcuts\n\n| Shortcut | Action |\n|----------|--------|\n| **Ctrl+A** | Select all text |\n| **Ctrl+F** | Search |\n| **Ctrl+P** | Print |\n| **Ctrl+S** | Save changes |\n| **Ctrl+Z** | Undo |\n| **Ctrl+Shift+Z / Ctrl+Y** | Redo |\n| **Ctrl++/-** | Zoom in/out |\n| **Ctrl+0** | Fit to width |\n| **Home / End** | First / last page |\n| **PageUp / PageDown** | Previous / next page |\n\n---\n\n## Saving\n\n- **Save Changes** button or Ctrl+S to apply annotations\n- Undo/redo history available before saving\n- Annotations are embedded in standard PDF format and compatible with Adobe Acrobat, Foxit Reader, PDF-XChange, and macOS Preview\n\n---\n\n## Related Documentation\n\n- **[Multi-Tool](doc:functionality/multi-tool)** - Page editing workspace\n- **[Sign PDFs](doc:functionality/security/sign)** - Add signatures",
|
||
"sourcePath": "docs/Functionality/Read-and-Annotate.md",
|
||
"editUrl": "https://github.com/Stirling-Tools/Stirling-Tools.github.io/blob/main/docs/Functionality/Read-and-Annotate.md"
|
||
},
|
||
"functionality/recommended-tools": {
|
||
"id": "functionality/recommended-tools",
|
||
"title": "Recommended Tools",
|
||
"description": "The most commonly used PDF tools in Stirling PDF",
|
||
"section": "functionality",
|
||
"markdown": "The PDF tools you'll reach for most often, featured on the home page for quick access.\n\n---\n\n## PDF Text Editor *(Alpha)* {#pdf-text-editor}\n\nOpen a PDF and edit its text and images right in your browser, then save a new copy. Edits are grouped so you can change a whole paragraph at once.\n\n> **⚠️ Warning: Experimental**\n>\n> The PDF Text Editor is **alpha / experimental**. Its behaviour and output may change, and complex PDFs may not come out perfectly. Always keep a copy of your original file.\n\n\n---\n\n## Multi-Tool\n\nUpload your PDFs once, then rotate, reorder, delete, and split pages in a single workspace without re-uploading between steps.\n\n**[Multi-Tool Guide →](doc:functionality/multi-tool)**\n\n---\n\n## Merge PDFs\n\nCombine several PDFs into one file. Drag and drop to set the order before you merge.\n\n---\n\n## Compare\n\nSpot the differences between two versions of a document. The comparison is text-based: removed words are highlighted in red and added words in green.\n\n**[Compare Guide →](doc:functionality/compare)**\n\n---\n\n## Compress\n\nShrink a PDF's file size (typically 10-90% smaller) by choosing how much quality you want to keep.\n\n**[Compress Guide →](doc:functionality/compress)**\n\n---\n\n## Convert\n\nConvert between PDF and 50+ formats, including images, Office documents, HTML, and more. You can convert several files in one go.\n\n**[Convert Guide →](doc:functionality/convert/convert)**\n\n---\n\n## OCR\n\nTurn scanned PDFs into searchable text by recognising the words in the page images. Supports 100+ languages.\n\n**[OCR Guide →](doc:functionality/ocr)**\n\n---\n\n## Redact\n\nPermanently remove sensitive information from a PDF. Draw boxes over what you want to hide, or let the tool find and remove text and patterns automatically.\n\n**Common patterns:**\n- SSN: `\\d{3}-\\d{2}-\\d{4}`\n- Phone: `\\(\\d{3}\\) \\d{3}-\\d{4}`\n- Email: `[\\w\\.-]+@[\\w\\.-]+\\.\\w+`\n\nRedaction is permanent - the original content cannot be recovered.\n\n**[Redaction Guide →](doc:functionality/page-operations/redact)**\n\n---\n\n## More Tools\n\n- **[All Tools](doc:functionality/functionality)** - Complete tool reference\n- **[Advanced Tools](doc:functionality/advanced-tools)** - Automation, repair, overlay, and more\n- **[API Documentation](doc:api)** - Programmatic access",
|
||
"sourcePath": "docs/Functionality/Recommended-Tools.md",
|
||
"editUrl": "https://github.com/Stirling-Tools/Stirling-Tools.github.io/blob/main/docs/Functionality/Recommended-Tools.md"
|
||
},
|
||
"functionality/security/certificate-signing": {
|
||
"id": "functionality/security/certificate-signing",
|
||
"title": "Certificate Signing",
|
||
"description": "Sign and validate PDF certificates",
|
||
"section": "functionality/security",
|
||
"markdown": "Digitally sign PDFs with X.509 certificates and validate existing signatures against trusted certificate chains.\n\n---\n\n## Signing PDFs\n\n\n \n Uses an auto-generated server certificate, so users can sign without uploading their own. This is a Pro/Enterprise feature and must be enabled by an administrator; it is not available on the free self-hosted edition.\n\n 1. Go to **Certificate Sign** tool\n 2. Upload PDF\n 3. In the **Certificate source** step, choose **Server** (shown only when the server certificate feature is enabled)\n 4. Configure signature appearance (optional)\n 5. Sign and download\n\n **Configuration (Pro/Enterprise):**\n\n \n \n ```yaml\n system:\n serverCertificate:\n enabled: true\n organizationName: Stirling-PDF\n validity: 365\n regenerateOnStartup: false\n ```\n \n \n ```bash\n SYSTEM_SERVERCERTIFICATE_ENABLED=true\n SYSTEM_SERVERCERTIFICATE_ORGANIZATIONNAME=\"My Company\"\n SYSTEM_SERVERCERTIFICATE_VALIDITY=365\n ```\n \n \n \n \n Use your own X.509 certificate. Supported formats: PKCS#12 (`.p12`/`.pfx`), PEM (separate private key + certificate), and JKS. This option is available on every edition, including free self-hosted.\n\n 1. Go to **Certificate Sign** tool\n 2. Upload PDF\n 3. In the **Certificate source** step, choose **Upload**, then pick your certificate format\n 4. Upload your certificate file(s) and enter the password (if any)\n 5. Configure signature appearance\n 6. Sign and download\n\n ```bash\n # Generate a test certificate\n openssl req -x509 -newkey rsa:4096 -keyout key.pem -out cert.pem -days 365\n\n # Convert to PKCS#12\n openssl pkcs12 -export -out mycert.p12 -inkey key.pem -in cert.pem\n ```\n \n \n Use a shared organization certificate so all users can sign without uploading their own. This is a Pro/Enterprise feature managed by an administrator; it is not available on the free self-hosted edition.\n\n An administrator uploads your own `.p12`/`.pfx` keystore (with its password) through the admin server-certificate settings, replacing the auto-generated certificate. The server certificate feature must be enabled:\n\n ```yaml\n system:\n serverCertificate:\n enabled: true\n organizationName: Acme Corp\n ```\n\n Once configured, users can choose **Server** in the **Certificate source** step to sign with the shared certificate.\n \n \n Sign with a certificate held on your own machine - a USB token or smart card (PKCS#11), or the Windows certificate store. The private key never leaves the device: Stirling PDF asks the token or operating system to perform the signing. This option appears only in the **desktop app** and works on every edition.\n\n 1. Go to **Certificate Sign** tool\n 2. Upload PDF\n 3. In the **Certificate source** step, choose **This device**\n 4. Pick the hardware type:\n - **Windows certificate store** (Windows only) - available certificates are listed automatically; pick one. Windows prompts for the card or token PIN when you sign.\n - **USB token** (PKCS#11, Windows/macOS/Linux) - choose the PKCS#11 driver (common drivers such as OpenSC, YubiKey, SafeNet eToken, and Thales IDPrime are detected automatically, or enter a custom driver path), enter the token PIN, then **List certificates** and pick one.\n 5. Configure signature appearance\n 6. Sign and download\n\n For security, you can only sign with a PKCS#11 driver that Stirling PDF auto-detects or one you explicitly allow. Add extra driver libraries with the `STIRLING_PKCS11_LIBRARIES` environment variable - absolute paths to the driver files, separated by your platform's path separator:\n\n ```bash\n STIRLING_PKCS11_LIBRARIES=/usr/lib/opensc-pkcs11.so\n ```\n\n :::note macOS and Linux\n The macOS Keychain is not a direct signing source. On macOS and Linux, reach a smart card or token through a PKCS#11 driver such as OpenSC.\n :::\n \n\n\n---\n\n### Signature Appearance\n\n**Visible:** Appears as a box on a chosen page showing the signer name, signing date, and reason, with an optional logo.\n\n**Invisible:** Embedded in PDF metadata only, not visible on the page.\n\n---\n\n## Validating Signatures\n\nVerify that a PDF was signed by the claimed certificate, the certificate is trusted, the PDF hasn't been modified, and the certificate hasn't been revoked.\n\n### Trust Sources\n\n| Source | Config Key | What It Trusts |\n|--------|-----------|----------------|\n| Server certificates | `serverAsAnchor` | PDFs signed by your Stirling PDF instance |\n| System trust store | `useSystemTrust` | OS-trusted CAs |\n| Mozilla CA bundle | `useMozillaBundle` | Mozilla's curated CA list |\n| Adobe AATL | `useAATL` | Adobe Approved Trust List |\n| EU EUTL | `useEUTL` | EU Trusted List (eIDAS) |\n\n### Revocation Checking\n\nCertificates can be revoked (invalidated) after they're issued - for example if a private key is compromised. Revocation checking lets Stirling PDF verify that a certificate is still valid at the time of use.\n\n```yaml\nsecurity:\n validation:\n revocation:\n mode: none # Options: none, ocsp, crl, ocsp+crl\n hardFail: false\n```\n\n| Mode | What it does |\n|------|-------------|\n| `none` | Skip revocation checks entirely |\n| `ocsp` | Check in real-time against the certificate authority's server (requires internet) |\n| `crl` | Download a list of revoked certificates (can work offline with cached lists) |\n| `ocsp+crl` | Try real-time check first, fall back to the list if that fails |\n\n**`hardFail`** controls what happens when the revocation check itself fails (e.g. server unreachable):\n- `false` (default) - validation passes with a warning\n- `true` - validation fails entirely. Use this in high-security environments where you'd rather reject a signature than skip the check.\n\n---\n\n## Timestamping PDFs\n\nUse the **Timestamp PDF** tool to add a trusted RFC 3161 timestamp that proves your PDF existed at a particular point in time. Pick a Time Stamp Authority (TSA), then download the timestamped file. The timestamp is added without altering the rest of the file, so any existing signatures stay intact.\n\n### Trusted Time Stamp Authorities\n\nYou can pick from the built-in TSA presets below, or your administrator can add more. Built-in presets:\n\n| Provider | URL |\n|----------|-----|\n| DigiCert | `http://timestamp.digicert.com` |\n| Sectigo | `http://timestamp.sectigo.com` |\n| SSL.com | `http://ts.ssl.com` |\n| FreeTSA | `https://freetsa.org/tsr` |\n| MeSign | `http://tsa.mesign.com` |\n\nIf you don't choose one, the server default is used (DigiCert by default). Administrators can allow additional TSA servers and change the default in `settings.yml`:\n\n```yaml\nsecurity:\n timestamp:\n defaultTsaUrl: http://timestamp.digicert.com\n customTsaUrls:\n - https://tsa.example.com/timestamp\n```\n\n### API Usage\n\n```bash\n# tsaUrl is optional; omit to use the server default\ncurl -X POST http://stirling-pdf:8080/api/v1/security/timestamp-pdf \\\n -F \"fileInput=@document.pdf\" \\\n -F \"tsaUrl=http://timestamp.digicert.com\" \\\n -o timestamped.pdf\n```\n\n---\n\n## Configuration Examples\n\n\n \n ```yaml\n system:\n serverCertificate:\n enabled: true\n\n security:\n validation:\n trust:\n serverAsAnchor: true\n useSystemTrust: true\n ```\n \n \n ```yaml\n system:\n serverCertificate:\n enabled: true\n organizationName: Acme Corp\n validity: 365\n\n security:\n validation:\n trust:\n serverAsAnchor: true\n useSystemTrust: true\n useMozillaBundle: true\n useAATL: false\n allowAIA: false\n revocation:\n mode: ocsp\n hardFail: false\n ```\n \n \n ```yaml\n security:\n validation:\n trust:\n serverAsAnchor: false\n useSystemTrust: true\n useMozillaBundle: true\n useAATL: true\n useEUTL: true\n allowAIA: false\n revocation:\n mode: ocsp+crl\n hardFail: true\n ```\n \n \n ```yaml\n security:\n validation:\n trust:\n serverAsAnchor: false\n useSystemTrust: false\n useMozillaBundle: false\n useAATL: false\n useEUTL: true\n eutl:\n lotlUrl: https://ec.europa.eu/tools/lotl/eu-lotl.xml\n acceptTransitional: true\n allowAIA: false\n revocation:\n mode: ocsp+crl\n hardFail: true\n ```\n \n\n\n> **📝 Note**\n>\n> The `system.serverCertificate.*` keys are honoured only on Pro/Enterprise editions. On the free self-hosted edition, setting `enabled: true` has no effect and the **Server** certificate source stays hidden; use a custom certificate (**Upload**), or **This device** in the desktop app, instead. All `security.validation.*` and `security.timestamp.*` settings apply to every edition.\n\n\n---\n\n## API Usage\n\n\n \n ```bash\n # certType must be one of PEM, PKCS12, PFX, JKS, SERVER, WINDOWS_STORE, PKCS11 (uppercase)\n # certType=SERVER requires the Pro/Enterprise server certificate feature to be enabled\n curl -X POST http://stirling-pdf:8080/api/v1/security/cert-sign \\\n -F \"fileInput=@document.pdf\" \\\n -F \"certType=SERVER\" \\\n -F \"reason=Approved\" \\\n -F \"location=London\" \\\n -F \"showSignature=true\" \\\n -F \"pageNumber=1\" \\\n -o signed.pdf\n ```\n \n \n ```bash\n # PKCS12/PFX use p12File; JKS uses jksFile; PEM uses privateKeyFile + certFile\n curl -X POST http://stirling-pdf:8080/api/v1/security/cert-sign \\\n -F \"fileInput=@document.pdf\" \\\n -F \"certType=PKCS12\" \\\n -F \"p12File=@mycert.p12\" \\\n -F \"password=certpass\" \\\n -o signed.pdf\n ```\n \n \n ```bash\n # Desktop app only; the request must come from the local machine.\n # WINDOWS_STORE selects a cert by alias; PKCS11 uses pkcs11LibraryPath (+ optional pkcs11Slot),\n # with password as the token PIN.\n curl -X POST http://localhost:8080/api/v1/security/cert-sign \\\n -F \"fileInput=@document.pdf\" \\\n -F \"certType=PKCS11\" \\\n -F \"pkcs11LibraryPath=/usr/lib/opensc-pkcs11.so\" \\\n -F \"password=token-pin\" \\\n -o signed.pdf\n ```\n \n \n ```bash\n curl -X POST http://stirling-pdf:8080/api/v1/security/validate-signature \\\n -F \"fileInput=@signed.pdf\"\n ```\n \n\n\nSee [API Documentation](doc:api) for complete endpoint reference.\n\n---\n\n## Troubleshooting\n\n### \"Certificate not trusted\"\nEnable the appropriate trust source in config, or add your CA certificate to the system trust store:\n```bash\ndocker cp ca-cert.crt stirling-pdf:/usr/local/share/ca-certificates/\ndocker exec stirling-pdf update-ca-certificates\n```\n\n### Revocation check fails\nCheck that the container has HTTPS access to OCSP/CRL servers. Use `hardFail: false` or switch to `crl` mode for restricted networks.\n\n### Server certificate not generated\nThe server certificate feature requires a Pro/Enterprise license; on the free self-hosted edition it stays disabled regardless of configuration. With a license, ensure `SYSTEM_SERVERCERTIFICATE_ENABLED=true` is set. Check logs with `docker logs stirling-pdf | grep -i certificate`.\n\n---\n\n## Related\n\n- [System and Security Settings](doc:configuration/security/system-and-security)\n- [Sign (Handwritten)](doc:functionality/security/sign)\n- [Settings Changes](doc:migration/settings-changes)",
|
||
"sourcePath": "docs/Functionality/Security/Certificate-Signing.md",
|
||
"editUrl": "https://github.com/Stirling-Tools/Stirling-Tools.github.io/blob/main/docs/Functionality/Security/Certificate-Signing.md"
|
||
},
|
||
"functionality/security/security": {
|
||
"id": "functionality/security/security",
|
||
"title": "Features - Security",
|
||
"description": "Security features for PDFs and deployment configurations",
|
||
"section": "functionality/security",
|
||
"markdown": "These are the tools you'll find under **Security** in the Stirling PDF app. Open a PDF, pick a tool, set your options, and download the result.\n\n## Password and access\n\n- **Add Password** - lock a PDF with a password. You can set a user password (needed to open the file) and an owner password (controls what people can do once it's open).\n\n- **Remove Password** - unlock a protected PDF. You'll need the current password.\n\n- **Change Permissions** - control what others can do with your PDF: printing, copying, editing, form filling, and more.\n\n- **Flatten** - merge form fields and interactive elements into the page so they can no longer be edited or filled in. Use this to lock down a completed form.\n\n- **Unlock PDF Forms** - reverse the lock on form fields so they can be edited and filled in again.\n\n## Signatures\n\n- **Sign** - add a handwritten, typed, or image signature. Draw with your mouse or touchscreen, type your name, or upload a signature image. For a cryptographic digital signature, use Certificate Sign.\n\n **Learn more:** [Sign PDF (Handwritten Signatures)](doc:functionality/security/sign)\n\n- **Certificate Sign** - digitally sign a PDF with an X.509 certificate to prove who signed it and that the document hasn't been changed. Choose **Manual** to upload your own certificate (PEM, PKCS12, or JKS), or **Auto (server)** to sign with the server's certificate (the server certificate requires a Pro or Enterprise license).\n\n **Learn more:** [Certificate Signing Guide](doc:functionality/security/certificate-signing)\n\n- **Shared Signing** *(Pro/Enterprise, Alpha)* - send a PDF to several people to sign. The owner invites registered users, each signs with their own certificate and an optional handwritten signature, and the owner tracks progress and finalizes the document.\n\n **Learn more:** [Shared Signing Guide](doc:functionality/security/shared-signing)\n\n- **Validate PDF Signature** - check the digital signatures in a PDF: confirm who signed it, whether the certificate is trusted, and whether the document was changed after signing.\n\n **Learn more:** [Certificate Signing - Validation](doc:functionality/security/certificate-signing)\n\n- **Remove Certificate Sign** - strip digital certificate signatures from a PDF. Handy when you need to edit a document that was already signed.\n\n- **Timestamp PDF** - add a trusted RFC 3161 timestamp that proves your PDF existed at a particular point in time. Stirling PDF contacts a trusted Time Stamp Authority (TSA) and embeds the timestamp. Only a SHA-256 hash of the document is sent to the TSA, so the PDF itself never leaves your server.\n\n **Learn more:** [Certificate Signing - Timestamping](doc:functionality/security/certificate-signing)\n\n## Content security\n\n- **Add Watermark** - stamp a text or image watermark across your PDF, with control over spacing, opacity, and rotation.\n\n- **Sanitize** - strip potentially dangerous content such as JavaScript, embedded files, external links, fonts, and metadata. A good first step before sharing untrusted PDFs.\n\n- **Redact** - permanently remove sensitive information. Search for text (or match a pattern) to find and black it out automatically, or draw redaction boxes by hand. The underlying text is removed, not just covered.\n\n## Information\n\n- **Get ALL Info on PDF** - see everything about a PDF: version, fonts, page dimensions, permissions, metadata, and more. View it as tables in the app or export it as JSON.\n\n---\n\n## How signature validation chooses what to trust\n\nWhen you run **Validate PDF Signature**, your administrator decides which certificate authorities count as trusted and whether to check that certificates haven't been revoked. The trust sources available are the operating system trust store, the Mozilla CA bundle, the Adobe Approved Trust List (AATL), the EU Trusted List (EUTL, for eIDAS), and your own server-generated certificates. Revocation can be checked in real time (OCSP), against a downloaded list (CRL), or both.\n\nFor the full list of settings and example configurations, see [Certificate Signing - Configuration](doc:functionality/security/certificate-signing).\n\n---\n\n## Related Configuration\n\nFor advanced security configuration, see:\n\n- **[System and Security Settings](doc:configuration/security/system-and-security)** - JWT, session management, server certificates\n- **[Certificate Signing](doc:functionality/security/certificate-signing)** - Comprehensive signing and validation guide\n- **[Single Sign-On](doc:configuration/security/single-sign-on-configuration)** - Enterprise authentication",
|
||
"sourcePath": "docs/Functionality/Security/Security.md",
|
||
"editUrl": "https://github.com/Stirling-Tools/Stirling-Tools.github.io/blob/main/docs/Functionality/Security/Security.md"
|
||
},
|
||
"functionality/security/shared-signing": {
|
||
"id": "functionality/security/shared-signing",
|
||
"title": "Shared Signing",
|
||
"description": "Collaborative multi-participant PDF signing workflows with digital certificates and wet signatures",
|
||
"section": "functionality/security",
|
||
"markdown": "> **⚠️ Warning: [Alpha Feature]**\n>\n> Shared Signing is currently in **alpha**. Functionality may change, and some features are incomplete. Use in production at your own risk.\n\n\nShared Signing lets a document owner send a PDF to multiple registered users for signing. Each participant reviews the document, applies their signature, and submits it back. The owner tracks progress and finalizes the document once all signatures are collected.\n\nShared Signing builds on storage. With the **local** storage provider it needs **no license** - just turn on `security.enableLogin`, `storage.enabled`, and `storage.signing.enabled`. The managed certificate options (Personal and Server certificates) require a Pro/Enterprise license; without one, participants sign by uploading their own certificate (P12/PKCS12 or JKS). The **database** and **s3** storage providers also require a Pro/Enterprise license. See [Modes](doc:modes-and-licensing) for details.\n\n---\n\n## What You Can Do\n\n- **Invite multiple signers** -- add registered users as participants to a signing session\n- **Flexible signing options** -- participants can use the server certificate, their personal certificate, or upload their own (P12, JKS, PEM)\n- **Handwritten signatures** -- participants can draw, type, or upload a wet signature overlay and place it on any page\n- **Track progress** -- see who has signed, viewed, or declined in real time\n- **Summary page** -- optionally append a page to the final PDF listing all signers, timestamps, and details\n- **Data cleanup** -- sensitive signature and certificate data is automatically cleared from the server after finalization\n\n---\n\n## Prerequisites\n\n\n \n ```yaml\n security:\n enableLogin: true\n\n storage:\n enabled: true\n signing:\n enabled: true\n\n system:\n frontendUrl: https://your-stirling-instance.com\n serverCertificate:\n enabled: true\n ```\n \n \n ```bash\n SECURITY_ENABLELOGIN=true\n STORAGE_ENABLED=true\n STORAGE_SIGNING_ENABLED=true\n SYSTEM_FRONTENDURL=https://your-stirling-instance.com\n SYSTEM_SERVERCERTIFICATE_ENABLED=true\n ```\n \n\n\n---\n\n## How It Works\n\n### Step 1: Create a Signing Session\n\n1. Open a PDF in the viewer\n2. Click the **Sign** button in the Quick Access Bar\n3. Click the **+** button next to **Signature Requests**\n4. Add participants by selecting registered users\n5. Optionally set a due date and configure signature display preferences\n6. Review and submit\n\n**Session options:**\n\n| Option | What it does |\n|--------|-------------|\n| **Signature visibility** | Choose whether the digital signature block is visible on the PDF or embedded invisibly |\n| **Signature page number** | Which page to place the signature block on |\n| **Reason** | A reason for signing (e.g., \"Approved\", \"I agree to these terms\") |\n| **Location** | Where the signing is taking place (e.g., \"New York\") |\n| **Show logo** | Includes the organization logo in the signature block |\n| **Include summary page** | Appends a page at the end listing all signers and their details |\n\n### Step 2: Participants Review and Sign\n\nParticipants see pending sign requests under the **Sign** button in the Quick Access Bar after logging in.\n\nFrom there they can:\n1. **Review** the document and session details (due date, signature preferences)\n2. **Choose a certificate** to sign with:\n\n| Certificate Option | Description | Requires Upload? |\n|-------------------|-------------|-----------------|\n| **Server Certificate** | Your organization's certificate | No |\n| **Personal Certificate** | Auto-generated for the participant | No |\n| **P12 / PKCS12 / PFX** | Participant's own certificate file | Yes (+ password) |\n| **JKS** | Java KeyStore file | Yes (+ password) |\n| **PEM** | PEM certificate + private key | Yes |\n\n3. **Add wet signatures** (optional) -- draw, type, or upload a handwritten signature and position it on any page. Multiple signatures can be placed across different pages.\n4. **Submit** their signature\n\nOnce submitted, the participant's status changes to **Signed** and they can no longer modify their submission.\n\nParticipants can also **decline** to sign, which marks their status as **Declined**.\n\n### Step 3: Track Progress\n\nThe session owner can monitor progress from the Quick Access Bar or the session detail view:\n\n- **Signature count** shown as \"X/Y signatures\" (e.g., \"3/5 signatures\")\n- **Color-coded badges**: Blue (none signed), Yellow (some signed), Green (all signed -- ready to finalize)\n- **Per-participant status**: Pending, Viewed, Signed, or Declined\n\nThe status auto-refreshes every 15 seconds.\n\n### Step 4: Finalize\n\nOnce you've collected the signatures you need, click **Finalize** to produce the signed PDF.\n\n> **⚠️ Warning**\n>\n> Finalization is a one-time operation. Participants who haven't signed will be skipped. Make sure you have all the signatures you need before finalizing.\n\n\n**What happens when you finalize:**\n\n1. All wet signature images are applied to the PDF at the positions each participant chose\n2. If enabled, a summary page is appended showing each participant's name, email, status, timestamp, reason, and certificate type\n3. Each participant's digital certificate is applied to the document\n4. The signed PDF is saved and available for download\n5. Sensitive data (signature images, certificate files, passwords) is permanently cleared from the server\n\n### Step 5: Download the Signed PDF\n\nAfter finalization, download the completed PDF from the session detail view or the **Completed Sessions** panel. The PDF contains all digital certificate signatures and wet signature overlays embedded in the document.\n\n---\n\n## Security\n\n- **One-time signing** -- after signing or declining, participants are automatically downgraded to read-only access and cannot re-sign\n- **Certificate validation** -- uploaded certificates are validated at submission time. Trust chain validation is configurable (see [Certificate Signing](doc:functionality/security/certificate-signing))\n- **Audit trail** -- all participant actions are recorded (viewed, signed, declined) with timestamps\n- **Post-finalization cleanup** -- wet signature images, certificate files, and passwords are permanently removed from the database after finalization. Only the final signed PDF is retained\n\n---\n\n## Configuration Reference\n\n### Signing Settings\n\n\n \n ```yaml\n storage:\n enabled: true\n signing:\n enabled: true # Master switch for shared signing\n userListScope: org # Who appears in the signer picker: 'org' (default) = whole instance, any other value = your own team only\n\n system:\n frontendUrl: https://your-instance.com\n serverCertificate:\n enabled: true\n organizationName: My Company\n validity: 365 # Certificate validity in days\n regenerateOnStartup: false\n ```\n \n \n ```bash\n STORAGE_ENABLED=true\n STORAGE_SIGNING_ENABLED=true\n STORAGE_SIGNING_USERLISTSCOPE=org\n SYSTEM_FRONTENDURL=https://your-instance.com\n SYSTEM_SERVERCERTIFICATE_ENABLED=true\n SYSTEM_SERVERCERTIFICATE_ORGANIZATIONNAME=\"My Company\"\n SYSTEM_SERVERCERTIFICATE_VALIDITY=365\n ```\n \n\n\n#### Who appears in the signer picker\n\nWhen you create a signing session, the participant picker lists the people you can invite. The `storage.signing.userListScope` setting controls who shows up:\n\n| Value | Who appears in the picker |\n|-------|---------------------------|\n| `org` (default) | Every enabled user on your instance |\n| _any other value_ | Only the people in your own team |\n\nThe signer list is only ever shown to signed-in users, so no one can browse your user list without logging in, whichever scope you choose.\n\n### Certificate Validation Settings\n\n```yaml\nsecurity:\n validation:\n trust:\n serverAsAnchor: true # Trust server-generated certificates\n useSystemTrust: true # Trust OS certificate store\n useMozillaBundle: true # Trust Mozilla CA bundle\n revocation:\n mode: none # Options: none, ocsp, crl, ocsp+crl\n hardFail: false # Fail if revocation check is inconclusive\n```\n\nSee [Certificate Signing - Configuration](doc:functionality/security/certificate-signing) for detailed trust chain configuration.\n\n---\n\n## Known Limitations\n\n- Participants must be registered users with accounts on your Stirling PDF instance\n- Finalization can only be done once -- a session cannot be re-opened afterwards\n- Each session covers a single document\n- Digital certificates are applied in participant order during finalization\n- The signature summary page is English-only\n\n---\n\n## Troubleshooting\n\n### Signature not appearing on the finalized PDF\n- Double-check the certificate type and password were entered correctly\n- Check the Stirling PDF server logs for signing errors\n- Make sure the source PDF is not corrupted or password-protected\n\n### Progress count not updating\n- The dashboard auto-refreshes every 15 seconds -- wait a moment and check again\n- Check your browser's network tab for failed API requests\n\n### Wet signatures missing after finalization\n- Make sure the page numbers used are within the document's page range (pages start at 0)\n\n### \"Group signing is disabled\" when creating a session\n- Verify `security.enableLogin: true`, `storage.enabled: true`, and `storage.signing.enabled: true` in your configuration\n\n---\n\n## Automation / API\n\nYou don't need any of this for normal use - the whole workflow above runs from the app. This section is for developers who want to drive the signing workflow programmatically. The endpoints are listed below; see the [API reference](doc:api) for full details.\n\n### Owner Endpoints (Authentication Required)\n\n| Method | Endpoint | Description |\n|--------|----------|-------------|\n| POST | `/api/v1/security/cert-sign/sessions` | Create signing session |\n| GET | `/api/v1/security/cert-sign/sessions` | List your sessions |\n| GET | `/api/v1/security/cert-sign/sessions/{id}` | Get session details |\n| GET | `/api/v1/security/cert-sign/sessions/{id}/pdf` | Download original PDF |\n| POST | `/api/v1/security/cert-sign/sessions/{id}/finalize` | Finalize and generate signed PDF |\n| GET | `/api/v1/security/cert-sign/sessions/{id}/signed-pdf` | Download signed PDF |\n| DELETE | `/api/v1/security/cert-sign/sessions/{id}` | Delete session |\n| POST | `/api/v1/security/cert-sign/sessions/{id}/participants` | Add participants |\n| DELETE | `/api/v1/security/cert-sign/sessions/{id}/participants/{pid}` | Remove participant |\n\n### Participant Endpoints (Authentication Required)\n\n| Method | Endpoint | Description |\n|--------|----------|-------------|\n| GET | `/api/v1/security/cert-sign/sign-requests` | List your sign requests |\n| GET | `/api/v1/security/cert-sign/sign-requests/{id}` | Get sign request details |\n| GET | `/api/v1/security/cert-sign/sign-requests/{id}/document` | Download document to review |\n| POST | `/api/v1/security/cert-sign/sign-requests/{id}/sign` | Sign the document |\n| POST | `/api/v1/security/cert-sign/sign-requests/{id}/decline` | Decline to sign |\n\n---\n\n## Related\n\n- [File Sharing and Storage](doc:configuration/storage/file-sharing-and-storage) -- Configure storage, sharing, and quotas\n- [Certificate Signing](doc:functionality/security/certificate-signing) -- Individual certificate signing and validation\n- [Sign (Handwritten)](doc:functionality/security/sign) -- Non-cryptographic visual signatures\n- [System and Security Settings](doc:configuration/security/system-and-security) -- Server certificates, JWT, sessions",
|
||
"sourcePath": "docs/Functionality/Security/Shared-Signing.md",
|
||
"editUrl": "https://github.com/Stirling-Tools/Stirling-Tools.github.io/blob/main/docs/Functionality/Security/Shared-Signing.md"
|
||
},
|
||
"functionality/security/sign": {
|
||
"id": "functionality/security/sign",
|
||
"title": "Sign PDF (Handwritten Signatures)",
|
||
"description": "Add handwritten, text, or image signatures to PDFs",
|
||
"section": "functionality/security",
|
||
"markdown": "Add handwritten signatures, text signatures, or image-based signatures to PDF documents. This tool is for visual/handwritten signatures - for certificate-based digital signatures, see [Certificate Signing](doc:functionality/security/certificate-signing).\n\n---\n\n## Signature Methods\n\n\n \n 1. Upload PDF and navigate to the signing location\n 2. Select the \"Draw\" tab to open the signature canvas\n 3. Draw using mouse or touchscreen\n 4. Position and resize the signature on the page\n 5. Apply and download\n\n A touchscreen or stylus gives the best results.\n \n \n 1. Upload PDF\n 2. Select the \"Type\" tab\n 3. Type your name and choose a font (Helvetica, Times, Courier, Arial, or Georgia)\n 4. Position and apply\n \n \n 1. Upload PDF\n 2. Select the \"Upload\" tab\n 3. Select a PNG/JPG of your signature\n 4. Position, resize, and apply\n\n Use a PNG with transparent background for best results.\n \n\n\n---\n\n## Pre-stored Signatures\n\nConfigure Stirling PDF to load pre-stored signature files for quick, consistent signing across documents.\n\n**Configuration:** [Sign with Custom Files](doc:configuration/security/sign-with-custom-files)\n\n---\n\n## Signature Options\n\n- **Transparency** - Remove the white background of an uploaded signature image to make it transparent\n- **Color** - Pick any ink color from the color picker (with quick black, blue, red, orange, green, and purple swatches) for drawn and typed signatures\n- **Size** - Adjust the pen thickness and resize the placed signature to fit the signature line\n- **Pages** - Sign on a single page, or place signatures on multiple pages\n\n---\n\n## Visual vs. Digital Signatures\n\n| | Visual Signature (This Tool) | Digital Signature ([Certificate](doc:functionality/security/certificate-signing)) |\n|---|---|---|\n| **Security** | Visual only, can be copied | Cryptographically secure |\n| **Authentication** | No verification | Proves signer identity |\n| **Tamper Detection** | None | Detects changes after signing |\n| **Setup** | None required | Requires certificate |\n\nVisual signatures do **not** provide authentication, tamper protection, or guaranteed legal standing. For legally binding signatures requiring verification, use [Certificate Signing](doc:functionality/security/certificate-signing).\n\n---\n\n## Related Tools\n\n- **[Certificate Signing](doc:functionality/security/certificate-signing)** - Digital signatures with certificates\n- **[Add Stamp](doc:functionality/content-editing/content-editing)** - Add official stamps\n- **[Add Password](doc:functionality/security/security)** - Protect signed documents",
|
||
"sourcePath": "docs/Functionality/Security/Sign.md",
|
||
"editUrl": "https://github.com/Stirling-Tools/Stirling-Tools.github.io/blob/main/docs/Functionality/Security/Sign.md"
|
||
},
|
||
"functionality/the-technologies": {
|
||
"id": "functionality/the-technologies",
|
||
"title": "Third-Party Credits",
|
||
"description": "Open-source libraries and tools used by Stirling PDF",
|
||
"section": "functionality",
|
||
"markdown": "Stirling PDF is built on these open-source projects.\n\n## Server-Side\n\n- **[PDFBox](https://pdfbox.apache.org/)** - Core PDF manipulation\n- **JPDFium** - PDFium-based engine used for merge/split and reading text and tables from PDFs\n- **[LibreOffice](https://www.libreoffice.org/)** - Office document conversions\n- **[qpdf](https://qpdf.sourceforge.io/)** - Specialized PDF operations\n- **[Tesseract OCR](https://github.com/tesseract-ocr/tesseract)** - Text recognition from images\n- **[OpenCV](https://opencv.org/)** - Image processing\n\n## Frontend\n\n- **[React](https://react.dev/)** + **[TypeScript](https://www.typescriptlang.org/)** with **[Vite](https://vitejs.dev/)**\n- **[EmbedPDF](https://www.embedpdf.com/)** / **[PDF.js](https://mozilla.github.io/pdf.js/)** - PDF viewing and annotation\n- **[pdf-lib](https://pdf-lib.js.org/)** - Client-side PDF manipulation\n- **[Mantine](https://mantine.dev/)** - UI components\n- **[i18next](https://www.i18next.com/)** - 40+ language translations\n\n## Desktop\n\n- **[Tauri](https://tauri.app/)** - Native app framework (Windows, Mac, Linux)\n\n## Browser File Storage\n\nFiles are stored locally in your browser's [IndexedDB](https://developer.mozilla.org/en-US/docs/Web/API/IndexedDB_API) between operations. They never leave your device until you process them. Clear storage when done on shared computers.\n\n## Source Code\n\n- [GitHub](https://github.com/Stirling-Tools/Stirling-PDF)",
|
||
"sourcePath": "docs/Functionality/The Technologies.md",
|
||
"editUrl": "https://github.com/Stirling-Tools/Stirling-Tools.github.io/blob/main/docs/Functionality/The Technologies.md"
|
||
},
|
||
"getting-started": {
|
||
"id": "getting-started",
|
||
"title": "Getting Started",
|
||
"section": "overview",
|
||
"markdown": "## Welcome to Stirling PDF\n\nStirling PDF is a locally hosted web application that allows you to perform various operations on PDF files. With 55+ tools, flexible deployment options, and enterprise features, it's the comprehensive PDF solution for individuals and organizations.\n\n## Benefits of Stirling PDF\n- **Extensive PDF Functionality:** 55+ tools covering signing, converting, merging, editing, OCR, and redaction.\n- **Stateful Workspace:** Upload once and chain tools together, with full undo and redo history.\n- **Runs Anywhere:** Docker, bare metal, Kubernetes, or native desktop apps for Windows, macOS, and Linux.\n- **Data Security:** Files are processed by your own instance, never a third-party service.\n- **Configure In-App:** Change settings from the UI, or drive everything with environment variables and `settings.yml`.\n- **Automation & Integration:** REST API, pipelines, folder scanning, and an MCP server for AI assistants.\n- **Enterprise Features:** SSO (OAuth2 and SAML), user management, permission controls, and audit logging.\n- **Self-Hosted:** Community-driven with frequent updates and GitHub support.\n- **Multi-Language Support:** Available in 40+ languages with active translations.\n\n---\n\n## Installation\n\nChoose how you want to run Stirling PDF based on your needs:\n\n### Desktop Applications\n\nNative apps with system integration:\n\n| Platform | Download | Guide |\n|----------|----------|-------|\n| **Windows** | [Installer](https://files.stirlingpdf.com/win-installer.exe) | [Windows Guide](doc:installation/windows) |\n| **Mac** (Universal) | [DMG](https://files.stirlingpdf.com/mac-installer.dmg) | [Mac Guide](doc:installation/mac) |\n| **Linux** | [DEB](https://files.stirlingpdf.com/linux-installer.deb) | [Unix Guide](doc:installation/unix) |\n\n**Features:** Fast startup, \"Open with\" integration, no login required, optional server connection for advanced tools\n\n---\n\n### Docker Deployment\n\nRecommended for server deployments and organizations:\n\n**Quick Start:**\n```bash\ndocker run -d \\\n -p 8080:8080 \\\n -v ./stirling-data:/configs \\\n docker.stirlingpdf.com/stirlingtools/stirling-pdf:latest\n```\n\n**Available versions:**\n- `latest` - Standard version (recommended)\n- `latest-fat` - Extra fonts and tools for highest quality conversions and full format support\n- `latest-ultra-lite` - Minimal size for resource-constrained environments\n\n**Full guide:** [Docker Installation Guide](doc:installation/docker-install)\n\n---\n\n### Manual Server Setup\n\nFor bare metal installations or environments without Docker:\n\n1. Download `Stirling-PDF.jar`\n2. Install Java 25+\n3. Install dependencies (LibreOffice, Tesseract for OCR)\n4. Run the JAR file\n\n**Full guide:** [Unix Installation Guide](doc:installation/unix)\n\n---\n\n## Documentation Guide\n\n### For Individual Users\n\n**[Tool Reference](doc:functionality/functionality)**\nBrowse all 55+ PDF tools with descriptions\n\n**[Migration Guide](doc:migration/overview)**\nUpgrading from V1? What's new in V2 and how to upgrade smoothly\n\n---\n\n### For Organizations & IT Teams\n\n**[Production Deployment Guide](doc:server-admin-onboarding)**\nComplete walkthrough: installation - configuration - security - monitoring\n\n**[Paid Offerings (Server & Enterprise)](doc:paid-offerings)**\nExternal databases, Google Drive integration, SSO, advanced monitoring, and priority support\n\n**[Configuration Options](doc:configuration/customisation/extra-settings)**\nAll configuration options for Docker and server deployments\n\n---\n\n### For Developers & Integration\n\n**[API Documentation](doc:api)**\nIntegrate Stirling PDF into your applications and workflows\n\n**[Configuration](doc:configuration/security/system-and-security)**\nSSO, certificates, security settings, and more\n\n**[Contribute Guide](doc:contribute)**\nHelp improve Stirling PDF - development setup and guidelines\n\n---\n\n## Quick Links\n\n- **Questions?** Check our **[FAQ](doc:faq)**\n- **Issues?** Report on **[GitHub](https://github.com/Stirling-Tools/Stirling-PDF/issues)**\n- **Community?** Join our **[Discord](https://discord.gg/Cn8pWhQRxZ)**",
|
||
"sourcePath": "docs/Getting Started.md",
|
||
"editUrl": "https://github.com/Stirling-Tools/Stirling-Tools.github.io/blob/main/docs/Getting Started.md"
|
||
},
|
||
"installation/development-setup": {
|
||
"id": "installation/development-setup",
|
||
"title": "Development Setup Guide",
|
||
"section": "installation",
|
||
"markdown": "## Development Setup for Stirling PDF\n\nThis guide covers setting up a local development environment for Stirling PDF, including both backend and frontend (V2.0+) development.\n\n## Prerequisites\n\nBefore getting started, ensure you have the following installed:\n\n- **Java**: JDK 25\n- **Node.js**: Version 22+ for frontend development\n- **npm**: Comes with Node.js\n- **Docker**: For testing and containerization\n- **Gradle**: Included in the repository (use `./gradlew`)\n- **Git**: For version control\n- **Task** (optional but recommended): [Task](https://taskfile.dev/) is the project's unified command runner. With it installed you can run `task dev`, `task check`, etc. from the repo root. Run `task --list` to see all commands.\n\n### IDE Setup\n\nRecommended IDEs:\n- **IntelliJ IDEA** (recommended for Java development)\n- **Visual Studio Code** (good for both frontend and backend)\n- **Eclipse**\n\n**Important**: Install the Lombok plugin for your IDE. Visit [projectlombok.org/setup](https://projectlombok.org/setup/) for IDE-specific instructions.\n\n## Getting Started\n\n### 1. Clone the Repository\n\n```bash\ngit clone https://github.com/Stirling-Tools/Stirling-PDF.git\ncd Stirling-PDF\n```\n\n### 2. Backend Development\n\n#### Running the Backend\n\n```bash\n# Build and run the Spring Boot application\n./gradlew bootRun\n```\n\nThe backend will start on `http://localhost:8080`\n\n#### Code Formatting\n\nStirling PDF uses Spotless for code formatting:\n\n```bash\n# Apply formatting (run before committing)\n./gradlew spotlessApply\n```\n\n#### Enable Security Features (Optional)\n\nFor local testing with full security features:\n\n```bash\n# Set environment variable\nexport SECURITY_ENABLELOGIN=true\n\n# Or add to your IDE's run configuration\n-DSECURITY_ENABLELOGIN=true\n```\n\n### 3. Frontend Development (V2.0+)\n\n#### Initial Setup\n\n```bash\n# Navigate to frontend directory\ncd frontend\n\n# Install dependencies\nnpm install\n```\n\n#### Running the Development Server\n\nThe project uses [Task](https://taskfile.dev/) as its command runner. From the repository root:\n\n```bash\n# Start the Vite dev server (runs `npx vite editor` under the hood)\ntask frontend:dev\n```\n\nThe frontend will start on `http://localhost:5173`\n\n**Important**: The Vite dev server automatically proxies API requests to the backend at `localhost:8080`. Make sure the backend is running before starting the frontend dev server.\n\n#### Frontend Technology Stack\n\n- **Framework**: React + TypeScript\n- **Build Tool**: Vite\n- **UI Library**: Mantine UI\n- **Styling**: TailwindCSS\n- **PDF Rendering**: PDF.js\n- **PDF Manipulation**: PDF-LIB\n- **Storage**: IndexedDB for client-side file storage\n- **i18n**: i18next for internationalization\n\n### 4. Desktop Application Development\n\nStirling PDF V2.0 uses Tauri for native desktop applications. Desktop builds also require **Rust** and **Cargo** installed. From the repository root:\n\n```bash\n# Run desktop app in development mode (runs `npx tauri dev`)\ntask desktop:dev\n\n# Build desktop application (runs `npx tauri build`)\ntask desktop:build\n```\n\n## Development Workflow\n\n### Full Development Setup\n\nThe quickest way is the unified Task runner, which starts the backend and frontend together:\n\n```bash\n# From the repository root - starts backend + frontend concurrently\ntask dev\n```\n\nOr run them in separate terminals:\n\n1. **Terminal 1** - Backend:\n ```bash\n ./gradlew bootRun\n ```\n\n2. **Terminal 2** - Frontend:\n ```bash\n task frontend:dev\n ```\n\n3. **Access the application**:\n - Frontend (React): http://localhost:5173\n - Backend API: http://localhost:8080\n - API Documentation: http://localhost:8080/swagger-ui/index.html\n\n### Building the Project\n\n```bash\n# Backend only (default - the frontend is not bundled unless asked for)\n./gradlew clean build\n\n# Full build with the frontend bundled into the backend JAR\n./gradlew clean build -PbuildWithFrontend=true\n```\n\n## Architecture Overview\n\n### Backend Architecture\n\n- **Framework**: Spring Boot\n- **PDF Processing**: Apache PDFBox\n- **Document Conversion**: LibreOffice (optional dependency)\n- **PDF Optimization**: qpdf (optional dependency)\n- **Security**: Spring Security (optional, controlled by `SECURITY_ENABLELOGIN`)\n\n### Frontend Architecture (V2.0)\n\n- **State Management**: React Context (FileContext for file operations)\n- **File Storage**: IndexedDB for client-side persistence\n- **Tool Architecture**: Hook-based pattern using `useToolOperation`\n- **Memory Management**: Manual cleanup for PDF.js documents and blob URLs\n- **Performance Target**: Improved handling of large PDFs with better memory management\n\n### Key Frontend Concepts\n\n#### FileContext\nCentral state management for all file operations:\n- Active files and their variants\n- Tool navigation state\n- Memory management (PDF.js documents, blob URLs, Web Workers)\n- IndexedDB persistence\n\n#### Tool Development\nTools use a modular hook-based architecture:\n- **useToolOperation**: Main orchestrator hook\n- **useToolState**: UI state management\n- **useToolApiCalls**: HTTP requests and file processing\n- **useToolResources**: Blob URLs, thumbnails, ZIP downloads\n\nSee `ADDING_TOOLS.md` in the repository for detailed tool development guide.\n\n## Testing\n\n### Running Tests\n\n```bash\n# Run all tests\n./gradlew test\n\n# Full Docker test suite (tests all variants)\n./testing/test.sh\n```\n\n### Testing Different Versions\n\nStirling PDF offers three Docker variants:\n- **Ultra-lite**: Basic PDF operations only\n- **Standard** (latest): Full feature set\n- **Fat** (latest-fat): Pre-downloaded dependencies for air-gapped environments\n\n## Configuration Files\n\n### Backend Configuration\n\n- `app/core/src/main/resources/application.properties`: Main application configuration\n- `settings.yml`: User-configurable settings (generated on first run)\n\n### Frontend Configuration\n\n- `frontend/editor/.env`: Environment variables for development (with `.env.desktop` and `.env.saas` overrides per build mode)\n- `frontend/editor/vite.config.ts`: Vite build/dev-server configuration\n- `frontend/editor/public/locales/<lang>/translation.toml`: Translation files (TOML format)\n\n> **📝 Note: FRONTEND_ALLOWED_HOSTS**\n>\n> `FRONTEND_ALLOWED_HOSTS` is a comma-separated allowlist of `Host` header values that the Vite dev server will accept. Set it when running the dev server behind a reverse proxy or under a custom hostname (e.g. `FRONTEND_ALLOWED_HOSTS=dev.example.com,localhost`). This is a dev-server environment variable only - it is not a production `settings.yml` key. When empty or unset, Vite keeps its default host checks.\n\n\n## Common Development Tasks\n\n### Adding Translations\n\nTranslations use TOML files, one per locale:\n\n1. Navigate to `frontend/editor/public/locales/<lang>/translation.toml`\n2. **Important**: Only update `en-US/translation.toml`. `en-US` is the source/primary locale and the language used when a translation is missing (`fallbackLng: \"en-US\"`).\n3. Edit `translation.toml`, adding keys under the relevant feature/tool.\n4. For counts, use ICU-style plural suffixes on the key (`_one`, `_other`, and `_zero` where needed).\n5. Other languages are managed separately by the community.\n\n### Adding a New PDF Tool\n\nSee the repository's `ADDING_TOOLS.md` for detailed instructions. Quick overview:\n\n1. Create backend controller endpoint\n2. Create frontend tool hook using `useToolOperation`\n3. Add UI component\n4. Add translations\n5. Register tool in routing\n\n## Troubleshooting\n\n### Backend Issues\n\n- **Port already in use**: Override the port with `-Dserver.port=8081` (or set the `SERVER_PORT` environment variable)\n- **Lombok errors**: Ensure Lombok plugin is installed in your IDE\n- **Build failures**: Run `./gradlew clean` and try again\n\n### Frontend Issues\n\n- **npm install fails**: Delete `node_modules` and `package-lock.json`, then run `npm install` again\n- **Proxy errors**: Ensure backend is running on port 8080\n- **Memory issues with large PDFs**: This is expected during development; memory management is optimized in production builds\n\n### Docker Issues\n\n- **Build failures**: Ensure Docker has enough memory allocated (at least 4GB recommended)\n- **Permission issues**: Use Docker without sudo or add your user to the docker group\n\n## Additional Resources\n\n- **GitHub Repository**: [Stirling-Tools/Stirling-PDF](https://github.com/Stirling-Tools/Stirling-PDF)\n- **CLAUDE.md**: Detailed architecture and development patterns\n- **DeveloperGuide.md**: Comprehensive developer documentation\n- **ADDING_TOOLS.md**: Guide for creating new PDF tools\n- **CONTRIBUTING.md**: Contribution guidelines\n\n## Need Help?\n\n- **GitHub Issues**: [Report bugs and request features](https://github.com/Stirling-Tools/Stirling-PDF/issues)\n- **Discord**: [Join our community](https://discord.gg/Cn8pWhQRxZ)\n- **Discussions**: [Ask questions on GitHub Discussions](https://github.com/Stirling-Tools/Stirling-PDF/discussions)",
|
||
"sourcePath": "docs/Installation/Development Setup.md",
|
||
"editUrl": "https://github.com/Stirling-Tools/Stirling-Tools.github.io/blob/main/docs/Installation/Development Setup.md"
|
||
},
|
||
"installation/docker-install": {
|
||
"id": "installation/docker-install",
|
||
"title": "Docker Guide",
|
||
"section": "installation",
|
||
"markdown": "## Docker Installation for Stirling PDF\n\nRun Stirling PDF in Docker for easy self-hosting, automatic updates, and flexible deployment.\n\n## Quick Start\n\n\n\n\n```bash\ndocker run -d \\\n --name stirling-pdf \\\n -p 8080:8080 \\\n -v ./stirling-data:/configs \\\n docker.stirlingpdf.com/stirlingtools/stirling-pdf:latest\n```\n\n\n\n\nCreate `docker-compose.yml`:\n\n```yaml\nservices:\n stirling-pdf:\n image: docker.stirlingpdf.com/stirlingtools/stirling-pdf:latest\n container_name: stirling-pdf\n ports:\n - '8080:8080'\n volumes:\n - ./stirling-data:/configs\n restart: unless-stopped\n```\n\nThen run:\n```bash\ndocker-compose up -d\n```\n\n\n\n\nThen open `http://localhost:8080` in your browser!\n\n> **ℹ️ Info: Login is ON by default**\n>\n> The default is `security.enableLogin: true`, so a fresh container starts with login **enabled** and creates a default admin account:\n>\n> ```\n> Username: admin\n> Password: stirling\n> ```\n>\n> Change this password immediately after first login. If you want the no-login experience instead (no authentication, no admin account), you must opt out explicitly by setting `SECURITY_ENABLELOGIN=false`. See [Modes](doc:modes-and-licensing) for how the deploy modes differ.\n\n\n## Choosing Your Version\n\n| Version | Tag | What's Included | Best For |\n|---------|-----|-----------------|----------|\n| **Standard** | `latest` | All PDF features | Most users, balanced features & size |\n| **Fat** | `latest-fat` | Everything + extra fonts & tools | Highest quality conversions, full format support |\n| **Ultra-Lite** | `latest-ultra-lite` | Core features only | Limited resources, minimal size |\n\n**Most users should use `latest`** - it has everything you need.\n\n### When to use each version:\n\n**Standard (`latest`)** - You want all PDF features, have normal server specs, or you're not sure which to pick.\n\n**Fat (`latest-fat`)** - You need the highest quality conversions with full font support, every conversion format, and all optional tools. Disk space isn't a concern.\n\n**Ultra-Lite (`latest-ultra-lite`)** - Running on very limited hardware (Raspberry Pi, low-end VPS), want fastest startup, or only need basic PDF operations.\n\nTo use a different version, just change the tag:\n```bash\ndocker run -d docker.stirlingpdf.com/stirlingtools/stirling-pdf:latest-ultra-lite\n```\n\n## Full Setup (With All Features)\n\nWant OCR, custom settings, and logging? Add more volumes:\n\n\n\n\n```bash\ndocker run -d \\\n --name stirling-pdf \\\n -p 8080:8080 \\\n -v ./stirling-data/tessdata:/usr/share/tessdata \\\n -v ./stirling-data/configs:/configs \\\n -v ./stirling-data/logs:/logs \\\n -v ./stirling-data/pipeline:/pipeline \\\n -e SECURITY_ENABLELOGIN=false \\\n -e SYSTEM_DEFAULTLOCALE=en-GB \\\n docker.stirlingpdf.com/stirlingtools/stirling-pdf:latest\n```\n\n\n\n\nCreate `docker-compose.yml`:\n\n```yaml\nservices:\n stirling-pdf:\n image: docker.stirlingpdf.com/stirlingtools/stirling-pdf:latest\n container_name: stirling-pdf\n ports:\n - '8080:8080'\n volumes:\n - ./stirling-data/tessdata:/usr/share/tessdata # OCR language files\n - ./stirling-data/configs:/configs # Settings & database\n - ./stirling-data/logs:/logs # Application logs\n - ./stirling-data/pipeline:/pipeline # Automation configs\n environment:\n - SECURITY_ENABLELOGIN=false # Opt out of login (default is true / enabled)\n - SYSTEM_DEFAULTLOCALE=en-GB # Default interface language\n restart: unless-stopped\n```\n\nThen run:\n```bash\ndocker-compose up -d\n```\n\n\n\n\n**What each volume does:**\n- `/configs` - Your settings and database\n- `/usr/share/tessdata` - OCR language files\n- `/logs` - Application logs\n- `/pipeline` - Automation configurations\n\n## Updating Stirling PDF\n\n\n\n\n```bash\ndocker stop stirling-pdf\ndocker rm stirling-pdf\ndocker pull docker.stirlingpdf.com/stirlingtools/stirling-pdf:latest\n# Then run your original docker run command\n```\n\n\n\n\n```bash\ndocker-compose down\ndocker-compose pull\ndocker-compose up -d\n```\n\n\n\n\nYour data is safe in the volumes and will persist across updates.\n\n## Platform-specific quick starts\n\nSeveral platforms have one-click installs or community packages that wrap the Docker setup. Use these when available - they're maintained by their respective communities and handle the platform-native bits (permissions, networking, backups) for you.\n\n\n\n\nAvailable in the **TrueNAS Apps catalog** (Community train).\n\n1. **Apps → Discover Apps**, search for \"Stirling PDF\".\n2. Click **Install**, accept defaults (or customise port / persistence).\n3. Open from **Apps → Installed**.\n\nSee the catalog listing at [apps.truenas.com/catalog/stirling-pdf/](https://apps.truenas.com/catalog/stirling-pdf/).\n\n\n\n\nAvailable in **Community Applications**. Stirling PDF was the [Unraid App of the Month for February 2026](https://newsletter.unraid.net/p/unraid-february-digest-0617).\n\n1. Install the [Community Applications](https://forums.unraid.net/topic/38582-plug-in-community-applications/) plugin if you don't already have it.\n2. **Apps** tab → search \"Stirling PDF\" → click the result → **Install**.\n3. Review the default paths / variables on the template, then **Apply**.\n\nThe template populates volumes, ports, and the standard Unraid `PUID=99 PGID=100` env vars for you.\n\n\n\n\nThe **Community Scripts** project provides a one-line LXC installer. From the Proxmox VE shell:\n\n```bash\nbash -c \"$(curl -fsSL https://raw.githubusercontent.com/community-scripts/ProxmoxVE/main/ct/stirling-pdf.sh)\"\n```\n\nThis creates an LXC, installs Java, LibreOffice, Tesseract, OCRmyPDF, and Stirling PDF as a systemd service. Once finished, browse to `http://<container-ip>:8080`.\n\nScript reference: [community-scripts/ProxmoxVE - stirling-pdf](https://community-scripts.github.io/ProxmoxVE/scripts?id=stirling-pdf).\n\nPrefer Docker-in-LXC instead? Create a Debian/Ubuntu LXC, enable nesting (`pct set <ctid> -features nesting=1,keyctl=1`), install Docker, and use the standard compose at the top of this page.\n\n\n\n\nSee the [Marius Hosting Synology guide](https://mariushosting.com/how-to-install-stirling-pdf-on-your-synology-nas/).\n\n\n\n\nSee the [Marius Hosting UGREEN guide](https://mariushosting.com/how-to-install-stirling-pdf-on-your-ugreen-nas/).\n\n\n\n\nSee the [Marius Hosting Asustor guide](https://mariushosting.com/how-to-install-stirling-pdf-on-your-asustor-nas/).\n\n\n\n\nNo official store entry, but the standard Docker Compose works fine in any compose-based UI:\n\n- **Portainer**: Stacks → Add stack → paste the compose from the [Full Setup](#full-setup-with-all-features) section.\n- **CasaOS**: Use the \"Install a customized app\" flow with the Docker image `docker.stirlingpdf.com/stirlingtools/stirling-pdf:latest`, port `8080`, and bind mounts for `/configs`, `/logs`, `/customFiles`, `/pipeline`, `/usr/share/tessdata`.\n\n\n\n\nFor rootless Podman with systemd, drop a Quadlet file at `~/.config/containers/systemd/stirling-pdf.container`:\n\n```ini\n[Unit]\nDescription=Stirling PDF\n\n[Container]\nImage=docker.stirlingpdf.com/stirlingtools/stirling-pdf:latest\nPublishPort=8080:8080\nVolume=%h/stirling-pdf/configs:/configs:Z\nVolume=%h/stirling-pdf/logs:/logs:Z\nVolume=%h/stirling-pdf/customFiles:/customFiles:Z\nVolume=%h/stirling-pdf/pipeline:/pipeline:Z\nVolume=%h/stirling-pdf/tessdata:/usr/share/tessdata:Z\nUserNS=keep-id:uid=1000,gid=1000\nAutoUpdate=registry\n\n[Install]\nWantedBy=default.target\n```\n\nThen `systemctl --user daemon-reload && systemctl --user start stirling-pdf`.\n\nThe `:Z` label is required on SELinux distros (Fedora/RHEL). `--userns=keep-id` sidesteps the `PUID`/`PGID` remap, which is skipped under rootless Podman.\n\n\n\n\n> **📝 Note: Community-maintained**\n>\n> The TrueNAS, Unraid, and Proxmox integrations above are community-maintained, not built or operated by Stirling Tools. Report issues with the integration itself to the respective project (TrueNAS Apps, Unraid Community Apps, community-scripts/ProxmoxVE). For Stirling PDF behaviour, use the [Stirling PDF issue tracker](https://github.com/Stirling-Tools/Stirling-PDF/issues).\n\n\n## Common Configurations\n\n### User Authentication\nLogin is enabled by default (default admin `admin` / `stirling`). To turn it off and run without authentication, set:\n```yaml\nenvironment:\n - SECURITY_ENABLELOGIN=false\n```\n\n### Change Interface Language\nSet the default UI language (locale codes use a hyphen). Empty/unset auto-detects from the browser and falls back to `en-US`.\n```yaml\nenvironment:\n - SYSTEM_DEFAULTLOCALE=es-ES # Spanish, or en-GB, fr-FR, de-DE, etc.\n```\n\n### Custom Port\n```yaml\nports:\n - '9000:8080' # Access at http://localhost:9000\n```\n\n## Next Steps\n\n- **Add OCR Languages**: See [OCR Configuration](doc:configuration/operations/ocr)\n- **Enable Authentication**: See [Security Settings](doc:configuration/security/system-and-security)\n- **Setup Automation**: See [Pipeline Configuration](doc:configuration/automation/pipeline)\n- **More Settings**: See [Configuration](doc:configuration/configuration)\n\n## Troubleshooting\n\n**Can't access at localhost:8080?**\n- Check if port 8080 is already in use\n- Try a different port: `-p 9000:8080`\n- Check firewall settings\n\n**Permission errors with volumes?**\n- Make sure the directories exist\n- Check folder permissions: `chmod -R 755 ./stirling-data`\n\n**Container keeps restarting?**\n- Check logs: `docker logs stirling-pdf`\n- Check system resources (RAM, disk space)\n- Try ultra-lite version for limited hardware",
|
||
"sourcePath": "docs/Installation/Docker Install.md",
|
||
"editUrl": "https://github.com/Stirling-Tools/Stirling-Tools.github.io/blob/main/docs/Installation/Docker Install.md"
|
||
},
|
||
"installation/kubernetes": {
|
||
"id": "installation/kubernetes",
|
||
"title": "Kubernetes Guide",
|
||
"section": "installation",
|
||
"markdown": "### Run stirling-pdf helm chart\n\n```bash\nhelm repo add stirling-pdf https://stirling-tools.github.io/Stirling-PDF-chart\nhelm repo update\nhelm install stirling-pdf stirling-pdf/stirling-pdf-chart --namespace stirling-pdf --create-namespace\n```\n\n### Override stirling-pdf default values\n\nCreate a `values.yaml` file with the values you want to override from the [documentation](https://github.com/Stirling-Tools/Stirling-PDF-chart/tree/main/charts/stirling-pdf).\n(For examples, see the comments in the default [values.yml](https://github.com/Stirling-Tools/Stirling-PDF-chart/blob/main/charts/stirling-pdf/values.yaml) file.)\nThen, add `-f values.yaml` to the `helm install` command.\n\n### Persistent storage\n\nStirling PDF keeps runtime data - user accounts, `settings.yml`, the internal database, and other state - under `/configs` (and related data paths). You can run without a persistent volume by supplying configuration through environment variables in your `values.yaml`, and the app works fine that way.\n\nA `PersistentVolumeClaim` is still recommended for reliable operation: it preserves data such as logins and settings across pod restarts and avoids errors from state being lost when a pod is rescheduled. The official Helm chart exposes persistence options in its [`values.yaml`](https://github.com/Stirling-Tools/Stirling-PDF-chart/blob/main/charts/stirling-pdf/values.yaml) - refer to the persistence-related keys there to enable a PVC and choose a storage class and size.\n\n### Overriding configuration\n\nConfiguration is controlled through the same environment variables and `settings.yml` options used in other deployments, set through the chart's `values.yaml`.\n\nCreate a `values.yaml` file and add the environment variables you want under the chart's env section, then pass it to Helm with `-f values.yaml`. See the comments in the default [`values.yaml`](https://github.com/Stirling-Tools/Stirling-PDF-chart/blob/main/charts/stirling-pdf/values.yaml) for the exact structure.\n\nFor example, to raise the log level for debugging you can set the standard Stirling PDF logging environment variable (such as `LOGGING_LEVEL_STIRLING=DEBUG`) as an env entry in your `values.yaml`, alongside any other environment variables like locale, security, or OAuth/SAML settings.\n\n### Upgrade the helm chart\n\n```bash\nhelm repo update\nhelm upgrade stirling-pdf stirling-pdf/stirling-pdf-chart --namespace stirling-pdf --reuse-values\n```",
|
||
"sourcePath": "docs/Installation/Kubernetes.md",
|
||
"editUrl": "https://github.com/Stirling-Tools/Stirling-Tools.github.io/blob/main/docs/Installation/Kubernetes.md"
|
||
},
|
||
"installation/mac": {
|
||
"id": "installation/mac",
|
||
"title": "Mac Installation Guide",
|
||
"section": "installation",
|
||
"markdown": "## MacOS Installation Guide for Stirling PDF\n\nStirling PDF for Mac is available as a **native desktop application** or can run as a **server** using the JAR file.\n\n## Desktop Application (Recommended)\n\nNative Mac desktop app with all PDF tools available.\n\n### What You Get\n\n- ✅ **Native macOS application** - Optimized for both Apple Silicon and Intel Macs\n- ✅ **No login required** - Install and start using PDF tools right away\n- ✅ **Processes files locally** - All your PDF processing stays on your Mac\n- ✅ **Optional server connection** - Connect to Stirling Cloud or your own self-hosted server for advanced tools like OCR and document conversions\n- ✅ **All local tools included** - Merge, split, rotate, sign, and more work without any server\n- ✅ **Better performance** - Native speed on M1/M2/M3 chips\n- ✅ **No external browser needed** - Uses the built-in window\n- ✅ **Menu bar integration** - Feels like a native Mac app\n\n### Installation\n\nPick whichever method you prefer. Both install the same desktop app.\n\n\n \n **1. Download the installer:** [Download Stirling PDF for Mac](https://files.stirlingpdf.com/mac-installer.dmg)\n\n The DMG is a universal binary that runs natively on both Apple Silicon (M1/M2/M3/etc.) and Intel Macs - no need to pick a build for your chip.\n\n **2. Install:** open the `.dmg` and drag Stirling PDF to your Applications folder.\n\n 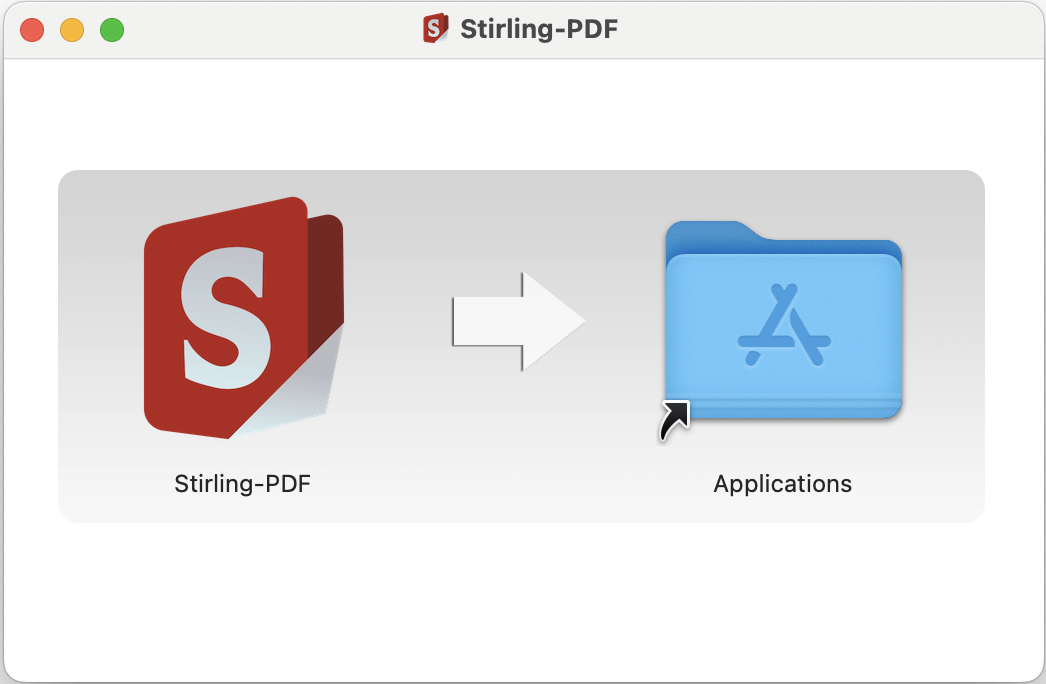\n\n **3. First-time launch (Gatekeeper):** macOS blocks the app on first launch because it's not from the App Store.\n\n 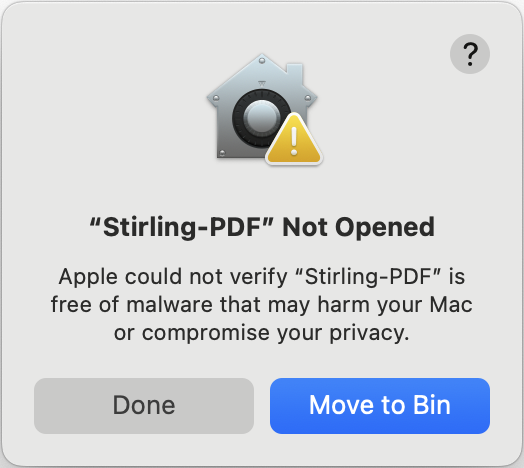\n\n Open **System Settings → Privacy & Security**, scroll to the **Security** section, click **\"Open Anyway\"** next to the Stirling PDF message, then launch again.\n\n \n \n \n ```bash\n brew tap Stirling-Tools/stirling-pdf\n brew install --cask stirling-pdf\n ```\n\n Updates come through `brew upgrade`:\n\n ```bash\n brew upgrade --cask stirling-pdf\n ```\n \n\n\n### Using the Desktop App\n\n1. Launch Stirling PDF\n2. Start using local PDF tools right away - no login needed\n3. Upload or drag-and-drop files into the window\n4. Optionally connect to Stirling Cloud or a self-hosted server for advanced tools like OCR and document conversions\n\n**Making Stirling PDF your default PDF viewer:**\n1. Right-click (or Control+click) any PDF file\n2. Select **\"Get Info\"**\n3. Under **\"Open with\"**, choose **Stirling PDF**\n4. Click **\"Change All\"** to apply to all PDFs\n5. Confirm when prompted\n\n**Benefits of desktop app:**\n- Files stay on your Mac (not in browser storage)\n- Work without internet connection\n- Native performance (especially on Apple Silicon)\n- Unlimited file storage\n- Menu bar integration\n- macOS gestures and features work\n\n**Multiple windows:**\n- Press **Cmd+N** to open an empty new window\n- Use **Open in new window** from the My Files page to open files in a separate window\n\n### Connection modes\n\nYou can pick one of three connection modes. See [Modes](doc:modes-and-licensing) for how each mode is licensed.\n\n- **Bundled local backend (default):** the app runs its own copy of Stirling PDF on your Mac, no setup or login, fully offline.\n- **Stirling Cloud:** sign in for advanced server-side tools.\n- **Self-hosted Server:** enter the URL of your own Stirling PDF instance (e.g., `http://192.168.1.53:8080`) for full control over your data.\n\n### Managed deployment (Jamf / MDM)\n\nTo pre-configure and lock the app across managed Macs - server URL, connection lock, and update behaviour - see [Managed Desktop Deployment](doc:installation/managed-deployment).\n\n## Server Version (For Hosting and Sharing)\n\nWant to host Stirling PDF on a Mac server for multiple users? Use the JAR file version.\n\n### Prerequisites\n\nInstall Java 25 (required for server version):\n\n```bash\n# Install Homebrew if you don't have it\n/bin/bash -c \"$(curl -fsSL https://raw.githubusercontent.com/Homebrew/install/HEAD/install.sh)\"\n\n# Install Java 25\nbrew install openjdk@25\n\n# Add to your PATH (add to ~/.zshrc to make permanent)\n# Using `brew --prefix` keeps this correct on both Apple Silicon (/opt/homebrew) and Intel (/usr/local)\nexport PATH=\"$(brew --prefix openjdk@25)/bin:$PATH\"\n```\n\n### JAR Downloads\n\nStirling PDF comes in three different JAR files:\n\n**Stirling-PDF-with-login.jar** (Recommended - Full Features):\n- Download: [Stirling-PDF-with-login.jar](https://files.stirlingpdf.com/Stirling-PDF-with-login.jar)\n- Bundles frontend UI + backend server in one file\n- **Includes authentication and additional features** - requires user login (default credentials: `admin` / `stirling`)\n- **Recommended for all users** - personal, shared, or enterprise deployments\n\n**Stirling-PDF.jar** (Plain JAR - Basic Features):\n- Download: [Stirling-PDF.jar](https://files.stirlingpdf.com/Stirling-PDF.jar)\n- Bundles frontend UI + backend server in one file\n- **Basic version** - no authentication, core features only\n- Only use if you require no login at all and don't mind missing certain features\n\n**Stirling-PDF-server.jar** (Backend Only - **Advanced**):\n- Download: [Stirling-PDF-server.jar](https://files.stirlingpdf.com/Stirling-PDF-server.jar)\n- Backend server only (no bundled UI)\n- **No authentication** - API access only\n- For desktop app backend, custom frontend, or API integrations\n\n### Running the Server\n\n1. **Download your preferred JAR file** (see above)\n\n2. **Open Terminal** and navigate to the download folder:\n ```bash\n cd ~/Downloads # Or wherever you saved the JAR\n ```\n\n3. **Run Stirling PDF**:\n ```bash\n java -jar Stirling-PDF.jar\n ```\n\n4. **Access via browser** at `http://localhost:8080`\n\n5. **Share with others** on your network at `http://your-mac-ip:8080`\n\n### Creating a Convenience Script\n\nFor easier launching, create a startup script:\n\n1. **Create the script**:\n ```bash\n nano ~/run-stirling.sh\n ```\n\n2. **Add these contents**:\n ```bash\n #!/bin/bash\n cd ~/Downloads # Change to where your JAR is located\n java -jar Stirling-PDF.jar\n ```\n\n3. **Save and exit** (Ctrl+X, then Y, then Enter)\n\n4. **Make it executable**:\n ```bash\n chmod +x ~/run-stirling.sh\n ```\n\n5. **Run anytime with**:\n ```bash\n ~/run-stirling.sh\n ```\n\n\n### Optional Dependencies\nInstall these via [Homebrew](https://brew.sh/) to enable additional features like advanced document conversion or PDF compression:\n\n ```bash\n # Install Homebrew if needed\n /bin/bash -c \"$(curl -fsSL https://raw.githubusercontent.com/Homebrew/install/HEAD/install.sh)\"\n\n # Install dependencies as needed\n brew install openjdk@25 # Required\n brew install qpdf # PDF compression\n brew install --cask libreoffice # Document conversion\n brew install tesseract # OCR functionality\n brew install tesseract-lang # Additional OCR languages\n brew install poppler # PDF to HTML conversion\n pip3 install weasyprint # URL to PDF conversion\n pip3 install unoserver # File to PDF conversion\n ```\n\nFor Tesseract OCR, add to `config/settings.yml` (generated once you first run the jar):\n\n```yaml\nsystem:\n tessdataDir: /usr/local/share/tessdata\n```\n\n ## Quick Troubleshooting\n - Java not found? Add to `~/.zshrc` (works on both Apple Silicon and Intel):\n ```bash\n export PATH=\"$(brew --prefix openjdk@25)/bin:$PATH\"\n ```\n - Verify installations with: `[command] --version` (e.g., `java --version`)\n - LibreOffice issues? Ensure no LibreOffice processes are running\n - Need help? Visit [GitHub Issues](https://github.com/Stirling-Tools/Stirling-PDF/issues)\n\n### Starting unoserver alongside Stirling PDF\n\nTo ensure that unoserver is running alongside Stirling PDF, you need to start it with the following command:\n\n```bash\nunoserver --port 2003 --interface 0.0.0.0\n```\n\nYou can add this command to your startup script or systemd service file to ensure it starts automatically with Stirling PDF.",
|
||
"sourcePath": "docs/Installation/Mac.md",
|
||
"editUrl": "https://github.com/Stirling-Tools/Stirling-Tools.github.io/blob/main/docs/Installation/Mac.md"
|
||
},
|
||
"installation/managed-deployment": {
|
||
"id": "installation/managed-deployment",
|
||
"title": "Managed Desktop Deployment",
|
||
"description": "Pre-configure and lock the Stirling PDF desktop app across many machines with MDM (Intune, Jamf, SCCM, Group Policy)",
|
||
"section": "installation",
|
||
"markdown": "This guide is for IT administrators rolling out the Stirling PDF **desktop app** to many machines and pre-configuring it - for example pointing everyone at a self-hosted server, stopping users changing that, or controlling how updates are applied. It works with any deployment or MDM tool (Microsoft Intune, Jamf, SCCM, Group Policy, Munki, and so on).\n\nFor a normal single-machine install, use the [Windows](doc:installation/windows), [Mac](doc:installation/mac), or [Linux](doc:installation/unix) guides instead.\n\n---\n\n## How it works\n\nWhen the desktop app starts, it looks for a small JSON file called **`stirling-provisioning.json`**. Whatever that file contains is applied to the app: the server it connects to, whether the user can change that, and how updates behave.\n\nWhere you put the file decides whether the user can override it:\n\n- **System directory (needs admin rights to write)** - the settings are applied **and locked**. The affected controls are greyed out with a \"Managed by administrator\" label and users cannot change them. This is what you want for a managed fleet.\n- **Per-user directory** - the settings are applied but **not locked**, so the user can still change them. Useful for setting a default without forcing it.\n\nYou can write this file yourself (it is only a few lines), or on Windows let the installer write it for you from install parameters (see the Windows section below).\n\n---\n\n## The provisioning file\n\n`stirling-provisioning.json` is plain JSON. Every field is optional - include only the ones you want to set:\n\n```json\n{\n \"serverUrl\": \"http://192.168.1.53:8080\",\n \"lockConnectionMode\": true,\n \"updateMode\": \"disabled\"\n}\n```\n\n| Field | Type | What it does |\n|-------|------|--------------|\n| `serverUrl` | string | The server the app connects to on launch (your self-hosted instance, or a Stirling Cloud URL). Include the protocol (`http://` or `https://`); a trailing slash is optional. |\n| `lockConnectionMode` | boolean | `true` stops users changing the server or connection mode in Settings. Only takes effect when `serverUrl` is also set. |\n| `loginAgreementEnabled` | boolean | `true` enables the login agreement/disclaimer dialog. It only turns the feature on - the text is supplied separately (see note below), and with no text nothing is shown. Can be set on its own (no `serverUrl` needed), so it also applies to local, no-login desktop installs. |\n| `updateMode` | string | How the built-in updater behaves: `prompt` (default - ask the user), `auto` (download and install silently on startup), or `disabled` (never check or show update UI). |\n\nA file with none of these fields is ignored.\n\n> **📝 Note: The login agreement flag only enables it**\n>\n> `loginAgreementEnabled` / `STIRLING_LOGIN_AGREEMENT` switches the feature on; it does not carry the disclaimer text. The dialog stays hidden until text is available - from the server the desktop connects to, or for a local bundled backend from a `customFiles/disclaimer/<locale>.md` file or the `LEGAL_LOGINAGREEMENT_FALLBACKTEXT` setting. With no text configured, nothing is shown. See [Login Agreement](doc:configuration/security/system-and-security).\n>\n> Passing the disclaimer text directly as an install parameter is planned for a future update.\n\n\n---\n\n## File locations\n\nPut the file in the **system** directory to apply and lock settings for everyone on the machine. The app also reads a **per-user** copy, which is applied but not locked.\n\n| OS | System directory (applies and locks) | Per-user directory (applies only) |\n|----|--------------------------------------|-----------------------------------|\n| **Windows** | `%PROGRAMDATA%\\Stirling-PDF\\stirling-provisioning.json` | `%APPDATA%\\Stirling-PDF\\stirling-provisioning.json` |\n| **macOS** | `/Library/Application Support/Stirling-PDF/stirling-provisioning.json` | `~/Library/Application Support/Stirling-PDF/stirling-provisioning.json` |\n| **Linux** | `/etc/stirling-pdf/stirling-provisioning.json` | `~/.config/Stirling-PDF/stirling-provisioning.json` |\n\n---\n\n## Windows (Intune / SCCM / Group Policy)\n\nOn Windows you do not have to write the JSON by hand. The MSI installer (and `winget --custom`) accept parameters and write the system provisioning file for you during a silent install.\n\n| Parameter | Description | Example |\n|-----------|-------------|---------|\n| `STIRLING_SERVER_URL` | Server URL the app connects to | `http://192.168.1.53:8080` |\n| `STIRLING_LOCK_CONNECTION` | Lock the connection so users cannot change it (`1` = locked) | `1` |\n| `STIRLING_LOGIN_AGREEMENT` | Enable the login agreement/disclaimer dialog (`1` = enabled). The text is supplied separately; the flag alone shows nothing. | `1` |\n| `STIRLING_UPDATE_MODE` | Set and lock the update mode (`prompt`, `auto`, or `disabled`) | `disabled` |\n| `INSTALLDIR` | Custom install directory (MSI only) | `C:\\CustomPath\\Stirling-PDF` |\n| `ALLUSERS` | Install for all users (requires admin; `1`) | `1` |\n\n**MSI (msiexec):**\n```batch\nmsiexec /i \"Stirling-PDF-windows-x86_64.msi\" /qn ^\n STIRLING_SERVER_URL=\"http://192.168.1.53:8080\" ^\n STIRLING_LOCK_CONNECTION=1 ^\n STIRLING_UPDATE_MODE=disabled ^\n ALLUSERS=1\n```\n\n**winget:**\n```powershell\nwinget install StirlingTools.StirlingPDF `\n --custom \"STIRLING_SERVER_URL=http://192.168.1.53:8080 STIRLING_LOCK_CONNECTION=1\"\n```\n\n`/qn` runs the MSI silently with no UI. The MSI is available in the [GitHub releases](https://github.com/Stirling-Tools/Stirling-PDF/releases/latest). These parameters write `%PROGRAMDATA%\\Stirling-PDF\\stirling-provisioning.json`, so the settings are applied and locked for every user on the machine.\n\n---\n\n## macOS (Jamf / MDM)\n\nWrite `stirling-provisioning.json` to the system directory and push it with your MDM (Jamf, Munki, and so on):\n\n```\n/Library/Application Support/Stirling-PDF/stirling-provisioning.json\n```\n\nFor example, to point every Mac at a self-hosted server, lock that choice, and turn updates off:\n\n```json\n{ \"serverUrl\": \"https://pdf.example.com\", \"lockConnectionMode\": true, \"updateMode\": \"disabled\" }\n```\n\n---\n\n## Linux (managed desktops)\n\nWrite the same file to the system directory:\n\n```\n/etc/stirling-pdf/stirling-provisioning.json\n```\n\nA per-user copy in `~/.config/Stirling-PDF/` is also read, but it is not locked.\n\n---\n\n## Changing or removing managed settings\n\nLocked settings can only be changed through the provisioning file. To update them, push a new `stirling-provisioning.json` (or remove it) with the same tool you used to deploy it, then have users restart the app. Removing the system file unlocks the controls again.",
|
||
"sourcePath": "docs/Installation/Managed Deployment.md",
|
||
"editUrl": "https://github.com/Stirling-Tools/Stirling-Tools.github.io/blob/main/docs/Installation/Managed Deployment.md"
|
||
},
|
||
"installation/path-structure": {
|
||
"id": "installation/path-structure",
|
||
"title": "Path Structure",
|
||
"section": "installation",
|
||
"markdown": "## Server Deployment\nWhen running in server mode, the base path defaults to `./` (current directory)\n\n\n## Desktop Deployment\nWhen running as a desktop application (non-server deployment), the base path is set according to the operating system:\n\n- **Windows**: `%APPDATA%\\Stirling-PDF\\`\n- **macOS**: `~/Library/Application Support/Stirling-PDF/`\n- **Linux/Unix**: `~/.config/Stirling-PDF/`\n\n\n## Directory Structure\n\nAll paths below are relative to the BASE_PATH. The File.separator ensures cross-platform compatibility.\n\n## Root Directories\n- `logs/` - Application logs storage\n- `configs/` - Configuration files\n- `pipeline/` - Pipeline-related operations\n- `customFiles/` - Custom assets and templates\n- `clientWebUI/` - Web interface assets\n\n## Configuration Files\n- `configs/settings.yml` - Main settings file\n- `configs/custom_settings.yml` - User-specific settings\n\n## Pipeline Directories\n- `pipeline/watchedFolders/` - Monitored directories for automated processing\n- `pipeline/finishedFolders/` - Completed processing output location\n\n## Custom Files Structure\n- `customFiles/static/` - Static asset overrides (logos, images, favicons, etc.)\n- `customFiles/templates/` - Legacy template files (deprecated, not used)\n- `customFiles/signatures/` - Digital signature files",
|
||
"sourcePath": "docs/Installation/Path Structure.md",
|
||
"editUrl": "https://github.com/Stirling-Tools/Stirling-Tools.github.io/blob/main/docs/Installation/Path Structure.md"
|
||
},
|
||
"installation/unix": {
|
||
"id": "installation/unix",
|
||
"title": "Unix Installation Guide",
|
||
"section": "installation",
|
||
"markdown": "## Unix Installation\n\nStirling PDF on Linux is available as a **native desktop application** or as a **server** using the JAR file.\n\n## Desktop Application (Recommended for Personal Use)\n\nNative Linux desktop app with all PDF tools available.\n\n### What You Get\n\n- ✅ **Native Linux application** - Integrated with your desktop environment\n- ✅ **Open PDFs directly** - Double-click any PDF to open in Stirling-PDF\n- ✅ **No login required** - Install and start using PDF tools right away\n- ✅ **Processes files locally** - All your PDF processing stays on your device\n- ✅ **Optional server connection** - Connect to Stirling Cloud or your own self-hosted server for advanced tools like OCR and document conversions\n- ✅ **All local tools included** - Merge, split, rotate, sign, and more work without any server\n- ✅ **Better performance** - Native Linux integration\n- ✅ **No browser needed** - Standalone application\n\n### Installation\n\nPick whichever package format matches your distribution.\n\n\n \n ```bash\n wget https://files.stirlingpdf.com/linux-installer.deb\n sudo dpkg -i linux-installer.deb\n ```\n\n Launch via your application menu or `stirling-pdf` from the terminal.\n \n \n ```bash\n wget https://files.stirlingpdf.com/linux-installer.rpm\n sudo dnf install ./linux-installer.rpm\n ```\n \n \n No install required - download, mark executable, run:\n\n ```bash\n wget https://files.stirlingpdf.com/linux-installer.AppImage\n chmod +x linux-installer.AppImage\n ./linux-installer.AppImage\n ```\n\n If you see `fuse: device not found` on Ubuntu 22.04+, install FUSE:\n\n ```bash\n sudo apt-get install libfuse2\n ```\n \n \n Install via any AUR helper:\n\n ```bash\n paru -S stirling-pdf-desktop\n # or: yay -S stirling-pdf-desktop\n ```\n\n Package: [stirling-pdf-desktop](https://aur.archlinux.org/packages/stirling-pdf-desktop).\n \n\n\n### Connecting to a server\n\nThe desktop app works fully offline for local PDF tools like merging, splitting, rotating, and signing. If you need advanced server-side features like OCR or document format conversions, you can connect to a server at any time. See [Modes](doc:modes-and-licensing) for how each mode is licensed.\n\n**Stirling Cloud**\n- Sign in with your Stirling Cloud account\n- Gives access to advanced tools powered by server-side processing\n- See [Modes](doc:modes-and-licensing) for what this mode includes\n\n**Self-hosted Server**\n- Enter the URL of your own Stirling-PDF server instance (e.g., `http://192.168.1.53:8080`)\n- Full control over your data and processing\n- Useful for team deployments or when you want all features on your own infrastructure\n\n### Managed deployment (MDM)\n\nTo pre-configure and lock the app across managed Linux desktops - server URL, connection lock, and update behaviour - see [Managed Desktop Deployment](doc:installation/managed-deployment).\n\n---\n\n## Server Version (For Hosting and Sharing)\n\nTo run the application without Docker/Podman, you will need to manually install all dependencies and build the necessary components.\n\nNote that some dependencies might not be available in the standard repositories of all Linux distributions, and may require additional steps to install.\n\nThe following guide assumes you have a basic understanding of using a command line interface in your operating system.\n\nIt should work on most Linux distributions and MacOS. For Windows, you might need to use Windows Subsystem for Linux (WSL) for certain steps.\nThe amount of dependencies is to actually reduce overall size, ie installing LibreOffice sub components rather than full LibreOffice package.\n\nYou could theoretically use a Distrobox/Toolbox, if your Distribution has old or not all Packages. But you might just as well use the Docker Container then.\n\n### Step 1: Prerequisites\n\nInstall the following software, if not already installed:\n\n- Java 25 or later\n- Gradle 7.0 or later (included within repo so not needed on server)\n- Git\n- Python 3.8 (with pip)\n- Make\n- GCC/G++\n- Automake\n- Autoconf\n- libtool\n- pkg-config\n- zlib1g-dev\n- libleptonica-dev\n\n\n \n ```bash\n sudo apt-get update\n sudo apt-get install -y git automake autoconf libtool \\\n libleptonica-dev pkg-config zlib1g-dev make g++ \\\n openjdk-25-jdk python3 python3-pip\n ```\n \n \n ```bash\n sudo dnf install -y git automake autoconf libtool \\\n leptonica-devel pkg-config zlib-devel make gcc-c++ \\\n java-25-openjdk python3 python3-pip\n ```\n \n \n ```bash\n nix-channel --update\n nix-env -iA nixpkgs.jdk25 nixpkgs.git nixpkgs.python38 \\\n nixpkgs.gnumake nixpkgs.libgcc nixpkgs.automake \\\n nixpkgs.autoconf nixpkgs.libtool nixpkgs.pkg-config \\\n nixpkgs.zlib nixpkgs.leptonica\n ```\n \n\n\n### Step 2: Clone and Build jbig2enc (Only required for certain OCR functionality)\n\n\n \n ```bash\n mkdir ~/.git\n cd ~/.git &&\\\n git clone https://github.com/agl/jbig2enc.git &&\\\n cd jbig2enc &&\\\n ./autogen.sh &&\\\n ./configure &&\\\n make &&\\\n sudo make install\n ```\n \n \n ```bash\n mkdir ~/.git\n cd ~/.git &&\\\n git clone https://github.com/agl/jbig2enc.git &&\\\n cd jbig2enc &&\\\n ./autogen.sh &&\\\n ./configure &&\\\n make &&\\\n sudo make install\n ```\n \n \n ```bash\n nix-env -iA nixpkgs.jbig2enc\n ```\n \n\n\n### Step 3: Install Additional Software\n\nNext we need to install LibreOffice for conversions, tesseract for OCR, and opencv for pattern recognition functionality.\n\nInstall the following software:\n\n- libreoffice (libreoffice-core libreoffice-common libreoffice-writer libreoffice-calc libreoffice-impress)\n- python3-uno\n- unoserver\n- pngquant\n- tesseract\n- opencv-python-headless\n\n\n \n ```bash\n sudo apt-get install -y libreoffice-writer libreoffice-calc libreoffice-impress tesseract-ocr\n pip3 install uno opencv-python-headless unoserver pngquant WeasyPrint --break-system-packages\n ```\n \n \n ```bash\n sudo dnf install -y libreoffice-writer libreoffice-calc libreoffice-impress tesseract\n pip3 install uno opencv-python-headless unoserver pngquant WeasyPrint\n ```\n \n \n ```bash\n nix-env -iA nixpkgs.libreoffice nixpkgs.tesseract nixpkgs.poppler_utils\n pip3 install uno opencv-python-headless unoserver pngquant WeasyPrint\n ```\n \n\n\n### Step 4: Grab latest Stirling PDF Jar\n\nStirling PDF comes in three different JAR files:\n\n**Stirling-PDF-with-login.jar** (Recommended - Full Features):\n- Download: [Stirling-PDF-with-login.jar](https://files.stirlingpdf.com/Stirling-PDF-with-login.jar)\n- Bundles frontend UI + backend server in one file\n- **Includes authentication and additional features** - requires user login (default credentials: `admin` / `stirling`)\n- **Recommended for all users** - personal, shared, or enterprise deployments\n\n**Stirling-PDF.jar** (Plain JAR - Basic Features):\n- Download: [Stirling-PDF.jar](https://files.stirlingpdf.com/Stirling-PDF.jar)\n- Bundles frontend UI + backend server in one file\n- **Basic version** - no authentication, core features only\n- Only use if you require no login at all and don't mind missing certain features\n\n**Stirling-PDF-server.jar** (Backend Only - **Advanced**):\n- Download: [Stirling-PDF-server.jar](https://files.stirlingpdf.com/Stirling-PDF-server.jar)\n- Backend server only (no bundled UI)\n- **No authentication** - API access only\n- For desktop app backend, custom frontend, or API integrations\n\nExample download and setup:\n\n```bash\nsudo wget https://files.stirlingpdf.com/Stirling-PDF.jar\nsudo chmod +x Stirling-PDF.jar\n```\n\n### Step 4b: Clone the Stirling-PDF Repository\n\nYou need the repository to get the `scripts` folder, which contains Python scripts used by OpenCV for certain PDF operations.\n\n```bash\ngit clone https://github.com/Stirling-Tools/Stirling-PDF.git\n```\n\n### Step 5: Move JAR and Scripts to Desired Location\n\nMove the downloaded JAR file and the `scripts` folder from the cloned repository to a desired location, for example, `/opt/Stirling-PDF/`.\nThe `scripts` folder is required for the Python scripts using OpenCV.\n\n\n \n ```bash\n sudo mkdir -p /opt/Stirling-PDF &&\\\n sudo mv Stirling-PDF.jar /opt/Stirling-PDF/ &&\\\n sudo cp -r Stirling-PDF/scripts /opt/Stirling-PDF/ &&\\\n echo \"JAR and scripts installed.\"\n ```\n \n \n ```bash\n sudo mkdir -p /opt/Stirling-PDF &&\\\n sudo mv Stirling-PDF.jar /opt/Stirling-PDF/ &&\\\n sudo cp -r Stirling-PDF/scripts /opt/Stirling-PDF/ &&\\\n echo \"JAR and scripts installed.\"\n ```\n \n \n ```bash\n mkdir -p ~/Stirling-PDF &&\\\n mv Stirling-PDF.jar ~/Stirling-PDF/ &&\\\n cp -r Stirling-PDF/scripts ~/Stirling-PDF/\n ```\n \n\n\n### Step 6: OCR Language Support\n\nIf you plan to use the OCR (Optical Character Recognition) functionality, you might need to install language packs for Tesseract if running non-english scanning.\n\n\n \n ```bash\n sudo apt update &&\\\n # All languages\n # sudo apt install -y 'tesseract-ocr-*'\n\n # Find languages:\n apt search tesseract-ocr-\n \n # View installed languages:\n dpkg-query -W tesseract-ocr- | sed 's/tesseract-ocr-//g'\n ```\n \n \n ```bash\n # All languages\n # sudo dnf install -y tesseract-langpack-*\n\n # Find languages:\n dnf search -C tesseract-langpack-\n \n # View installed languages:\n rpm -qa | grep tesseract-langpack | sed 's/tesseract-langpack-//g'\n ```\n \n \n ```bash\n nix-env -iA nixpkgs.tesseract\n ```\n Note: Nix Package Manager pre-installs almost all the language packs when tesseract is installed.\n \n \n 1. Download the desired language pack(s) by selecting the `.traineddata` file(s) for the language(s) you need.\n 2. Place the `.traineddata` files in the Tesseract tessdata directory: `/usr/share/tessdata`\n 3. Please view [tesseract install guide](https://tesseract.readthedocs.io/en/latest/installation.html) for more info.\n\n **IMPORTANT:** DO NOT REMOVE EXISTING `eng.traineddata`, IT'S REQUIRED.\n\n \n\n\n### Step 7: Run Stirling PDF\n\n\n \n ```bash\n java -jar /opt/Stirling-PDF/Stirling-PDF-*.jar\n ```\n \n \n ```bash\n java -jar /opt/Stirling-PDF/Stirling-PDF-*.jar\n ```\n \n \n ```bash\n java -jar /opt/Stirling-PDF/Stirling-PDF-*.jar\n ```\n Since libreoffice, soffice, and conversion tools have their dbus_tmp_dir set as `dbus_tmp_dir=\"/run/user/$(id -u)/libreoffice-dbus\"`, you get the following error:\n `[Thread-7] INFO s.s.SPDF.utils.ProcessExecutor - mkdir: cannot create directory '/run/user/1501': Permission denied`\n To resolve this, use:\n `bash\n mkdir temp\n export DBUS_SESSION_BUS_ADDRESS=\"unix:path=./temp\"\n `\n \n\n\n### Step 8: Adding a Desktop Icon\n\nThis will add a modified Appstarter to your Appmenu.\n\n```bash\nlocation=$(pwd)/gradlew\nimage=$(pwd)/docs/stirling.svg\n\ncat > ~/.local/share/applications/Stirling-PDF.desktop <<EOF\n[Desktop Entry]\nName=Stirling PDF;\nGenericName=Launch StirlingPDF and open its WebGUI;\nCategory=Office;\nExec=xdg-open http://localhost:8080 && nohup $location java -jar /opt/Stirling-PDF/Stirling-PDF-*.jar &;\nIcon=$image;\nKeywords=pdf;\nType=Application;\nNoDisplay=false;\nTerminal=true;\nEOF\n```\n\nNote: Currently the app will run in the background until manually closed.\n\n### Optional: Changing the Host and Port\n\nTo override the default configuration, you can add the following to the `configs/custom_settings.yml` file inside your install directory (for example, `/opt/Stirling-PDF/configs/custom_settings.yml`):\n\n```yaml\nserver:\n host: 0.0.0.0\n port: 3000\n```\n\nFor systemd add in the .env file (see run as service for setting environment variables):\n\n```bash\nSERVER_HOST=\"0.0.0.0\"\nSERVER_PORT=\"3000\"\n```\n\n**Note:** The file `custom_settings.yml` is created after the first application launch. To have it before that, you can create the directory and add the file yourself.\n\n### Optional: Run Stirling PDF as a service (requires root).\n\nFirst create a .env file, where you can store environment variables:\n\n```\ntouch /opt/Stirling-PDF/.env\n```\n\nIn this file you can add all variables, one variable per line, as stated in the main readme (for example SYSTEM_DEFAULTLOCALE=\"de-DE\").\n\nCreate a new file where we store our service settings and open it with nano editor:\n\n```\nnano /etc/systemd/system/stirlingpdf.service\n```\n\nPaste this content, make sure to update the filename of the jar-file. Press Ctrl+S and Ctrl+X to save and exit the nano editor:\n\n```\n[Unit]\nDescription=Stirling-PDF service\nAfter=syslog.target network.target\n\n[Service]\nSuccessExitStatus=143\n\nUser=root\nGroup=root\n\nType=simple\n\nEnvironmentFile=/opt/Stirling-PDF/.env\nWorkingDirectory=/opt/Stirling-PDF\nExecStart=/usr/bin/java -jar Stirling-PDF-*.jar\nExecStop=/bin/kill -15 $MAINPID\n\n[Install]\nWantedBy=multi-user.target\n```\n\nNotify systemd that it has to rebuild its internal service database (you have to run this command every time you make a change in the service file):\n\n```\nsudo systemctl daemon-reload\n```\n\nEnable the service to tell the service to start it automatically:\n\n```\nsudo systemctl enable stirlingpdf.service\n```\n\nSee the status of the service:\n\n```\nsudo systemctl status stirlingpdf.service\n```\n\nManually start/stop/restart the service:\n\n```\nsudo systemctl start stirlingpdf.service\nsudo systemctl stop stirlingpdf.service\nsudo systemctl restart stirlingpdf.service\n```\n\n### Starting unoserver alongside Stirling PDF\n\nTo ensure that unoserver is running alongside Stirling PDF, you need to start it with the following command:\n\n```bash\nunoserver --port 2003 --interface 0.0.0.0\n```\n\nYou can add this command to your startup script or systemd service file to ensure it starts automatically with Stirling PDF.\n\n### Customizing Paths in settings.yml\n\nIf the install path is different, it can be customized in `settings.yml`:\n\n```yaml\nsystem:\n customPaths:\n pipeline:\n watchedFoldersDir: \"\" #Defaults to /pipeline/watchedFolders\n finishedFoldersDir: \"\" #Defaults to /pipeline/finishedFolders\n operations:\n weasyprint: \"\" #Defaults to /opt/venv/bin/weasyprint\n unoconvert: \"\" #Defaults to /opt/venv/bin/unoconvert\n```",
|
||
"sourcePath": "docs/Installation/Unix.md",
|
||
"editUrl": "https://github.com/Stirling-Tools/Stirling-Tools.github.io/blob/main/docs/Installation/Unix.md"
|
||
},
|
||
"installation/versions": {
|
||
"id": "installation/versions",
|
||
"title": "Versions",
|
||
"section": "installation",
|
||
"markdown": "## Versions of Stirling PDF\n\nStirling PDF is available in several formats, each catering to different needs and use cases:\n\n## Docker Versions\nFor server deployments, we offer three pre-configured Docker images:\n- \n- \n- \n\n- **Fat**: Includes all Full features plus additional fonts and pre-bundled jar security version\n- **Full**: All features pre-configured and ready to use\n- **Ultra-Lite**: Minimal installation with core features only\n\n\n## Desktop Versions (Windows & Unix)\nThe desktop versions of Stirling PDF use a dynamic feature system. They start with Ultra-Lite features as the base and automatically enable additional functionality based on installed dependencies:\n\nBase Features (Ultra-Lite):\n- Core PDF operations (merge, split, rotate, etc.)\n- Basic conversions\n- Password protection\n- All features marked with ✔️ in the Ultra-Lite column below\n\nAdditional features become available automatically when you install:\n- LibreOffice: Enables document format conversions (PDF to Word, Excel, etc.)\n- Tesseract: Enables OCR functionality\n- QPDF: Enables compression and repair features\n- Other dependencies: Enable their respective features\n\n\n## Feature Comparison\n\nFor the desktop app, the **Ultra-Lite** column below lists the tools that run locally and fully offline on the bundled backend. The **Full-only** tools (OCR, Office conversions, and other tools that depend on external binaries) require a connected server - either Stirling Cloud or your own self-hosted server.\n\nHere are the different technologies each version uses:\n\n| Technology | Ultra-Lite | Full |\n|----------------|:----------:|:----:|\n| Java | ✔️ | ✔️ |\n| JavaScript | ✔️ | ✔️ |\n| Libre | | ✔️ |\n| Python | | ✔️ |\n| OpenCV | | ✔️ |\n| Tesseract | | ✔️ |\n\nAnd here you see what functions are offered as part of each.\n\nOperation | Ultra-Lite | Full\n-------------------------|------------|-----\nadd-page-numbers | ✔️ | ✔️\nadd-password | ✔️ | ✔️\nadd-image | ✔️ | ✔️\nadd-watermark | ✔️ | ✔️\nadjust-contrast | ✔️ | ✔️\nauto-split-pdf | ✔️ | ✔️\nauto-redact | ✔️ | ✔️\nauto-rename | ✔️ | ✔️\ncert-sign | ✔️ | ✔️\ncrop | ✔️ | ✔️\nchange-metadata | ✔️ | ✔️\nchange-permissions | ✔️ | ✔️\ncompare | ✔️ | ✔️\nextract-page | ✔️ | ✔️\nextract-images | ✔️ | ✔️\nflatten | ✔️ | ✔️\nget-info-on-pdf | ✔️ | ✔️\nimg-to-pdf | ✔️ | ✔️\nmarkdown-to-pdf | ✔️ | ✔️\nmerge-pdfs | ✔️ | ✔️\nmulti-page-layout | ✔️ | ✔️\noverlay-pdf | ✔️ | ✔️\npdf-organizer | ✔️ | ✔️\npdf-to-csv | ✔️ | ✔️\npdf-to-img | ✔️ | ✔️\npdf-to-single-page | ✔️ | ✔️\nremove-blanks | ✔️ | ✔️\nremove-pages | ✔️ | ✔️\nremove-password | ✔️ | ✔️\nrotate-pdf | ✔️ | ✔️\nsanitize-pdf | ✔️ | ✔️\nscale-pages | ✔️ | ✔️\nsign | ✔️ | ✔️\nshow-javascript | ✔️ | ✔️\nsplit-by-size-or-count | ✔️ | ✔️\nsplit-pdf-by-sections | ✔️ | ✔️\nsplit-pdfs | ✔️ | ✔️\ncompress-pdf | | ✔️\nextract-image-scans | | ✔️\nocr-pdf | | ✔️\npdf-to-pdfa | | ✔️\npdf-to-text | ✔️ | ✔️\npdf-to-html | | ✔️\npdf-to-word | | ✔️\npdf-to-presentation | | ✔️\npdf-to-xml | | ✔️\nremove-annotations | ✔️ | ✔️\nremove-cert-sign | ✔️ | ✔️\nremove-image-pdf | ✔️ | ✔️\nfile-to-pdf | | ✔️\nxlsx-to-pdf | | ✔️\nhtml-to-pdf | | ✔️\nurl-to-pdf | | ✔️\nrepair | | ✔️",
|
||
"sourcePath": "docs/Installation/Versions.md",
|
||
"editUrl": "https://github.com/Stirling-Tools/Stirling-Tools.github.io/blob/main/docs/Installation/Versions.md"
|
||
},
|
||
"installation/windows": {
|
||
"id": "installation/windows",
|
||
"title": "Windows Guide",
|
||
"section": "installation",
|
||
"markdown": "## Windows Installation Guide for Stirling PDF\n\nStirling PDF for Windows comes in two versions: a **Desktop Application** for personal use and a **Server Version** for hosting and sharing with others.\n\n## Desktop Application (Recommended for Personal Use)\n\n**V2.0 brings a native Windows desktop experience** with all PDF tools available offline!\n\n### What You Get\n\n- ✅ **Native Windows application** - Feels like a built-in Windows program\n- ✅ **Open PDFs directly** - Double-click any PDF to open in Stirling PDF\n- ✅ **No login required** - Install and start using PDF tools right away\n- ✅ **Processes files locally** - All your PDF processing stays on your device\n- ✅ **Optional server connection** - Connect to Stirling Cloud or your own self-hosted server for advanced tools like OCR and document conversions\n- ✅ **All local tools included** - Merge, split, rotate, sign, and more work without any server\n- ✅ **Automatic updates** - Stay current with latest features\n- ✅ **Better performance** - Optimized for Windows\n- ✅ **No browser needed** - Standalone application\n\n### Installation\n\nPick whichever method you prefer. All three install the same desktop app.\n\n\n \n 1. Download: [Stirling PDF Desktop Installer](https://files.stirlingpdf.com/win-installer.exe)\n 2. Run the installer and follow the prompts (installs to `C:\\Program Files\\Stirling-PDF`)\n 3. Launch from the Start Menu - search for \"Stirling PDF\"\n\n For unattended deployments with a pre-configured server URL, see [Automated Installation](#automated-installation) below.\n \n \n ```powershell\n winget install StirlingTools.StirlingPDF\n ```\n\n For unattended deployments with a pre-configured server URL, see [Automated Installation](#automated-installation) below.\n \n \n ```powershell\n scoop bucket add stirling-pdf https://github.com/Stirling-Tools/homebrew-stirling-pdf\n scoop install stirling-pdf/stirling-pdf\n ```\n\n Updates come through automatically on new releases:\n\n ```powershell\n scoop update stirling-pdf\n ```\n \n\n\n### Connecting to a server\n\nThe desktop app works fully offline for local PDF tools like merging, splitting, rotating, and signing. If you need advanced server-side features like OCR or document format conversions, you can pick one of three connection modes. See [Modes](doc:modes-and-licensing) for how each mode is licensed.\n\n**Built-in local processing (default)**\n- The desktop app runs its own Stirling PDF server on your machine, no setup or login\n- All processing stays on your device and works without internet\n\n**Stirling Cloud**\n- Sign in with your Stirling Cloud account\n- Gives access to advanced tools powered by server-side processing\n- See [Modes](doc:modes-and-licensing) for what this mode includes\n\n**Self-hosted Server**\n- Enter the URL of your own Stirling PDF server instance (e.g., `http://192.168.1.53:8080`)\n- Full control over your data and processing\n- Useful for team deployments or when you want all features on your own infrastructure\n\n### Using the Desktop App\n\n**Opening PDFs:**\n- **Double-click any PDF file** - Opens in Stirling PDF\n- **Right-click → Open with → Stirling PDF**\n- **Drag and drop** files into the application\n- **File → Open** from the menu\n\n**Making Stirling PDF your default PDF viewer:**\n1. Right-click any PDF file\n2. Select \"Open with\" → \"Choose another app\"\n3. Select \"Stirling PDF\"\n4. Check \"Always use this app to open .pdf files\"\n5. Click OK\n\n**Benefits of desktop app:**\n- Files stay on your computer (not in browser storage)\n- Work without internet connection\n- Faster performance\n- Unlimited file storage (not limited by browser)\n\n**Multiple windows:**\n- Press **Ctrl+N** to open an empty new window\n- Use **Open in new window** from the My Files page to open files in a separate window\n\n### Software Updates\n\nThe desktop app keeps itself current. Open **Settings → Software Updates** to check for updates and choose how they are applied. The update behaviour is controlled by the `update_mode` setting, which has three values:\n\n| Mode | Behaviour |\n|------|-----------|\n| `prompt` | Default. Shows the update popup and lets you decide when to install |\n| `auto` | Silently downloads, installs, and restarts on startup |\n| `disabled` | Never checks for updates or shows update UI |\n\nWhen the mode is set by an administrator through a provisioning file (see [Managed Desktop Deployment](doc:installation/managed-deployment)), the Software Updates control is locked and shows **\"Managed by administrator\"** so users cannot change it.\n\n### Automated Installation\n\nFor silent or headless installs and pre-configuring the app for managed fleets - server URL, connection lock, and update mode via MSI or `winget` parameters, or a provisioning file - see [Managed Desktop Deployment](doc:installation/managed-deployment).\n\n### Desktop app troubleshooting\n\n- **App shows in Task Manager but no window appears** - The desktop app renders its UI using the Microsoft Edge WebView2 Runtime. If the process is running but nothing is displayed, install the [Microsoft Edge WebView2 Runtime](https://developer.microsoft.com/en-us/microsoft-edge/webview2/) and launch the app again.\n- **Connecting to a self-hosted server** - Use your backend server URL (for example `http://192.168.1.53:8080`). To verify the server is reachable, open `http://<server>:<port>/api/v1/info/status` in a browser - it should return JSON with a status of `UP`.\n\n## Server Version (For Hosting and Sharing)\n\nWant to host Stirling PDF on a Windows server for multiple users? Use the server version.\n\n### Server Downloads\n\nStirling PDF comes in three different JAR files:\n\n**Stirling-PDF-with-login.jar** (Recommended - Full Features):\n- Download: [Stirling-PDF-with-login.jar](https://files.stirlingpdf.com/Stirling-PDF-with-login.jar)\n- Bundles frontend UI + backend server in one file\n- **Includes authentication and additional features** - requires user login (default credentials: `admin` / `stirling`)\n- **Recommended for all users** - personal, shared, or enterprise deployments\n\n**Stirling-PDF.jar** (Plain JAR - Basic Features):\n- Download: [Stirling-PDF.jar](https://files.stirlingpdf.com/Stirling-PDF.jar)\n- Bundles frontend UI + backend server in one file\n- **Basic version** - no authentication, core features only\n- Only use if you require no login at all and don't mind missing certain features\n\n**Stirling-PDF-server.jar** (Backend Only - **Advanced**):\n- Download: [Stirling-PDF-server.jar](https://files.stirlingpdf.com/Stirling-PDF-server.jar)\n- Backend server only (no bundled UI)\n- **No authentication** - API access only\n- For desktop app backend, custom frontend, or API integrations\n\n**Required:** [Java JDK 25 (Temurin 25)](https://adoptium.net/temurin/releases/?version=25&os=windows) - Server versions need Java installed\n\n### Server Installation Steps\n\n1. **Install Java JDK 25** from the link above\n2. **Download** your preferred JAR file\n3. **Run the JAR file:**\n ```bash\n java -jar Stirling-PDF.jar\n ```\n4. **Access** via browser at `http://localhost:8080`\n5. **Share the URL** with users on your network (e.g., `http://your-server-ip:8080`)\n\n### Optional Dependencies\nThese dependencies enable additional features in Stirling PDF. Install only the ones you need:\n\n#### Python and Related Tools\nPython and its related tools enable various features in Stirling PDF:\n- OpenCV: Enables image scan extraction features\n- Unoserver: Enables file to PDF conversion features\n- Python: Required base for OpenCV and other Python-based features\n\n1. Python Installation:\n - Download Python from [Python's official site](https://www.python.org/downloads/)\n - **Recommended version:** install **Python 3.11.x**. Python 3.12 and newer can break the unoserver/unoconv LibreOffice conversion path, so 3.11 is the safe choice.\n - During installation, **IMPORTANT**: Check \"Add Python to PATH\"\n - Verify installation by opening Command Prompt and running:\n ```bash\n python --version\n ```\n\n2. OpenCV Installation:\n - After Python is installed, open Command Prompt as administrator\n - Install OpenCV by running:\n ```bash\n pip install opencv-python\n ```\n - Verify installation:\n ```bash\n python -c \"import cv2\"\n ```\n - Enables the Detect & Split Scanned Photos operation\n \n3. Unoserver Installation:\n - First install LibreOffice (see LibreOffice section below)\n - Open Command Prompt as administrator\n - Install unoserver:\n ```bash\n pip install unoserver\n ```\n - Verify installation:\n ```bash\n unoserver --version\n ```\n - Enables File To PDF operation\n Note: Unoserver requires both Python and LibreOffice to function properly\n\n#### QPDF\n- Download from [QPDF's official site](https://qpdf.sourceforge.io/)\n- Enables PDF compression and other operations\n\n#### LibreOffice\n- Download and install from [LibreOffice's official site](https://www.libreoffice.org/download/download-libreoffice/)\n- Enables PDF to DOCX conversion and other document format conversions\n\n#### Tesseract OCR\n1. Download the installer from [UB Mannheim's GitHub](https://github.com/UB-Mannheim/tesseract/wiki)\n2. During installation, check additional languages you need\n3. Add to settings.yml in your Stirling PDF installation directory:\n ```yaml\n system:\n tessdataDir: C:\\\\Program Files\\\\Tesseract-OCR\\\\tessdata\n ```\n- Enables OCR functionality for PDFs\n\n#### Weasyprint\n1. Download from [Weasyprint's releases](https://github.com/Kozea/WeasyPrint/releases)\n2. Create a directory (e.g., `c:\\weasyprint\\`) and place weasyprint.exe there\n- Enables URL to PDF conversion\n- Note: Some antivirus software may flag weasyprint.exe - you may need to whitelist it\n\n#### PDFtoHTML\n1. Download from [SourceForge](https://sourceforge.net/projects/pdftohtml/)\n2. Create a directory (e.g., `c:\\pdftohtml\\`) and place pdftohtml.exe there\n- Enables PDF to HTML conversion\n\n## Adding Directories to System PATH\n\nAfter installing dependencies, you'll need to add their directories to your system's PATH. Here's how:\n\n1. Open Windows Search (Windows key + S)\n2. Type \"Environment Variables\" and click \"Edit the system environment variables\"\n3. Click \"Environment Variables\" button at the bottom\n4. Under \"System variables\", find and select \"Path\"\n5. Click \"Edit\"\n6. Click \"New\" to add each required path:\n - For Python: Should be added automatically during installation if \"Add Python to PATH\" was checked\n - For LibreOffice: `C:\\Program Files\\LibreOffice\\program`\n - For Tesseract: `C:\\Program Files\\Tesseract-OCR`\n - For Weasyprint: `C:\\weasyprint` (or your chosen directory)\n - For PDFtoHTML: `C:\\pdftohtml` (or your chosen directory)\n - For QPDF: The installation directory (usually `C:\\Program Files\\qpdf\\bin`)\n7. Click \"OK\" on all windows to save changes\n\n## Server Installation Steps\n\n1. Download the latest Stirling PDF JAR from the [releases page](https://github.com/Stirling-Tools/Stirling-PDF/releases/latest)\n2. Install any desired optional dependencies following the instructions above\n3. Launch the JAR with `java -jar Stirling-PDF.jar`\n4. Access the web interface through your browser. The application prints the URL in the console logs, normally http://localhost:8080\n\n## Notes\n- The application hosts a web server that is accessible to anyone on your network\n- If you install multiple Python-based dependencies, ensure they're using the same Python installation to avoid conflicts\n- Make sure to restart Stirling PDF after installing new dependencies or modifying PATH variables\n- Some features will be unavailable until their required dependencies are installed\n\n## Troubleshooting\n\n1. Verifying PATH Settings:\n - Open Command Prompt (cmd)\n - Type `echo %PATH%` to see all directories in your PATH\n - For each dependency, try running its command to verify it's accessible:\n ```bash\n python --version\n unoserver --version\n python -c \"import cv2\"\n tesseract --version\n ```\n\n2. Common Issues:\n - If changes to PATH don't take effect, try:\n - Logging out and back in\n - Restarting your computer\n - Opening a new Command Prompt window\n - If a dependency isn't found, double-check the exact path in File Explorer\n - For Tesseract issues, verify the tessdata directory contains language files\n - For LibreOffice conversions, ensure no LibreOffice windows are open when converting\n - For Python/OpenCV issues:\n - Make sure pip is up to date: `python -m pip install --upgrade pip`\n - Try installing with administrator privileges\n - Check if Python is properly added to PATH\n - For unoserver issues:\n - Verify both Python and LibreOffice are properly installed\n - Make sure LibreOffice is in PATH\n - Try running LibreOffice once before using unoserver\n\n## Starting unoserver alongside Stirling PDF\n\nTo ensure that unoserver is running alongside Stirling PDF, you need to start it with the following command:\n\n```bash\nunoserver --port 2003 --interface 0.0.0.0\n```\n\nYou can add this command to your startup script or systemd service file to ensure it starts automatically with Stirling PDF.\n\n\nNeed help? Visit the [Stirling PDF GitHub Issues](https://github.com/Stirling-Tools/Stirling-PDF/issues) page.",
|
||
"sourcePath": "docs/Installation/Windows.md",
|
||
"editUrl": "https://github.com/Stirling-Tools/Stirling-Tools.github.io/blob/main/docs/Installation/Windows.md"
|
||
},
|
||
"migration/breaking-changes": {
|
||
"id": "migration/breaking-changes",
|
||
"title": "Breaking Changes in V2",
|
||
"description": "Important changes that may affect your V2 upgrade",
|
||
"section": "migration",
|
||
"markdown": "Most V1 deployments will upgrade smoothly to V2, but there are some important changes you should know about. This page documents breaking changes and how to handle them.\n\n---\n\n## ⚠️ Impact Summary\n\n| Change | Impact | Action Required |\n|--------|--------|-----------------|\n| **Template Customization** | High | Rewrite customizations |\n| **UI Settings Location** | Medium | Use in-app settings |\n| **Session Management** | Low | Update setting names |\n| **Database Notifications** | Low | Use audit logs instead |\n\n---\n\n## 🎨 UI Customization Architecture Changed\n\n**Impact:** HIGH for users who customized UI using `customFiles/templates/`\n\n### What Changed\n\n**V1 Architecture:**\n```bash\ncustomFiles/\n └── templates/\n ├── fragments/\n │ └── navbar.html # Custom Thymeleaf template\n └── home.html # Custom Thymeleaf template\n```\n\nV1 used **server-side rendering** with Thymeleaf templates. HTML was generated dynamically on the server for each request.\n\n**V2 Architecture:**\nV2 uses a **React frontend** with client-side rendering. The UI is built into **static files** (HTML, CSS, JavaScript) that are served to the browser.\n\n**What this means:**\n- ❌ Thymeleaf templates (`.html` with `th:*` attributes) no longer work because there's no server-side rendering\n- ✅ Static file overrides **still work** via `customFiles/static/` - same concept, different paths\n- The file paths are different because they're now built React files instead of Thymeleaf templates\n\n### Migration Path\n\nYour V1 Thymeleaf templates cannot be directly reused in V2, but you have three options:\n\n#### Option 1: Use Built-In Customization (Recommended)\n\nV2 provides in-app settings for most common customizations:\n\n**Available Customizations:**\n- App name and description\n- Navbar branding\n- Logo style (classic/modern)\n- Custom logo upload\n- Homepage description\n\n**How to use:**\n1. Enable login: `SECURITY_ENABLELOGIN=true`\n2. Log in as admin\n3. Go to Settings → UI\n4. Configure branding there\n\n**Learn more:** [UI Customisation](doc:configuration/customisation/ui-customisation)\n\n#### Option 2: Static File Overrides (Same Concept as V1, Different Paths)\n\n**✅ Still supported in V2!** The static file override system works the same way conceptually - place files in `customFiles/static/` to override defaults.\n\n**How it works:**\n1. V2 checks `customFiles/static/` **first** for any requested file\n2. If not found, falls back to the bundled static files\n3. This lets you override logos, CSS, HTML, JavaScript, or any other static asset\n\n**Example Docker compose:**\n```yaml\nvolumes:\n - ./customFiles:/customFiles:rw\n```\n\n**Key difference from V1:**\n- V1 paths: `customFiles/templates/fragments/navbar.html` (Thymeleaf)\n- V2 paths: `customFiles/static/index.html` (React build output)\n\nThe file paths are different because V2 serves the **compiled React app** instead of Thymeleaf templates. See [Other Customisations - Static File Overrides](doc:configuration/customisation/other-customisations) for:\n- How to determine the correct file paths in V2\n- Examples of common customizations\n- Understanding the build output structure\n\n**Use cases:**\n- Custom favicon or logo\n- Modified `index.html` for advanced branding\n- Custom CSS to override styles\n- Additional static assets\n\n#### Option 3: Fork the Frontend (Advanced)\n\nFor complete UI customization:\n\n**Steps:**\n1. Fork Stirling PDF repository\n2. Modify React components in `frontend/src/`\n3. Build custom frontend\n4. Deploy in split mode with custom frontend\n\n**Trade-offs:**\n- ✅ Complete control\n- ❌ Must maintain your fork\n- ❌ Manual merges for updates\n\n### What No Longer Works\n\nThese V1 **Thymeleaf template features** no longer work because V2 uses React (client-side) instead of Thymeleaf (server-side):\n\n```html\n<!-- V1: Thymeleaf fragment injection (NO LONGER WORKS) -->\n<div th:replace=\"fragments/navbar :: navbar\"></div>\n\n<!-- V1: Thymeleaf conditionals (NO LONGER WORKS) -->\n<div th:if=\"${@propertyService.get('ui.showAdvanced')}\">\n Custom content\n</div>\n\n<!-- V1: Thymeleaf variables (NO LONGER WORKS) -->\n<span th:text=\"${appName}\"></span>\n```\n\n**Why they don't work:** These are Thymeleaf-specific features that require server-side HTML generation. V2 uses React which compiles to static JavaScript that runs in the browser.\n\n**Alternative:** You can still customize the **output** by overriding the built static files in `customFiles/static/`, but you'll be editing the compiled HTML/CSS/JS instead of Thymeleaf templates.\n\n---\n\n## ⚙️ UI Settings Moved to In-App Configuration\n\n**Impact:** MEDIUM - Settings moved, but easy to reconfigure\n\n### What Changed\n\n**V1 Configuration:**\n```yaml\nui:\n appName: 'My PDF Tool'\n homeDescription: 'Welcome to our PDF service!'\n```\n\n**V2 Configuration:**\n```yaml\nui:\n appNameNavbar: 'My PDF Tool' # Still in YAML\n # appName and homeDescription REMOVED\n # Configure these in-app instead\n```\n\n### Why the Change\n\n**Benefits:**\n- ✅ No container restart needed\n- ✅ Visual interface with preview\n- ✅ Validation prevents errors\n- ✅ Changes apply immediately\n- ✅ Role-based access control\n\n### Migration Steps\n\n1. **Note your current settings:**\n ```yaml\n # From V1 settings.yml\n ui:\n appName: 'CompanyName PDF'\n homeDescription: 'Internal document processing'\n ```\n\n2. **Remove from settings.yml:**\n ```yaml\n ui:\n appNameNavbar: 'CompanyName PDF'\n # appName - REMOVE THIS LINE\n # homeDescription - REMOVE THIS LINE\n ```\n\n3. **Configure in UI:**\n - Enable login: `SECURITY_ENABLELOGIN=true`\n - Start V2\n - Log in as admin\n - Go to Settings → UI\n - Enter app name and description\n - Save\n\n### Environment Variables\n\nThese environment variables **no longer work**:\n\n```bash\n# V1 (NO LONGER WORKS)\nUI_APPNAME=\"My PDF Tool\"\nUI_HOMEDESCRIPTION=\"Welcome!\"\n\n# V2 (USE IN-APP SETTINGS INSTEAD)\n# Set through UI after logging in\n```\n\n`UI_APPNAMENAVBAR` still works for navbar branding.\n\n---\n\n## 🔐 Session Management Improvements\n\n**Impact:** LOW - New session features with simple setting updates\n\n### What Changed\n\nSession management enhanced with new JWT-based features and improved settings:\n\n| V1 Setting | V2 Setting | Change |\n|------------|------------|--------|\n| `jwt.enabled` | `jwt.persistence` | Renamed |\n| `jwt.keyCleanup` | `jwt.enableKeyCleanup` | Renamed |\n| `jwt.secureCookie` | _(removed)_ | Always secure now |\n| _(new)_ | `jwt.enableKeyRotation` | New feature |\n| _(new)_ | `jwt.keyRetentionDays` | New feature |\n\n### Migration\n\n**V1 Configuration:**\n```yaml\nsecurity:\n jwt:\n enabled: false\n keyCleanup: false\n secureCookie: true\n```\n\n**V2 Configuration:**\n```yaml\nsecurity:\n jwt:\n persistence: true # was 'enabled'\n enableKeyCleanup: true # was 'keyCleanup'\n enableKeyRotation: true # NEW\n keyRetentionDays: 7 # NEW\n # secureCookie REMOVED\n```\n\n### Environment Variables\n\n**V1 (NO LONGER WORKS):**\n```bash\nSECURITY_JWT_ENABLED=false\nSECURITY_JWT_KEYCLEANUP=false\nSECURITY_JWT_SECURECOOKIE=true\n```\n\n**V2 (USE THESE):**\n```bash\nSECURITY_JWT_PERSISTENCE=true\nSECURITY_JWT_ENABLEKEYCLEANUP=true\nSECURITY_JWT_ENABLEKEYROTATION=true\nSECURITY_JWT_KEYRETENTIONDAYS=7\n```\n\n### After Upgrade\n\n**Expected behavior:** Users will be logged out once after upgrade.\n\n**Why:** Session token format changed with new JWT implementation.\n\n**Action:** Users just need to log in again. Normal behavior.\n\n**Learn more:** [Settings Changes - JWT Configuration](doc:migration/settings-changes)\n\n---\n\n## 🔕 Database Notifications Removed\n\n**Impact:** LOW - Replaced with better alternative\n\n### What Changed\n\nDatabase backup/import notifications removed.\n\n**V1 Configuration (NO LONGER WORKS):**\n```yaml\npremium:\n enterpriseFeatures:\n databaseNotifications:\n backups:\n successful: false\n failed: false\n imports:\n successful: false\n failed: false\n```\n\n### Why Removed\n\nReplaced with comprehensive audit logging system that provides:\n- More detailed information\n- Searchable history\n- Export capabilities\n- Better retention policies\n\n### Migration to Audit Logs\n\n**V2 Alternative:**\n\n1. **Enable audit logging:**\n ```yaml\n system:\n logging:\n level: INFO\n ```\n\n2. **Monitor logs:**\n ```bash\n docker logs stirling-pdf | grep \"Database backup\"\n docker logs stirling-pdf | grep \"Database import\"\n ```\n\n3. **Or use audit log UI:**\n - Log in as admin\n - Go to Settings → Audit Logs\n - Filter by operation type\n - Export as needed\n\n### What You Get Instead\n\n**Audit logs provide:**\n- ✅ Database operations (backup, import, export)\n- ✅ User actions (login, logout, operations)\n- ✅ Admin actions (settings changes, user management)\n- ✅ Failed operations with error details\n- ✅ Search and filter capabilities\n- ✅ Export to CSV/JSON\n\n**Example audit log entry:**\n```json\n{\n \"timestamp\": \"2025-01-15T10:30:00Z\",\n \"user\": \"admin\",\n \"action\": \"database.backup\",\n \"status\": \"success\",\n \"details\": {\n \"size\": \"1.2 GB\",\n \"duration\": \"45s\",\n \"location\": \"/backups/db-2025-01-15.sql\"\n }\n}\n```\n\n---\n\n## 🔧 Calibre Custom Path Removed\n\n**Impact:** LOW - Auto-detection improved\n\n### What Changed\n\nCustom Calibre path no longer needed.\n\n**V1 Configuration (NO LONGER WORKS):**\n```yaml\nsystem:\n customPaths:\n operations:\n calibre: '/usr/bin/calibre'\n```\n\n### Why Removed\n\nV2 has improved path detection:\n- Automatically finds Calibre in standard locations\n- Checks multiple common paths\n- Better error messages if not found\n\n### Migration\n\n1. **Remove from settings.yml:**\n ```yaml\n system:\n customPaths:\n operations:\n # calibre: '' # DELETE THIS LINE\n ```\n\n2. **Verify Calibre is installed:**\n ```bash\n docker exec stirling-pdf which ebook-convert\n ```\n\n3. **If not found, install in container:**\n ```dockerfile\n # In your Dockerfile\n RUN apt-get update && apt-get install -y calibre\n ```\n\n### Standard Detection Paths\n\nV2 automatically checks:\n- `/usr/bin/ebook-convert`\n- `/usr/local/bin/ebook-convert`\n- `ebook-convert` (in PATH)\n\nIf Calibre is in any standard location, it will be found automatically.\n\n---\n\n## 📦 Docker Image Changes\n\n**Impact:** LOW - Most users unaffected\n\n### Tag Changes\n\n**V1 Tags:**\n```bash\nstirlingtools/s-pdf:latest # OLD NAME\nstirlingtools/s-pdf:0.xx.x\n```\n\n**V2 Tags:**\n```bash\ndocker.stirlingpdf.com/stirlingtools/stirling-pdf:latest # NEW NAME\ndocker.stirlingpdf.com/stirlingtools/stirling-pdf:2.x.x\n```\n\n### Migration\n\nUpdate your docker-compose.yml:\n\n**V1:**\n```yaml\nservices:\n stirling-pdf:\n image: stirlingtools/s-pdf:latest # OLD\n```\n\n**V2:**\n```yaml\nservices:\n stirling-pdf:\n image: docker.stirlingpdf.com/stirlingtools/stirling-pdf:latest # NEW\n```\n\n### Backwards Compatibility\n\nThe old `s-pdf` image is deprecated but still receives updates for now. However, you should migrate to the new image name.\n\n---\n\n## 🌐 API Compatibility\n\n**Impact:** LOW - Most endpoints unchanged\n\n### What Stayed the Same\n\n✅ All existing API endpoints work\n✅ Request/response formats unchanged\n✅ Authentication methods compatible\n✅ API keys still valid\n\n### What Changed\n\n**New endpoints added:**\n- `/api/v1/security/validate-signature` - PDF signature validation\n- `/api/v1/misc/remove-cert-sign` - Remove certificate signatures\n- `/api/v1/misc/booklet-imposition` - Booklet printing layout\n- `/api/v1/misc/unlock-pdf-forms` - Unlock form fields\n- `/api/v1/misc/replace-color` - Color replacement\n- `/api/v1/misc/add-attachments` - Add file attachments\n- `/api/v1/misc/edit-toc` - Edit table of contents\n\n**Enhanced endpoints:**\n- Better error messages\n- Consistent error format\n- Progress tracking for long operations\n\n### Migration\n\n**No action needed** for existing API integrations. New endpoints are additive.\n\n**If using OpenAPI spec:**\n1. Download updated spec from `/v3/api-docs`\n2. Regenerate client code if needed\n\n---\n\n## 🗄️ Database Schema\n\n**Impact:** NONE - Automatic migration\n\n### What Changed\n\nDatabase schema updated to support:\n- Enhanced audit logging\n- JWT key rotation\n- User invitation system\n- In-app settings storage\n\n### Migration\n\n**Automatic!** On first V2 startup:\n1. V2 detects V1 schema\n2. Runs migration scripts\n3. Updates to V2 schema\n4. All data preserved\n\n**No manual action needed.**\n\n### Rollback Considerations\n\nDatabase is **forward-compatible only**:\n- ✅ V1 → V2 upgrade: Automatic\n- ⚠️ V2 → V1 rollback: Database needs manual downgrade\n\n**If you need to rollback:**\n1. Restore database backup from before V2 upgrade\n2. Or use V1-compatible database dump\n\n**Recommendation:** Take database backup before upgrading.\n\n---\n\n## 📱 Browser Compatibility\n\n**Impact:** LOW - Modern browsers required\n\n### Minimum Browser Versions\n\n**V2 Requirements:**\n\n| Browser | Minimum Version | Notes |\n|---------|----------------|-------|\n| **Chrome** | 90+ | Recommended |\n| **Firefox** | 88+ | Recommended |\n| **Safari** | 14+ | Some limitations |\n| **Edge** | 90+ | Chromium-based |\n\n**V1 vs V2:**\n- V1 supported older browsers (IE11, old Safari)\n- V2 requires modern browsers for IndexedDB, modern JavaScript\n\n### Why the Change\n\nV2 features require modern browser APIs:\n- IndexedDB for file storage\n- ES2020+ JavaScript\n- Modern CSS features\n- Web Workers for performance\n\n### If Users Have Old Browsers\n\n**Options:**\n1. **Update browser** (recommended)\n2. **Use desktop app** (supports older systems)\n3. **Stay on V1** (still receives security updates)\n\n---\n\n## 🔒 Security Changes\n\n**Impact:** LOW - Generally more secure\n\n### HTTPS Enforcement\n\n**V2 Change:** Secure cookies always enabled for production.\n\n**V1:**\n```yaml\nsecurity:\n jwt:\n secureCookie: true # Configurable\n```\n\n**V2:**\n```yaml\n# secureCookie removed - always secure in production\n```\n\n**Impact:**\n- ✅ More secure by default\n- ⚠️ Requires HTTPS in production\n- Development mode (localhost) still works over HTTP\n\n**Migration:**\nIf running in production, ensure HTTPS is configured:\n```yaml\nserver:\n ssl:\n enabled: true\n key-store: /path/to/keystore.p12\n key-store-password: ${SSL_PASSWORD}\n```\n\n### Session Management\n\n**V2 Changes:**\n- Shorter default session timeout (4 hours → 2 hours)\n- Better session invalidation\n- Stricter CORS policies\n\n**To increase timeout:**\n```yaml\nsecurity:\n sessionTimeout: 14400 # 4 hours in seconds\n```\n\n---\n\n## 🎯 Feature Flag Changes\n\n**Impact:** LOW - Endpoint customization still works\n\n### What Changed\n\nTool IDs updated for consistency:\n\n| Old ID (V1) | New ID (V2) | Tool Name |\n|-------------|-------------|-----------|\n| `pdf-organizer` | `reorganize-pages` | Reorganize Pages |\n| `sign-forms` | `sign` | Sign PDF |\n\n### Migration\n\nUpdate `settings.yml` endpoint customization:\n\n**V1:**\n```yaml\nendpoints:\n toRemove: ['pdf-organizer']\n```\n\n**V2:**\n```yaml\nendpoints:\n toRemove: ['reorganize-pages']\n```\n\n**Complete tool ID list:** [Endpoint Customisation](doc:configuration/customisation/endpoint-or-feature-customisation)\n\n---\n\n## 📖 Documentation Structure\n\n**Impact:** NONE - Just informational\n\n### What Changed\n\nDocumentation reorganized for clarity:\n- \"V2 Guides\" → \"Guides\" (current features)\n- \"Migration\" section added (V1→V2 transition)\n- Dedicated pages for super tools\n- Comprehensive tool reference\n\n### Old Links\n\nDocumentation has been reorganized:\n- Guides section contains current features (File Storage, Undo/Redo, Desktop vs Web)\n- Migration section contains V1→V2 transition information\n- Individual pages moved to appropriate sections\n\n---\n\n## ✅ Pre-Upgrade Checklist\n\nBefore upgrading to V2, verify:\n\n### 1. Customizations\n- [ ] **Using custom templates?** → Plan rewrite or use built-in settings\n- [ ] **Custom logo?** → Will work in V2\n\n### 2. Configuration\n- [ ] **Backup settings.yml** before modifying\n- [ ] **Note UI settings** (appName, homeDescription)\n- [ ] **Update JWT settings** (enabled → persistence)\n- [ ] **Remove deprecated sections** (database notifications)\n\n### 3. Infrastructure\n- [ ] **Backup database** before upgrade\n- [ ] **Test in staging** environment first\n- [ ] **Verify HTTPS** configured for production\n- [ ] **Check browser versions** for users\n\n### 4. Features\n- [ ] **Using database notifications?** → Switch to audit logs\n- [ ] **Custom Calibre path?** → Remove, auto-detection works\n\n### 5. API Integrations\n- [ ] **Using deprecated tool IDs?** → Update to new IDs\n- [ ] **Update OpenAPI spec** if using generated clients\n- [ ] **Test API endpoints** in staging\n\n---\n\n## 🆘 Troubleshooting\n\n### \"Unknown configuration key\" warnings\n\n**Symptom:**\n```\nWARN: Unknown configuration key: premium.proFeatures.googleDrive\n```\n\n**Solution:** Remove deprecated settings from settings.yml. See [Settings Changes](doc:migration/settings-changes).\n\n---\n\n### Custom templates not loading\n\n**Symptom:** Custom navbar/homepage not appearing.\n\n**Solution:** Template system removed. Use in-app settings or custom CSS instead.\n\n---\n\n### Users logged out after upgrade\n\n**Symptom:** All users need to re-login after V2 upgrade.\n\n**Solution:** Expected behavior due to JWT format change. Users just need to log in once.\n\n---\n\n### API returns 404 for tool\n\n**Symptom:** API call fails with tool not found.\n\n**Solution:** Update tool IDs. Example: `pdf-organizer` → `reorganize-pages`. See [Feature Flag Changes](#-feature-flag-changes).\n\n---\n\n### App name not showing\n\n**Symptom:** `ui.appName` in settings.yml not displaying.\n\n**Solution:** Setting moved to in-app configuration. Log in as admin, go to Settings → UI. See [UI Settings](#%EF%B8%8F-ui-settings-moved-to-in-app-configuration).\n\n---\n\n## 🔄 Rollback Guide\n\nIf you need to return to V1:\n\n### 1. Stop V2\n```bash\ndocker stop stirling-pdf\n```\n\n### 2. Restore Database\n```bash\n# Option A: Restore from backup\ndocker exec -i postgres psql -U stirling < backup-before-v2.sql\n\n# Option B: Use existing (database is backward compatible for rollback)\n```\n\n### 3. Restore Settings\n```bash\n# Restore V1 settings.yml from backup\ncp settings.yml.v1.backup configs/settings.yml\n```\n\n### 4. Start V1\n```bash\n# Update docker-compose.yml\nimage: docker.stirlingpdf.com/stirlingtools/stirling-pdf:1.5.0\n\ndocker-compose up -d\n```\n\n### Data Preservation\n\nYour data remains intact:\n- ✅ User accounts\n- ✅ API keys\n- ✅ Configurations\n- ✅ Custom files\n\n---\n\n## 📚 Related Documentation\n\n- **[Migration Overview](doc:migration/overview)** - General upgrade guide\n- **[New Features](doc:migration/new-features)** - What's new in V2\n- **[Settings Changes](doc:migration/settings-changes)** - Configuration updates\n- **[FAQ](doc:faq)** - Common questions\n\n---\n\n## Summary\n\n**Breaking changes are minimal:**\n\n✅ Most configurations work unchanged\n✅ All data migrates automatically\n✅ API compatibility maintained\n⚠️ Template customizations need rewrite\n⚠️ UI settings moved to in-app config\n⚠️ JWT settings renamed\n\n**Action required:**\n1. Update JWT setting names\n2. Remove deprecated configurations\n3. Reconfigure UI settings in-app\n4. Rewrite template customizations (if any)\n\n**Most users can upgrade with minimal changes!**",
|
||
"sourcePath": "docs/Migration/Breaking-Changes.md",
|
||
"editUrl": "https://github.com/Stirling-Tools/Stirling-Tools.github.io/blob/main/docs/Migration/Breaking-Changes.md"
|
||
},
|
||
"migration/new-features": {
|
||
"id": "migration/new-features",
|
||
"title": "New Features in V2",
|
||
"description": "All new features and capabilities added in V2",
|
||
"section": "migration",
|
||
"markdown": "V2 brings powerful new features that fundamentally improve how you work with PDFs. This page documents everything new in V2.\n\n---\n\n## 📁 Browser File Storage\n\n**The Game Changer:** Upload PDFs once, use them across multiple tools without re-uploading.\n\n### What's New\n\n- **Persistent Storage:** Files stored locally in your browser using IndexedDB\n- **Cross-Tool Usage:** Access uploaded files from any tool\n- **Smart Management:** Automatic cleanup, manual delete options\n- **Large File Support:** Up to 10GB storage (browser-dependent)\n\n### How It Works\n\n```\nUpload PDF → Stored in Browser → Use in Any Tool → Delete When Done\n```\n\n**Example Workflow:**\n1. Upload `report.pdf` in Multi-Tool\n2. Compress it\n3. Switch to Add Page Numbers (file still there!)\n4. Add watermark (still no re-upload!)\n5. Download final result\n\n### Storage Limits\n\n| Browser | Storage Limit | Notes |\n|---------|--------------|-------|\n| Chrome/Edge | ~10GB | 60% of available disk space |\n| Firefox | ~10GB | User-configurable |\n| Safari | ~1GB | More restrictive |\n\n---\n\n## ⏮️ Undo, Redo & Version History\n\n**Made a mistake?** Just undo it! V2 introduces comprehensive version control.\n\n### What's New\n\n- **Undo/Redo:** Undo and redo buttons in toolbar\n- **Version History:** See all previous versions with timestamps\n- **Jump to Version:** Restore any previous state\n- **Visual Indicators:** See current version in timeline\n- **All Local:** History stored in your browser, fully private\n\n### How It Works\n\nEvery operation creates a new version:\n\n```\nOriginal.pdf → [Compress] → v1 → [Add Pages] → v2 → [Watermark] → v3\n ↑ ↑ ↑ ↑\n Can restore to any point in history\n```\n\n### Accessing Features\n\n- **Undo Button:** Click undo in toolbar\n- **Redo Button:** Click redo in toolbar\n- **History Panel:** Click history icon in Multi-Tool\n\n### Example Use Case\n\n**Scenario:** You compressed a PDF too aggressively and text is blurry.\n\n**Solution:**\n1. Click undo button to undo compression\n2. Open Version History panel\n3. See: Original → Compress (MEDIUM) ← You are here\n4. Click \"Restore\" on Original\n5. Re-compress with LIGHT setting instead\n\n\n---\n\n## 🖥️ Desktop Applications\n\n**NEW:** Native desktop apps for Windows, Mac, and Linux.\n\n### What's New\n\n- **Lightning Fast:** 0.3 second startup time\n- **Native Integration:** \"Open with Stirling PDF\" in file explorer\n- **System Default:** Set as default PDF viewer\n- **Sign in with Stirling Cloud or self-hosted server** - Choose your connection on launch\n- **Resource Efficient:** Uses ~50MB RAM vs browser ~200MB\n\n### Platform Support\n\n| Platform | Format | Features |\n|----------|--------|----------|\n| **Windows** | `.exe` installer | Context menu integration |\n| **macOS** | `.dmg` | Dock integration |\n| **Linux** | `.deb` | Desktop file integration |\n\n### Key Differences from Web\n\n| Feature | Desktop | Web Browser |\n|---------|---------|-------------|\n| Startup Speed | 0.3s | 2-3s |\n| File Association | ✅ Yes | ❌ No |\n| Default Viewer | ✅ Yes | ❌ No |\n| System Integration | ✅ Native | ⚠️ Limited |\n| Storage | Unlimited | Browser limits |\n| Updates | Manual | Automatic |\n\n### Right-Click Integration\n\nAfter installation:\n1. Right-click any PDF in file explorer\n2. Select \"Open with Stirling PDF\"\n3. PDF opens directly in app\n4. Sign in (if needed)\n5. Process immediately\n\n**Learn More:**\n- [Windows Installation](doc:installation/windows)\n- [Mac Installation](doc:installation/mac)\n- [Linux Installation](doc:installation/unix)\n\n---\n\n---\n\n## ⌨️ Custom Keyboard Shortcuts\n\n**NEW:** Configure your own keyboard shortcuts for quick tool access.\n\n### What's New\n\n- **Custom Hotkeys:** Assign keyboard shortcuts to any tool\n- **Quick Access:** Default shortcuts for 7 most popular tools (Cmd/Ctrl+Alt+1-7)\n- **Flexible Mapping:** Use any combination of Ctrl, Alt, Shift, Cmd keys\n- **Visual Feedback:** See all shortcuts in settings\n- **Conflict Detection:** Prevents duplicate shortcut assignments\n- **Easy Reset:** Restore default shortcuts anytime\n\n### Default Shortcuts\n\nThe 7 Recommended Tools come with pre-configured shortcuts:\n\n| Tool | Windows/Linux | Mac |\n|------|---------------|-----|\n| Multi-Tool | Ctrl+Alt+1 | Cmd+Option+1 |\n| Read & Annotate | Ctrl+Alt+2 | Cmd+Option+2 |\n| Merge | Ctrl+Alt+3 | Cmd+Option+3 |\n| Compare | Ctrl+Alt+4 | Cmd+Option+4 |\n| Compress | Ctrl+Alt+5 | Cmd+Option+5 |\n| OCR | Ctrl+Alt+6 | Cmd+Option+6 |\n| Redact | Ctrl+Alt+7 | Cmd+Option+7 |\n\n### Customizing Shortcuts\n\n**To configure:**\n1. Open Settings (gear icon)\n2. Navigate to \"Keyboard Shortcuts\" section\n3. Find the tool you want to assign\n4. Click \"Set Shortcut\"\n5. Press your desired key combination\n6. Save changes\n\n**Example:**\n- Want to open Convert with Ctrl+Alt+C?\n- Navigate to Convert tool in shortcuts list\n- Click \"Set Shortcut\"\n- Press Ctrl+Alt+C\n\n### Tips\n\n- **Don't override browser shortcuts:** Avoid Ctrl+T, Ctrl+W, etc.\n- **Use Alt/Option combos:** Less likely to conflict with system shortcuts\n- **Keep it memorable:** Use letters that relate to tool names\n- **Test after setting:** Make sure shortcuts work in practice\n\n---\n\n## ⚙️ In-App Settings Management\n\n**NEW:** Configure everything through the UI (admin only).\n\n### What's New\n\n- **Visual Configuration:** No more editing YAML files\n- **Instant Validation:** See errors before saving\n- **Live Preview:** Some settings apply immediately\n- **Organized Sections:** Settings grouped logically\n- **Search Settings:** Find what you need quickly\n- **Import/Export:** Backup and restore configurations\n\n### Settings You Can Configure\n\n**System:**\n- Default locale and timezone\n- Resource limits\n- Logging levels\n- CORS origins\n\n**Security:**\n- Login requirements\n- User registration\n- Session timeout\n- Password policies\n\n**UI Customization:**\n- App name and description\n- Logo style (classic/modern)\n- Navbar branding\n- Homepage content\n\n**Features:**\n- Enable/disable tools\n- Endpoint customization\n- OCR languages\n- Conversion settings\n\n### How to Access\n\n1. Enable login: `SECURITY_ENABLELOGIN=true`\n2. Log in as admin\n3. Click Settings icon in navbar\n4. Configure through UI\n5. Save changes\n\n**Benefits Over File Configuration:**\n- No container restart needed (for most settings)\n- Validation prevents errors\n- Changes tracked in audit log\n- Role-based access control\n\n---\n\n## 🔐 PDF Signature Validation\n\n**NEW:** Comprehensive certificate chain validation for signed PDFs.\n\n### What's New\n\nFull trust chain validation system:\n\n- **Multiple Trust Sources:**\n - System trust store\n - Mozilla CA bundle\n - Adobe Approved Trust List (AATL)\n - EU Trusted List (EUTL)\n - Server-generated anchor certificates\n\n- **Revocation Checking:**\n - OCSP (Online Certificate Status Protocol)\n - CRL (Certificate Revocation Lists)\n - Configurable hard/soft fail\n\n- **AIA (Authority Information Access):**\n - Automatic intermediate cert fetching\n - Chain building support\n\n### Configuration\n\n```yaml\nsecurity:\n validation:\n trust:\n serverAsAnchor: true # Trust server-generated certs\n useSystemTrust: true # Use OS trust store\n useMozillaBundle: true # Mozilla CA certificates\n useAATL: false # Adobe trust list\n useEUTL: false # EU trust list\n allowAIA: false # Fetch intermediate certs\n revocation:\n mode: none # none, ocsp, crl, ocsp+crl\n hardFail: false # Fail if revocation check fails\n```\n\n### Use Cases\n\n**Enterprise:**\n- Validate invoices signed by partners\n- Verify contract signatures\n- Compliance with legal requirements\n\n**Government:**\n- Validate officially signed documents\n- EU eIDAS compliance\n- EUTL integration\n\n**General:**\n- Verify PDF authenticity\n- Check if signature still valid\n- Detect tampered documents\n\n**Learn More:** [Certificate Signing](doc:functionality/security/certificate-signing)\n\n---\n\n## 🔑 Server Certificate Management\n\n**NEW:** Automatic certificate generation for signing PDFs.\n\n### What's New\n\n- **Auto-Generated Certs:** Server creates signing certificates on startup\n- **Customizable:** Configure organization name, validity period\n- **No Manual Setup:** Works out of the box\n- **Renewable:** Regenerate certificates as needed\n- **\"Sign with Stirling PDF\" Feature:** Users can sign with server cert\n\n### Configuration\n\n```yaml\nsystem:\n serverCertificate:\n enabled: true\n organizationName: Stirling-PDF\n validity: 365 # days\n regenerateOnStartup: false\n```\n\n### How It Works\n\n1. **First Startup:**\n - Server generates self-signed certificate\n - Stored in `configs/` directory\n - Used for \"Sign with Stirling PDF\" feature\n\n2. **Subsequent Startups:**\n - Uses existing certificate (unless `regenerateOnStartup: true`)\n - Certificate persists across restarts\n\n3. **User Signs PDF:**\n - Selects \"Sign with Stirling PDF\"\n - Server signs using generated certificate\n - Signature embedded in PDF\n\n### Custom Certificates\n\nYou can also provide your own certificates:\n\n```bash\nconfigs/\n ├── keystore.p12 # Your certificate\n └── settings.yml\n```\n\nThen disable auto-generation:\n```yaml\nsystem:\n serverCertificate:\n enabled: false # Use custom cert instead\n```\n\n**Learn More:**\n- [Certificate Signing Guide](doc:functionality/security/certificate-signing)\n- [Configuration](doc:configuration/security/system-and-security)\n\n---\n\n## 🎯 Multi-Tool Workbench\n\n**NEW:** Dedicated workspace for chaining unlimited operations.\n\n### What's New\n\n- **Visual Workbench:** See all loaded files and their history\n- **Unlimited Operations:** Chain as many tools as needed\n- **Operation History:** See what you've done to each file\n- **Undo/Redo:** Per-file version control\n- **Batch Processing:** Process multiple files simultaneously\n- **Result Management:** Keep, download, or discard results\n\n### Example Workflow\n\n```\nMulti-Tool Workbench\n├── invoice.pdf\n│ ├── [Original]\n│ ├── [OCR - English]\n│ ├── [Compress - MEDIUM]\n│ └── [Add Page Numbers] ← Current\n├── report.pdf\n│ ├── [Original]\n│ └── [Add Watermark] ← Current\n└── contract.pdf\n └── [Original] ← No operations yet\n```\n\n### Key Features\n\n1. **Smart Tool Switching:**\n - Switch tools without losing files\n - Context preserved between operations\n - No re-uploading needed\n\n2. **Operation Queue:**\n - See pending operations\n - Reorder before processing\n - Cancel if needed\n\n3. **Result Preview:**\n - Preview before downloading\n - Compare before/after\n - Verify operations succeeded\n\n**Learn More:** [Multi-Tool Workbench Guide](doc:functionality/multi-tool)\n\n---\n\n## 📖 Read & Annotate Tool\n\n**NEW:** Full-featured PDF viewer with annotation capabilities.\n\n### What's New\n\n- **PDF Viewer:** Read PDFs directly in browser\n- **Annotation Tools:**\n - Highlight text\n - Add comments\n - Draw shapes\n - Insert text boxes\n - Sticky notes\n- **Navigation:**\n - Thumbnail sidebar\n - Table of contents\n - Page search\n - Zoom controls\n- **Collaboration:**\n - Export annotations\n - Share annotated PDFs\n - Comment threads\n\n### Use Cases\n\n**Review:**\n- Mark up documents for approval\n- Add review comments\n- Highlight important sections\n\n**Collaboration:**\n- Annotate contracts before signing\n- Review proposals with team\n- Provide feedback on drafts\n\n**Study:**\n- Highlight key passages\n- Add study notes\n- Mark important pages\n\n### Annotation Types\n\n| Tool | Use Case | Example |\n|------|----------|---------|\n| **Highlight** | Mark important text | Legal clauses |\n| **Comment** | Add feedback | \"Needs revision\" |\n| **Text Box** | Add missing text | Corrections |\n| **Shape** | Circle/underline | Draw attention |\n| **Sticky Note** | Quick notes | \"Follow up\" |\n\n**Learn More:** [Read & Annotate Guide](doc:functionality/read-and-annotate)\n\n---\n\n## 🔄 Enhanced Session Management\n\n**Improved:** Better session and token management with rotation and cleanup.\n\n### What's New in V2\n\n| Feature | V1 | V2 |\n|---------|----|----|\n| Token Persistence | Optional | Configurable |\n| Key Rotation | ❌ No | ✅ Yes |\n| Key Cleanup | Manual | Automatic |\n| Key Retention | N/A | Configurable days |\n| Secure Cookie | Hardcoded | Removed (always secure) |\n\n### New Settings\n\n```yaml\nsecurity:\n jwt:\n persistence: true # Store keys across restarts\n enableKeyRotation: true # Rotate signing keys periodically\n enableKeyCleanup: true # Auto-delete old keys\n keyRetentionDays: 7 # How long to keep old keys\n```\n\n### Benefits\n\n**Key Rotation:**\n- Improved security through regular key changes\n- Seamless for users (old tokens still work during grace period)\n- Configurable rotation schedule\n\n**Automatic Cleanup:**\n- No manual key management needed\n- Prevents key accumulation\n- Configurable retention period\n\n**Persistence:**\n- Keys survive container restarts\n- No user re-login after restart\n- Optional for stateless deployments\n\n---\n\n## ✉️ Email Invitation System\n\n**NEW:** Invite users via email instead of manual registration.\n\n### What's New\n\n- **Email Invites:** Send registration links via email\n- **Token-Based:** Secure one-time registration tokens\n- **Expiration:** Invites expire after configurable period\n- **Role Assignment:** Set user role in invite\n- **Bulk Invites:** Invite multiple users at once\n\n### Configuration\n\n```yaml\nmail:\n enabled: true\n from: noreply@example.com\n smtp:\n host: smtp.example.com\n port: 587\n username: noreply@example.com\n password: ${MAIL_PASSWORD}\n```\n\n### Requirements\n\n- `mail.enabled: true`\n- `security.enableLogin: true`\n- Valid SMTP configuration\n\n### How It Works\n\n**Admin perspective:**\n1. Go to User Management\n2. Click \"Invite User\"\n3. Enter email and select role\n4. Send invite\n\n**User perspective:**\n1. Receive email with invite link\n2. Click link (valid for 48 hours)\n3. Create account with password\n4. Automatically logged in\n\n### Environment Variables\n\n```bash\nMAIL_ENABLED=true\nMAIL_FROM=noreply@example.com\nMAIL_ENABLEINVITES=true\nMAIL_HOST=smtp.gmail.com\nMAIL_PORT=587\nMAIL_USERNAME=your-email@gmail.com\nMAIL_PASSWORD=your-app-password\nMAIL_TLS_ENABLED=true\n```\n\n---\n\n## 🎨 Logo Customization\n\n**NEW:** Choose between logo styles and customize branding.\n\n### What's New\n\n```yaml\nui:\n logoStyle: classic # Options: 'classic' or 'modern'\n```\n\n### Logo Styles\n\n| Style | Description | Best For |\n|-------|-------------|----------|\n| **Classic** | Traditional \"S\" icon | Established brands |\n| **Modern** | Minimalist design | Clean, modern look |\n\n### Custom Logo\n\nYou can still provide custom logo files:\n\n```bash\ncustomFiles/\n └── static/\n └── logo.svg # Your custom logo\n```\n\nThen reference in settings:\n```yaml\nui:\n appNameNavbar: 'My Company PDF'\n logoStyle: classic # Or use custom logo\n```\n\n---\n\n## Summary\n\n**V2's Major Features:**\n\n- 📁 **Browser File Storage** - Upload once, use across multiple tools\n- ⏮️ **Undo/Redo & Version History** - Never lose work\n- 🖥️ **Desktop Applications** - Native Windows, Mac, Linux apps\n- 🎨 **Multi-Tool Workbench** - Chain unlimited operations\n- 📖 **Read & Annotate** - Full PDF viewer with annotation support\n- ⚙️ **In-App Settings** - Configure everything through UI\n- 🔐 **Enhanced Security** - PDF signature validation, server certificates\n- ✉️ **Email Invitations** - Streamlined user onboarding\n- ⌨️ **Custom Keyboard Shortcuts** - Quick tool access\n- 🔄 **Enhanced Session Management** - Better token management with rotation\n\n---\n\n## Learn More\n\n- **[Migration Overview](doc:migration/overview)** - How to upgrade\n- **[Settings Changes](doc:migration/settings-changes)** - Configuration updates\n- **[Breaking Changes](doc:migration/breaking-changes)** - What changed\n- **[Getting Started](doc:getting-started)** - Start using V2",
|
||
"sourcePath": "docs/Migration/New-Features.md",
|
||
"editUrl": "https://github.com/Stirling-Tools/Stirling-Tools.github.io/blob/main/docs/Migration/New-Features.md"
|
||
},
|
||
"migration/overview": {
|
||
"id": "migration/overview",
|
||
"title": "Migrating from V1 to V2",
|
||
"description": "Complete guide for upgrading from Stirling PDF V1 to V2",
|
||
"section": "migration",
|
||
"markdown": "Upgrading to Stirling PDF V2 is straightforward for most users. This guide will walk you through the upgrade process.\n\n> **⚠️ Warning: Backup Your Configuration**\n>\n> Before upgrading, **back up your configuration folder** (usually mounted as `/configs`) to ensure you can restore your settings if needed:\n> ```bash\n> # Docker volume backup\n> docker cp stirling-pdf:/configs ./configs-backup\n>\n> # Or if using bind mount\n> cp -r ./configs ./configs-backup\n> ```\n\n\n---\n\n## Quick Upgrade Guide\n\n### Docker Users (Most Common)\n\nUpdate your image tag to `latest` (or specific V2 version):\n\n```yaml\nservices:\n stirling-pdf:\n image: docker.stirlingpdf.com/stirlingtools/stirling-pdf:latest # Change from 1.x to latest\n # Keep all your existing environment variables and volumes\n```\n\nThen pull and restart. See the [Docker Installation Guide - Updating Section](doc:installation/docker-install) for complete update commands.\n\n**That's it!** Your data and settings migrate automatically.\n\n---\n\n### Desktop Application Users\n\n1. **Windows**: Download new installer from [GitHub Releases](https://github.com/Stirling-Tools/Stirling-PDF/releases), run it (automatically updates)\n2. **Mac**: Download new DMG, drag to Applications (replaces old version)\n3. **Linux**: Install new `.deb`/`.rpm`/`.AppImage`\n\nYour settings carry over automatically.\n\n---\n\n### Manual Installation (JAR)\n\n1. Download the latest V2 release from [GitHub Releases](https://github.com/Stirling-Tools/Stirling-PDF/releases)\n2. Stop the current V1 instance\n3. Replace the JAR file\n4. Start with the same command\n\n---\n\n## Migration Guide Sections\n\nThis migration guide is organized into detailed sections:\n\n### 📋 [Settings Changes](doc:migration/settings-changes)\n**Start here** if you have custom configuration. Covers:\n- New settings added in V2\n- Deprecated settings to remove\n- Settings that were renamed\n- Configuration examples and migration checklist\n\n### ⚠️ [Breaking Changes](doc:migration/breaking-changes)\n**Important** - Review if you have customizations. Covers:\n- Template customization system changes (most impactful)\n- UI settings moved to in-app configuration\n- Session management improvements\n- Database notification changes\n- API compatibility notes\n\n### ✨ [New Features](doc:migration/new-features)\n**Explore what's new** - Comprehensive list of V2 features:\n- Browser file storage\n- Undo/redo functionality\n- Desktop applications\n- Multi-Tool workbench\n- PDF signature validation\n- In-app settings management\n- And much more...\n\n---\n\n## Should You Upgrade?\n\n**Yes, if you want:**\n- ✅ Faster workflows with file persistence\n- ✅ Undo/redo functionality\n- ✅ Better performance with large files\n- ✅ Desktop applications\n- ✅ Modern, responsive interface\n- ✅ Future features and updates\n\n**Consider staying on V1 if:**\n- ⚠️ You heavily customized UI using Thymeleaf templates in `customFiles/templates/` (requires rewriting for React in V2)\n - **Note:** Static file overrides via `customFiles/static/` still work in V2 - only Thymeleaf templates don't work\n- ⚠️ You have specific compatibility requirements with very old browsers\n\n---\n\n## What Stays the Same\n\n- ✅ All existing PDF tools\n- ✅ Backend API compatibility\n- ✅ Configuration files (settings.yml)\n- ✅ Docker deployment process\n- ✅ Security features (SSO, user management)\n- ✅ Pipeline automation (renamed \"Automate\" in UI)\n- ✅ Privacy commitment\n\n---\n\n## Your Data is Safe\n\nV2 is **fully compatible** with V1 data:\n- ✅ User accounts and permissions\n- ✅ API keys\n- ✅ Settings and configurations\n- ✅ Database (internal or external)\n- ✅ Custom OCR language files\n- ✅ Custom fonts and certificates\n\n**No manual migration needed** - database schema updates automatically on first startup.\n\n---\n\n## Post-Upgrade Checklist\n\nAfter upgrading, verify everything works:\n\n- [ ] Can log in with existing credentials\n- [ ] All PDF tools work as expected\n- [ ] Settings and preferences retained\n- [ ] API integrations still function (if applicable)\n- [ ] Custom branding appears correctly\n- [ ] OCR languages available\n- [ ] Pipelines continue working (now called \"Automate\" in UI)\n\n---\n\n## Troubleshooting\n\n### Common Issues\n\n**\"Unknown configuration key\" warnings**\n- **Cause:** Old V1 settings in your `settings.yml`\n- **Solution:** See [Settings Changes](doc:migration/settings-changes) to remove deprecated settings\n\n**Users logged out after upgrade**\n- **Cause:** JWT token format changed (normal)\n- **Solution:** Users just need to log in once\n\n**Custom templates not loading**\n- **Cause:** Thymeleaf template system no longer used (V2 uses React)\n- **Solution:** Use static file overrides instead via `customFiles/static/` - See [Breaking Changes - UI Customization](doc:migration/breaking-changes)\n\n**App name not showing**\n- **Cause:** Setting moved to in-app configuration\n- **Solution:** Log in as admin → Settings → UI\n\n---\n\n## Rolling Back (If Needed)\n\nIf you need to return to V1:\n\n```bash\n# Restore config backup\ncp -r ./configs-backup ./configs\n\n# Pull V1 image\ndocker pull docker.stirlingpdf.com/stirlingtools/stirling-pdf:1.5.0\n\n# Update docker-compose.yml to use 1.5.0 tag\ndocker-compose up -d\n```\n\n**Note:** Your data will work if you roll back (database is backward compatible).\n\n---\n\n## Getting Help\n\nIf you encounter issues:\n\n1. **[Settings Changes](doc:migration/settings-changes)** - Update your configuration\n2. **[Breaking Changes](doc:migration/breaking-changes)** - Review important changes\n3. **[New Features](doc:migration/new-features)** - Learn what's new\n4. **[FAQ](doc:faq)** - Common questions answered\n5. **[GitHub Issues](https://github.com/Stirling-Tools/Stirling-PDF/issues)** - Report problems\n6. **[Discord](https://discord.gg/Cn8pWhQRxZ)** - Community support\n\n---\n\n## Summary\n\n**Upgrading is easy:**\n1. Back up your `/configs` folder\n2. Pull latest Docker image (or download desktop app)\n3. Start with existing configuration\n4. Review [Settings Changes](doc:migration/settings-changes) for any needed updates\n5. Check [Breaking Changes](doc:migration/breaking-changes) if you have customizations\n\n**Welcome to V2!** Enjoy the faster, more modern Stirling PDF experience.",
|
||
"sourcePath": "docs/Migration/Overview.md",
|
||
"editUrl": "https://github.com/Stirling-Tools/Stirling-Tools.github.io/blob/main/docs/Migration/Overview.md"
|
||
},
|
||
"migration/settings-changes": {
|
||
"id": "migration/settings-changes",
|
||
"title": "Settings Changes from V1 to V2",
|
||
"description": "Configuration changes between V1 and V2",
|
||
"section": "migration",
|
||
"markdown": "This page documents all `settings.yml` changes between V1 and V2.\n\n---\n\n## New Settings in V2\n\n### PDF Signature Validation\n\n**Entire new section added:**\n\n```yaml\nsecurity:\n validation: # NEW in V2\n trust:\n serverAsAnchor: true\n useSystemTrust: true\n useMozillaBundle: true\n useAATL: false # Adobe Approved Trust List\n useEUTL: false # EU Trusted List\n allowAIA: false\n aatl:\n url: https://trustlist.adobe.com/tl.pdf\n eutl:\n lotlUrl: https://ec.europa.eu/tools/lotl/eu-lotl.xml\n acceptTransitional: false\n revocation:\n mode: none # Options: none, ocsp, crl, ocsp+crl\n hardFail: false\n```\n\n**What it does:** Comprehensive PDF signature validation with configurable trust chains.\n\n**Migration:** No action needed, defaults are safe for most users.\n\n**Learn more:** [Certificate Signing](doc:functionality/security/certificate-signing) | [Security Configuration](doc:configuration/security/system-and-security)\n\n---\n\n### Server Certificate Management\n\n**New section added:**\n\n```yaml\nsystem:\n serverCertificate: # NEW in V2\n enabled: true\n organizationName: Stirling-PDF\n validity: 365 # days\n regenerateOnStartup: false\n```\n\n**What it does:** Auto-generates signing certificates for \"Sign with Stirling PDF\" feature.\n\n**Migration:** Works automatically with defaults.\n\n**Learn more:** [Certificate Signing](doc:functionality/security/certificate-signing) | [Certificate Configuration](doc:configuration/security/system-and-security)\n\n---\n\n### Enhanced JWT Configuration\n\n**Changed settings:**\n\n```yaml\n# V1 (OLD)\nsecurity:\n jwt:\n enabled: false\n keyCleanup: false\n secureCookie: true # REMOVED\n\n# V2 (NEW)\nsecurity:\n jwt:\n persistence: true # replaces 'enabled'\n enableKeyRotation: true # NEW\n enableKeyCleanup: true # replaces 'keyCleanup'\n keyRetentionDays: 7\n```\n\n**Migration:**\n- Replace `jwt.enabled` with `jwt.persistence`\n- Replace `jwt.keyCleanup` with `jwt.enableKeyCleanup`\n- Add `jwt.enableKeyRotation: true`\n- Remove `jwt.secureCookie` (no longer used)\n\n---\n\n### Email Invites\n\n**New setting added:**\n\n```yaml\nmail:\n enableInvites: false # NEW in V2\n```\n\n**What it does:** Enable email invitations for user registration.\n\n**Requirements:**\n- `mail.enabled: true`\n- `security.enableLogin: true`\n\n**Migration:** Set to `true` if you want invite functionality.\n\n---\n\n### UI Logo Customization\n\n**New setting added:**\n\n```yaml\nui:\n logoStyle: classic # NEW in V2 - Options: 'classic' or 'modern'\n```\n\n**What it does:** Choose between classic S icon or modern minimalist logo.\n\n**Migration:** Leave as `classic` (default) or set to `modern` for new look.\n\n---\n\n## Removed Settings in V2\n\n### UI Settings Moved to In-App Configuration\n\n**V1 settings (REMOVED):**\n\n```yaml\nui:\n appName: '' # REMOVED\n homeDescription: '' # REMOVED\n```\n\n**Migration:**\n1. Enable login: `SECURITY_ENABLELOGIN=true`\n2. Log in as admin\n3. Go to Settings in UI\n4. Configure app name and description there\n\n**Why:** In-app settings are more user-friendly and apply immediately.\n\n**Learn more:** [UI Customisation](doc:configuration/customisation/ui-customisation)\n\n---\n\n### Google Drive Integration\n\n**V1 settings (REMOVED):**\n\n```yaml\npremium:\n proFeatures:\n googleDrive: # REMOVED in V2\n enabled: false\n clientId: ''\n apiKey: ''\n appId: ''\n```\n\n**Migration:** Remove this section from your `settings.yml`.\n\n**Why:** Feature discontinued in V2.\n\n---\n\n### Database Notifications\n\n**V1 settings (REMOVED):**\n\n```yaml\npremium:\n enterpriseFeatures:\n databaseNotifications: # REMOVED in V2\n backups:\n successful: false\n failed: false\n imports:\n successful: false\n failed: false\n```\n\n**Migration:** Remove this section from your `settings.yml`.\n\n**Why:** Replaced with more comprehensive audit logging.\n\n---\n\n### Calibre Custom Path\n\n**V1 setting (REMOVED):**\n\n```yaml\nsystem:\n customPaths:\n operations:\n calibre: '' # REMOVED in V2\n```\n\n**Migration:** Remove this line.\n\n**Why:** Path detection improved, no longer needs custom configuration.\n\n---\n\n## Migration Checklist\n\nUse this checklist when upgrading your `settings.yml`:\n\n### Required Changes\n\n- [ ] **JWT Settings:**\n - [ ] Replace `jwt.enabled` with `jwt.persistence`\n - [ ] Replace `jwt.keyCleanup` with `jwt.enableKeyCleanup`\n - [ ] Add `jwt.enableKeyRotation: true`\n - [ ] Remove `jwt.secureCookie` line\n\n- [ ] **Remove Deprecated Sections:**\n - [ ] Remove `premium.proFeatures.googleDrive` section\n - [ ] Remove `premium.enterpriseFeatures.databaseNotifications` section\n - [ ] Remove `system.customPaths.operations.calibre` line\n\n- [ ] **UI Settings:**\n - [ ] Remove `ui.appName` (use in-app settings)\n - [ ] Remove `ui.homeDescription` (use in-app settings)\n\n### Optional Additions\n\n- [ ] **Add `ui.logoStyle: classic`** if you want to explicitly set logo\n- [ ] **Configure `security.validation`** if you need custom signature validation\n- [ ] **Set `system.serverCertificate`** options if needed\n- [ ] **Enable `mail.enableInvites`** if you want email invitations\n\n---\n\n## Environment Variable Changes\n\n### New Environment Variables in V2\n\n```bash\n# Signature validation\nSECURITY_VALIDATION_TRUST_SERVERASANCHOR=true\nSECURITY_VALIDATION_TRUST_USESYSTEMTRUST=true\nSECURITY_VALIDATION_TRUST_USEMOZILLABUNDLE=true\nSECURITY_VALIDATION_TRUST_USEAATL=false\nSECURITY_VALIDATION_TRUST_USEEUTL=false\nSECURITY_VALIDATION_REVOCATION_MODE=none\n\n# Server certificates\nSYSTEM_SERVERCERTIFICATE_ENABLED=true\nSYSTEM_SERVERCERTIFICATE_ORGANIZATIONNAME=\"My Company\"\nSYSTEM_SERVERCERTIFICATE_VALIDITY=365\n\n# JWT\nSECURITY_JWT_PERSISTENCE=true\nSECURITY_JWT_ENABLEKEYROTATION=true\nSECURITY_JWT_ENABLEKEYCLEANUP=true\n\n# Email configuration\nMAIL_FROM=noreply@example.com\nMAIL_ENABLEINVITES=true\n\n# Logo\nUI_LOGOSTYLE=modern\n```\n\n### Deprecated Environment Variables\n\n```bash\n# These no longer work in V2\nSECURITY_JWT_ENABLED # Use SECURITY_JWT_PERSISTENCE\nSECURITY_JWT_KEYCLEANUP # Use SECURITY_JWT_ENABLEKEYCLEANUP\nSECURITY_JWT_SECURECOOKIE # Removed\nUI_APPNAME # Use in-app settings\nUI_HOMEDESCRIPTION # Use in-app settings\n```\n\n---\n\n## Configuration Examples\n\n### Minimal V2 Configuration (Works Out of Box)\n\n```yaml\nsecurity:\n enableLogin: false\n\nsystem:\n defaultLocale: en-US\n\nui:\n appNameNavbar: ''\n```\n\nAll new V2 features use sensible defaults.\n\n---\n\n### V1 to V2 Configuration Diff\n\n**V1 Configuration:**\n```yaml\nsecurity:\n jwt:\n enabled: false\n keyCleanup: false\n secureCookie: true\n\nui:\n appName: 'My PDF Tool'\n homeDescription: 'Welcome!'\n appNameNavbar: 'PDF Tool'\n\npremium:\n proFeatures:\n googleDrive:\n enabled: false\n```\n\n**V2 Configuration:**\n```yaml\nsecurity:\n jwt:\n persistence: true # Changed\n enableKeyRotation: true # NEW\n enableKeyCleanup: true # Changed\n keyRetentionDays: 7\n validation: # NEW section\n trust:\n serverAsAnchor: true\n useSystemTrust: true\n\nsystem:\n serverCertificate: # NEW section\n enabled: true\n organizationName: Stirling-PDF\n\nui:\n appNameNavbar: 'PDF Tool'\n logoStyle: classic # NEW\n # appName and homeDescription removed - use in-app settings\n```\n\n---\n\n## Troubleshooting\n\n### \"Unknown configuration key\" warnings\n\n**Symptom:** Warnings about unrecognized settings on startup.\n\n**Cause:** Old V1 settings still in your `settings.yml`.\n\n**Solution:** Remove deprecated settings listed in this guide.\n\n---\n\n### JWT tokens invalid after upgrade\n\n**Symptom:** Users logged out, need to re-login.\n\n**Cause:** JWT key format changed.\n\n**Solution:** Expected behavior, users just need to log in again once.\n\n---\n\n### Custom app name not showing\n\n**Symptom:** App name doesn't appear after setting `ui.appName`.\n\n**Cause:** Setting moved to in-app configuration.\n\n**Solution:**\n1. Log in as admin\n2. Go to Settings → UI\n3. Configure there\n\n---\n\n## Related Documentation\n\n- **[New Features](doc:migration/new-features)** - What's new in V2\n- **[Breaking Changes](doc:migration/breaking-changes)** - Important changes\n- **[Configuration Options](doc:configuration/customisation/extra-settings)** - All configuration variables\n- **[System and Security](doc:configuration/security/system-and-security)** - Advanced config\n\n---\n\n## Summary\n\n**Key Takeaways:**\n- ✅ Most settings remain the same\n- 🔄 JWT settings have new names\n- ➕ Many new optional features\n- ➖ Google Drive and database notifications removed\n- 🎨 UI settings moved to in-app configuration\n\n**Action Required:**\n- Update JWT setting names\n- Remove deprecated sections\n- Optionally configure new features\n\nYour existing configuration will work in V2 with minimal changes!",
|
||
"sourcePath": "docs/Migration/Settings-Changes.md",
|
||
"editUrl": "https://github.com/Stirling-Tools/Stirling-Tools.github.io/blob/main/docs/Migration/Settings-Changes.md"
|
||
},
|
||
"modes-and-licensing": {
|
||
"id": "modes-and-licensing",
|
||
"title": "Modes",
|
||
"description": "The different ways to run Stirling PDF and where credits apply",
|
||
"section": "overview",
|
||
"markdown": "Stirling PDF runs in several modes depending on how you deploy it. This page is just an overview of what each mode is - for pricing, feature matrix, and full license terms see [Paid Offerings](doc:paid-offerings).\n\n---\n\n## At a glance\n\n| Mode | What it is | Where files are processed | Credits? |\n|---|---|---|---|\n| **Desktop - Local** | Native Windows/Mac/Linux app, no sign-in | Your device | No |\n| **Desktop + Stirling.com Cloud** | Same desktop app, signed in to Stirling.com Cloud | Mix: local for basic tools, cloud for advanced | Yes, on cloud-routed ops |\n| **Desktop + Self-hosted server** | Desktop app pointed at your own Stirling server | Your server | No |\n| **Web - Self-hosted** | Docker / Kubernetes / JAR, accessed via browser | Your server | No |\n| **Stirling.com Cloud** | `stirling.com/app` web app | Stirling.com Cloud | Yes |\n\n---\n\n## Desktop\n\n### Local\n\nThe default for the Windows, Mac, and Linux desktop apps. No sign-in, no server, no credits. Basic PDF tools (merge, split, rotate, sign, watermark, page operations, etc.) run entirely on your device.\n\nTools that need server-side processing (OCR, document-format conversions, compression, repair) are not available in this mode - sign in to Stirling.com Cloud or connect to a self-hosted server to use them.\n\n### With Stirling.com Cloud\n\nThe desktop app signed in to your Stirling.com Cloud account. Basic tools still run locally for free; advanced tools route to Stirling.com Cloud and consume credits.\n\n### With a self-hosted server\n\nThe desktop app pointed at a Stirling PDF instance you run yourself. All tools route to your server and **no credits apply**. Whichever license tier your server runs (Free, Server, Enterprise) is what the desktop client gets.\n\n---\n\n## Web - Self-hosted\n\nStirling PDF running in Docker, Kubernetes, or as a bare-metal JAR, accessed via a browser. **No credits ever.** License tier determines your user capacity and which advanced features (SSO, SAML, audit logs, etc.) are unlocked - see [Paid Offerings](doc:paid-offerings).\n\n---\n\n## Stirling.com Cloud\n\nThe hosted version at [stirling.com/app](https://stirling.com/app). All processing happens in Stirling's cloud, and every operation costs credits. Free accounts include a monthly allowance; paid plans include more credits. See [Paid Offerings](doc:paid-offerings) for current pricing.\n\n---\n\n## More than 5 users\n\nThe free tier covers up to 5 users. Once you have more than 5, you need a paid Server or Enterprise plan. Server includes 100 users and adds capacity in blocks of 100; Enterprise is sized to your organization under a custom agreement. A paid plan also adds:\n\n- Official support (tickets, SLAs, priority responses)\n- SSO, SAML, audit logging, and other paid-tier features\n\nSee [Paid Offerings](doc:paid-offerings) for the full feature comparison, [book a demo](https://www.stirling.com/book-a-demo) to see the paid features first-hand, or [contact us](https://www.stirling.com/contact-us) if you're not sure which plan fits.",
|
||
"sourcePath": "docs/Modes-and-Licensing.md",
|
||
"editUrl": "https://github.com/Stirling-Tools/Stirling-Tools.github.io/blob/main/docs/Modes-and-Licensing.md"
|
||
},
|
||
"paid-offerings": {
|
||
"id": "paid-offerings",
|
||
"title": "Paid Offerings",
|
||
"description": "Server and Enterprise paid plans for Stirling PDF",
|
||
"section": "overview",
|
||
"markdown": "## Stirling PDF Paid Offerings\n\nStirling PDF offers Server and Enterprise paid plans. These provide the same great software with added features, streamlined license management, and support options.\n\n> This page covers **self-hosted** Server and Enterprise licensing (a license key, no credits). Stirling Cloud and the credit-based Processor plan are separate offerings - see [Modes](doc:modes-and-licensing) for how the deployment modes compare, and [stirling.com/pricing](https://www.stirling.com/pricing) for the full plan lineup.\n\n## Available Plans\n\n### Free Plan\n- **Cost**: Free forever\n- **Users**: Up to 5 users\n- **Features**:\n - Self-hosted deployment\n - All PDF operations\n - Community support\n - Regular updates\n- **Perfect for**: Personal use, small teams, or evaluation\n\n### Server Plan\n- **Cost**: $99/month or $999/year (save $189 with annual billing)\n- **Available billing**: Monthly or Yearly\n- **Users**: 100 users included. Add capacity in blocks of 100 users as your team grows\n- **Value**: One bill for the whole team instead of per-seat licenses (100 users works out under $1 per user per month)\n- **Features**:\n - Self-hosted deployment\n - All PDF operations\n - 100 users included, with capacity added in blocks of 100\n - One bill instead of per-seat licenses\n - Community support\n - Regular updates\n - Support tickets via support@stirlingpdf.com\n - [External Database](doc:configuration/storage/external-database) support for optimized deployments and load-balancing\n - Google Drive integration\n - [OAuth2 SSO](doc:configuration/security/oauth-sso-configuration) (Google, GitHub, Keycloak, any OIDC provider)\n- **Perfect for**: Teams and organizations that want predictable, block-based pricing without tracking individual seats\n\n### Enterprise Plan\n- **Cost**: Custom pricing - [contact sales](https://www.stirling.com/contact-us) for a quote\n- **Available billing**: Agreed as part of your contract\n- **Users**: Sized to your organization, with volume discounts as you scale\n- **Features**:\n - All Server Plan features, plus:\n - Air-gapped / offline deployment, activated with a [certificate file](#option-2-certificate-file-air-gapped-offline) instead of an online key check\n - Uptime SLAs\n - Custom procurement, security review, and contract terms\n - Volume discounts\n - [SAML2 SSO](doc:configuration/security/saml-sso-configuration) (Okta, Azure AD, etc.) with automated login handling\n - Custom automated metadata handling\n - Priority support tickets via support@stirlingpdf.com\n - 1:1 meetings with the Stirling PDF team (from registered email domain)\n - Priority feature enhancements\n - Prometheus endpoint for advanced usage monitoring\n - Usage Monitoring UI\n - Audit logs\n - Custom integrations support\n - Dedicated account manager\n- **Perfect for**: Regulated environments and large organizations that need air-gapped deployment, uptime SLAs, and an agreement to match\n- **Evaluating?** [Book a demo](https://www.stirling.com/book-a-demo) to see the Enterprise features in action\n\n## Purchasing a License\n\n### In-App Purchase (Recommended)\n\nStirling PDF offers streamlined in-app purchasing and license activation. This covers the Server plan; Enterprise is quoted and issued by sales rather than bought in-app.\n\n1. **Navigate to Settings**: Log in as an admin and go to Settings → Plan\n2. **Select Your Plan**: Choose the Server plan (100 users included, capacity added in blocks of 100)\n3. **Choose Billing Period**: Select monthly or yearly billing (yearly saves money)\n4. **Complete Checkout**: You'll be redirected to Stripe's secure checkout\n5. **Automatic Activation**: After payment, your license key is automatically retrieved and activated\n6. **Confirmation**: You'll see your active plan status immediately in the Settings\n\n**Benefits of In-App Purchase:**\n- No manual license key entry required\n- Instant activation after payment\n- Manage billing directly from the app\n- Automatic license key synchronization\n- Easy plan upgrades\n\n### Alternative - Contact Us\n\nIf you prefer to purchase outside the app or have questions:\n\n1. Visit [stirling.com/contact-us](https://www.stirling.com/contact-us) or email support@stirlingpdf.com\n2. Our team will assist you with your purchase\n3. You'll receive your license key via email\n4. Follow manual activation steps below\n\n## Activating Your License\n\n### Automatic Activation\n\nIf you purchased in-app, your license is automatically activated. No further action needed!\n\n### Manual Activation\n\nStirling PDF accepts two manual activation inputs from the admin UI: a license **key** (string), or a license **certificate file** (`.lic` / `.cert`, used for offline / air-gapped Enterprise activation).\n\n#### Option 1 - License Key\n\nIf you purchased via the website and received a license key by email:\n\n1. **Admin Settings**: Log in as an admin and navigate to Settings → Plan\n2. **Open License Input**: Expand the \"Got a license key or certificate file?\" section\n3. **Select Input Type**: Make sure \"License Key\" is selected\n4. **Enter License Key**: Paste your license key in the provided field\n5. **Activate**: Save to apply the license\n6. **Confirmation**: Your plan features will be enabled immediately\n\n#### Option 2 - Certificate File (Air-Gapped / Offline)\n\nIf you received a `.lic` or `.cert` certificate file (typically issued for Enterprise customers who need to activate without outbound internet access):\n\n1. **Admin Settings**: Log in as an admin and navigate to Settings → Plan\n2. **Open License Input**: Expand the \"Got a license key or certificate file?\" section\n3. **Select Input Type**: Switch to \"Certificate File\"\n4. **Choose File**: Click \"Choose License File\" and select your `.lic` or `.cert` file (must start with `-----BEGIN LICENSE FILE-----`)\n5. **Upload**: The file is uploaded, validated, saved to your `configs/` folder, and activated automatically. Any previous certificate is backed up to `configs/backup/`\n6. **Confirmation**: Your plan features will be enabled immediately\n\nBoth flows activate dynamically and do not strictly require a restart.\n\n> **Recommended**: Restart the Stirling PDF installation after activation. While the license is applied immediately, restarting ensures all components (security profile, premium feature gates, user/seat counters, scheduled validation jobs) pick up the new license state from a clean startup. This avoids edge cases where cached state from before activation lingers in a long-running process.\n\n### Legacy - settings.yml Activation\n\nFor scripted deployments or fully automated provisioning, you can still activate via `settings.yml` directly:\n\n1. Navigate to the Stirling PDF config folder\n2. Open `settings.yml`\n3. Find the premium section:\n\n```yaml\npremium:\n key: 00000000-0000-0000-0000-000000000000\n enabled: false # Enable license key checks for pro/enterprise features\n```\n\n4. Replace the key with your license key\n5. Change `enabled` from `false` to `true`\n6. Restart Stirling PDF\n\nTo reference a certificate file from `settings.yml` instead of uploading via the UI:\n\n 1. Place your `.lic` or `.cert` certificate in the config folder (e.g., `configs/cert.lic`)\n 2. Use the `file:` prefix to point at the certificate path:\n\n ```yaml\n premium:\n key: file:configs/cert.lic\n enabled: true\n ```\n\n\n## Managing Your Subscription\n\n### Billing Portal\n\nStirling PDF includes a convenient billing management interface:\n\n1. Navigate to Settings → Plan\n2. On your current plan, click \"Manage\"\n3. You'll be redirected to Stripe's customer portal where you can:\n - Update payment methods\n - View invoices\n - Cancel or modify subscriptions\n - Update billing information\n\n## Feature Configuration\n\nOnce activated, you can customize premium features in your `settings.yml`:\n\n```yaml\npremium:\n proFeatures:\n ssoAutoLogin: false\n customMetadata:\n autoUpdateMetadata: false\n author: username\n creator: Stirling-PDF\n producer: Stirling-PDF\n googleDrive:\n enabled: false\n clientId: ''\n apiKey: ''\n appId: ''\n```\n\n## License Model\n\nStirling PDF uses an **installation-based licensing model**:\n\n- Each license is tied to a specific installation (identified by machine fingerprint)\n- **Server Plan**: $99/month covers one installation with 100 users included\n - Capacity is added in blocks of 100 users, so you get one bill instead of per-seat licenses\n - Example: 100 users = under $1 per user per month\n- **Enterprise Plan**: Capacity and terms are set in your contract, with volume discounts as you scale\n - [Contact sales](https://www.stirling.com/contact-us) for a quote covering your user count, deployment model, and SLA\n\n## Upgrading Your Plan\n\nYou can upgrade from Free → Server at any time:\n\n1. Navigate to Settings → Plan\n2. On the plan tier you want, click \"Upgrade\"\n3. Complete checkout\n4. Your existing license will be automatically upgraded\n\nMoving Server → Enterprise goes through sales - use the \"Contact Us\" button on the Enterprise tier in Settings → Plan, or [contact sales](https://www.stirling.com/contact-us).\n\nAdding more user capacity to an existing Server plan is coming soon as an in-app feature. Until it lands, email support@stirlingpdf.com and we'll add the block for you.\n\n**Note**: When upgrading, your new plan starts immediately and you'll be credited for any unused time on your previous plan.\n\n## Support\n\n### Community Support (All Plans)\n- GitHub Issues: [github.com/Stirling-Tools/Stirling-PDF](https://github.com/Stirling-Tools/Stirling-PDF)\n- Discord: Join our community server\n\n### Email Support (Server & Enterprise)\n- Email: support@stirlingpdf.com\n- Response time: 1-2 business days (Server), Priority response (Enterprise)\n\n### Enterprise Support\n- Priority email support\n- 1:1 meetings with Stirling PDF team\n- Dedicated account manager\n- Uptime SLAs agreed in your contract\n\n## Frequently Asked Questions\n\n**Q: Can I try before I buy?**\nA: Yes! The Free plan includes all features for up to 5 users. Test thoroughly before upgrading. If you'd rather be walked through the paid features first, [book a demo](https://www.stirling.com/book-a-demo).\n\n**Q: What happens if I cancel?**\nA: Your license remains active until the end of your billing period, then reverts to Free plan limits.\n\n**Q: What happens when we pass 100 users?**\nA: The Server plan includes 100 users. When you need more, capacity is added in blocks of 100 - you stay on one bill rather than buying individual seats. Adding a block from inside the app is coming soon; in the meantime, email support@stirlingpdf.com.\n\n**Q: How is Enterprise priced?**\nA: Custom, based on your user count, deployment model, and the terms you need. It is not sold in-app - [contact sales](https://www.stirling.com/contact-us) for a quote. Volume discounts apply as you scale. If you want to see it working first, [book a demo](https://www.stirling.com/book-a-demo).\n\n**Q: Can I move my license to a different server?**\nA: Contact support@stirlingpdf.com for license transfers. Enterprise customers have more flexibility.\n\n**Q: Do I need an internet connection?**\nA: License activation requires internet for initial verification. Enterprise customers running air-gapped can request offline certificate files instead.\n\n**Q: What's the difference between monthly and yearly billing?**\nA: Yearly billing offers significant savings. For Server plan: $999/year vs $1,188/year monthly (save $189 = almost 2 months free).\n\n**Q: How do I get an invoice?**\nA: Invoices are automatically sent via email and accessible through the Billing Portal.\n\n## Migration from V1\n\nIf you're upgrading from Stirling PDF V1 with an existing license:\n\n1. Your existing license key will continue to work\n2. You can enter it manually via Settings → Plan\n3. Or, re-activate through the in-app purchase flow\n4. Contact support@stirlingpdf.com if you encounter any issues\n\n---\n\nFor pricing details, visit [stirling.com/pricing](https://stirling.com/pricing)\n\nFor technical support, email support@stirlingpdf.com",
|
||
"sourcePath": "docs/Paid-Offerings.md",
|
||
"editUrl": "https://github.com/Stirling-Tools/Stirling-Tools.github.io/blob/main/docs/Paid-Offerings.md"
|
||
},
|
||
"server-admin-onboarding": {
|
||
"id": "server-admin-onboarding",
|
||
"title": "Production Deployment Guide",
|
||
"description": "Complete production deployment guide for server administrators deploying Stirling-PDF",
|
||
"section": "overview",
|
||
"markdown": "Welcome! This guide will walk you through deploying Stirling-PDF for your organization, from initial installation to advanced configuration and scaling.\n\n> **💡 Tip: For Organizations & Teams**\n>\n> This guide is designed for server administrators deploying Stirling-PDF for teams, departments, or entire organizations. If you're interested in **paid plan features** (external database, Google Drive, SSO, advanced user management, priority support), we'll highlight upgrade paths throughout this guide.\n\n\n---\n\n## Overview: What You'll Accomplish\n\nBy the end of this guide, you'll have:\n\n1. ✅ **Stirling-PDF running** on your infrastructure\n2. ✅ **User authentication configured** with admin access\n3. ✅ **Settings customized** for your organization\n4. ✅ **Security hardened** with HTTPS and proper access controls\n5. ✅ **Monitoring setup** to track usage and performance\n6. ✅ **Understanding of paid plan** upgrade paths (Server/Enterprise)\n\n**Time estimate:** 30-60 minutes for basic setup, 2-3 hours for full enterprise configuration\n\n---\n\n## Step 1: Choose Your Deployment Path\n\n\n\n\n**Best for:** Most organizations, production deployments, easy management\n\n**Why Docker Compose?**\n- ✅ Simple one-command deployment\n- ✅ Easy updates and rollbacks\n- ✅ Persistent data management\n- ✅ Production-ready configuration\n- ✅ Easy to scale and customize\n\n**Requirements:**\n- Docker Engine 20.10+\n- Docker Compose 1.29+\n- 2GB RAM minimum (4GB+ recommended)\n- 10GB disk space\n\n**Jump to:** [Docker Compose Setup](#docker-compose-setup)\n\n\n\n\n**Best for:** Quick testing, single-container deployments, learning\n\n**Why Docker Run?**\n- ✅ Fastest way to get started\n- ✅ Single command deployment\n- ✅ Good for testing before production\n- ⚠️ More manual management needed\n\n**Requirements:**\n- Docker Engine 20.10+\n- 2GB RAM minimum\n- 5GB disk space\n\n**Jump to:** [Docker Run Setup](#docker-run-setup)\n\n\n\n\n**Best for:** Enterprise scale, high availability, cloud-native deployments\n\n**Why Kubernetes?**\n- ✅ Auto-scaling capabilities\n- ✅ High availability and fault tolerance\n- ✅ Load balancing built-in\n- ✅ Cloud provider integration\n- ⚠️ More complex to set up\n\n**Requirements:**\n- Kubernetes cluster 1.19+\n- kubectl configured\n- Persistent volume support\n- Load balancer support\n\n**Jump to:** [Kubernetes Guide](doc:installation/kubernetes)\n\n\n\n\n**Best for:** Environments without Docker, specific OS requirements\n\n**Why Bare Metal?**\n- ✅ Maximum control\n- ✅ No container overhead\n- ✅ Custom Java configurations\n- ⚠️ More maintenance required\n\n**Requirements:**\n- Java 25+\n- Linux/Unix system\n- 2GB RAM minimum\n- LibreOffice, Tesseract (for features)\n\n**Jump to:** [Unix Installation Guide](doc:installation/unix)\n\n\n\n\n---\n\n## Step 2: Installation\n\nFollow the installation instructions for your chosen deployment method from Step 1.\n\n\n\n\n### Docker Compose Setup\n\nThis is the recommended approach for production deployments.\n\n#### 2.1: Create docker-compose.yml\n\nCreate a directory for your Stirling-PDF deployment:\n\n```bash\nmkdir -p ~/stirling-pdf\ncd ~/stirling-pdf\n```\n\nCreate `docker-compose.yml` with this production-ready configuration:\n\n```yaml\n\nservices:\n stirling-pdf:\n image: docker.stirlingpdf.com/stirlingtools/stirling-pdf:latest\n container_name: stirling-pdf\n ports:\n - '8080:8080'\n volumes:\n # Persistent data storage\n - ./stirling-data/tessdata:/usr/share/tessdata # OCR language files\n - ./stirling-data/configs:/configs # Settings & database\n - ./stirling-data/logs:/logs # Application logs\n - ./stirling-data/customFiles:/customFiles:rw # Custom branding files\n - ./stirling-data/pipeline:/pipeline # Automation configs\n environment:\n # Core Settings\n - SECURITY_ENABLELOGIN=true # Enable user authentication\n\n # Language & Localization\n - SYSTEM_DEFAULTLOCALE=en-US # Default UI locale for new users\n\n # System Configuration\n - SYSTEM_GOOGLEVISIBILITY=false # Hide from search engines\n - SYSTEM_ROOTURIPATH=/ # Base URL path\n - SYSTEMFILEUPLOADLIMIT=2000MB # Max upload size (legacy: SYSTEM_MAXFILESIZE in MB)\n\n restart: unless-stopped\n\n # Optional: Resource limits\n deploy:\n resources:\n limits:\n memory: 4G\n cpus: '2.0'\n reservations:\n memory: 2G\n cpus: '1.0'\n```\n\n#### 2.2: Start Stirling-PDF\n\n```bash\n# Start the container\ndocker-compose up -d\n\n# Check if it's running\ndocker-compose ps\n\n# View logs\ndocker-compose logs -f\n```\n\n#### 2.3: Verify Installation\n\nOpen your browser and navigate to:\n```\nhttp://your-server-ip:8080\n```\n\nYou should see the Stirling-PDF homepage!\n\n> **💡 Tip: Success!**\n>\n> If you see the Stirling-PDF interface, your installation is successful. Continue to Step 3 to set up authentication.\n\n\n**Troubleshooting:**\n- **Can't connect?** Check firewall rules: `sudo ufw allow 8080`\n- **Container won't start?** Check logs: `docker-compose logs`\n- **Permission errors?** Fix permissions: `sudo chmod -R 755 ./stirling-data`\n\n\n\n\n### Docker Run Setup\n\nFor quick testing or simpler deployments.\n\n#### 2.1: Create Data Directory and Run Container\n\n```bash\n# Create data directory\nmkdir -p ~/stirling-data\n\n# Run Stirling-PDF\ndocker run -d \\\n --name stirling-pdf \\\n -p 8080:8080 \\\n -v ~/stirling-data/tessdata:/usr/share/tessdata \\\n -v ~/stirling-data/configs:/configs \\\n -v ~/stirling-data/logs:/logs \\\n -v ~/stirling-data/customFiles:/customFiles:rw \\\n -e SECURITY_ENABLELOGIN=true \\\n -e SYSTEM_DEFAULTLOCALE=en-US \\\n -e SYSTEM_GOOGLEVISIBILITY=false \\\n -e SYSTEMFILEUPLOADLIMIT=2000MB \\\n --restart unless-stopped \\\n docker.stirlingpdf.com/stirlingtools/stirling-pdf:latest\n```\n\n#### 2.2: Verify Installation\n\n```bash\n# Check if running\ndocker ps | grep stirling-pdf\n\n# View logs\ndocker logs -f stirling-pdf\n```\n\nOpen your browser and navigate to:\n```\nhttp://your-server-ip:8080\n```\n\nYou should see the Stirling-PDF homepage!\n\n> **💡 Tip: Success!**\n>\n> If you see the Stirling-PDF interface, your installation is successful. Continue to Step 3 to set up authentication.\n\n\n**Troubleshooting:**\n- **Can't connect?** Check firewall rules: `sudo ufw allow 8080`\n- **Container won't start?** Check logs: `docker logs stirling-pdf`\n- **Permission errors?** Fix permissions: `sudo chmod -R 755 ~/stirling-data`\n\n\n\n\n### Kubernetes Setup\n\nFor enterprise-scale deployments with high availability.\n\nKubernetes deployment requires:\n- Persistent Volume Claims (PVCs)\n- Deployments and Services\n- Ingress/LoadBalancer configuration\n- Resource limits and autoscaling\n\n**See full guide:** [Kubernetes Installation Guide](doc:installation/kubernetes)\n\nThis includes complete YAML configurations, namespace setup, SSL/TLS, and horizontal pod autoscaling.\n\n\n\n\n### Bare Metal Setup\n\nFor environments without Docker or specific OS requirements.\n\nBare metal installation requires:\n- Java 25+\n- LibreOffice (for conversions)\n- Tesseract OCR (for OCR features)\n- Systemd service setup\n\n**See full guide:** [Unix Installation Guide](doc:installation/unix)\n\nThis includes complete dependency installation, JAR setup, systemd configuration, and troubleshooting.\n\n\n\n\n---\n\n## Step 3: Initial Login & Admin Setup\n\nNow that Stirling-PDF is running with authentication enabled, you need to create your admin account.\n\n### 3.1: First-Time Login\n\n1. **Navigate to your Stirling-PDF instance:**\n ```\n http://your-server-ip:8080\n ```\n\n2. **Log in with default credentials:**\n ```\n Username: admin\n Password: stirling\n ```\n\n3. **Change the default password immediately:**\n - After first login, go to Settings → Account\n - Change to a strong password (12+ characters, mixed case, numbers, symbols)\n\n> **💡 Tip: Customizing Default Credentials**\n>\n> You can set custom default credentials **before first startup** using environment variables:\n>\n> ```yaml\n> environment:\n> - SECURITY_INITIALLOGIN_USERNAME=youradmin\n> - SECURITY_INITIALLOGIN_PASSWORD=YourSecurePassword123!\n> ```\n>\n> **Important:** These only work on first startup. If you change them after the database is created, the old credentials remain active. Always change the password through the UI after first login.\n\n\n> **💡 Tip: User Registration**\n>\n> After first login, you can control how additional users are created through Settings → Security (covered in Step 4).\n\n\n### 3.2: Verify Admin Access\n\n1. **Log in with your admin account**\n\n2. **Click the Settings gear icon** ⚙️ in the top navigation bar\n\n3. **Verify you have admin access** by checking for admin-only sections:\n - **General Settings** - System configuration\n - **Security Settings** - User management, login settings\n - **UI Customization** - Branding and appearance\n - **User Management** - Create/manage users\n - **Endpoint Configuration** - Enable/disable tools\n\n **Note:** Regular users can also access Settings but only see their personal preferences (language, theme). Only admins see the sections listed above.\n\n4. **If you don't see admin sections:**\n - Check logs: `docker logs stirling-pdf`\n - Verify you're the first user created\n - Confirm `SECURITY_ENABLELOGIN=true` is set\n\n> **⚠️ Warning: Secure Your Admin Account**\n>\n> - **Change the default password immediately** after first login\n> - Use a strong password (12+ characters, mixed case, numbers, symbols)\n> - Consider using SSO (OAuth2/SAML2) to avoid password management entirely\n\n\n---\n\n## Step 4: Configure Essential Settings\n\nNow that you're logged in as admin, let's configure Stirling-PDF for your organization.\n\n### 4.1: General Settings\n\nNavigate to **Settings → General**\n\n\n\n\n**These settings should be configured immediately:**\n\n#### System Locale & Language\n```yaml\nsystem:\n defaultLocale: en-US # or en-GB, de-DE, fr-FR, etc.\n\nui:\n languages: [] # Empty = all languages enabled. Or specify: [\"en_GB\", \"de_DE\", \"fr_FR\"]\n```\n\n**Why:** Ensures UI appears in the correct language for your users\n\n#### Search Engine Visibility\n```yaml\nsystem:\n googlevisibility: false # Prevents search engines from indexing your site\n```\n\n**Why:** Keeps your internal PDF tool private\n\n#### File Upload Limits\n```yaml\nsystem:\n fileUploadLimit: 2000MB # or \"2GB\" - adjust based on your needs\n```\n\n**Why:** Prevents users from uploading files that crash the system\n\n\n\n\n**Configure these for better user experience:**\n\n#### Legal & Compliance\n```yaml\nlegal:\n termsAndConditions: https://yourcompany.com/tos # or empty string to disable\n privacyPolicy: https://yourcompany.com/privacy # or empty string to disable\n accessibilityStatement: '' # optional\n cookiePolicy: '' # optional\n impressum: '' # optional (required in some countries like Germany)\n```\n\n**Why:** Legal compliance, especially in GDPR/regulated industries\n\n#### Update Notifications (Optional)\n```yaml\nsystem:\n showUpdate: false # Set true to show update notifications\n showUpdateOnlyAdmin: false # Only admins see updates (requires showUpdate: true)\n```\n\n**Why:** Control update notifications in production environments\n\n#### Process Limits\n```yaml\nprocessExecutor:\n sessionLimit:\n libreOfficeSessionLimit: 1\n tesseractSessionLimit: 1\n pythonOpenCvSessionLimit: 8\n timeoutMinutes:\n libreOfficetimeoutMinutes: 30\n tesseractTimeoutMinutes: 30\n```\n\n**Why:** Prevents resource exhaustion based on your server capacity\n\n\n\n\n### 4.2: Security Settings\n\nNavigate to **Settings → Security**\n\n> **⚠️ Warning: Critical for Production**\n>\n> These settings directly impact your organization's security. Review carefully!\n\n\n#### User Registration Control\n\n\n\n\n**Best for:** Controlled environments, enterprises, security-conscious orgs\n\n**How it works:**\n1. Admin creates user accounts manually in Settings → User Management\n2. Admin shares credentials with users securely\n3. Users log in with provided credentials\n\n**Email Invitations (Optional):**\nIf you configure email, admins can send invitation links instead.\n\n\n\n\n```yaml\nmail:\n enabled: true\n enableInvites: true\n host: smtp.gmail.com\n port: 587\n username: noreply@yourcompany.com\n password: ${MAIL_PASSWORD} # Use environment variable\n from: noreply@yourcompany.com\n startTlsEnable: true # STARTTLS upgrade after connecting (port 587)\n```\n\n\n\n\n```bash\nMAIL_ENABLED=true\nMAIL_ENABLEINVITES=true\nMAIL_HOST=smtp.gmail.com\nMAIL_PORT=587\nMAIL_USERNAME=noreply@yourcompany.com\nMAIL_PASSWORD=your-app-password\nMAIL_FROM=noreply@yourcompany.com\nMAIL_STARTTLSENABLE=true\n```\n\n\n\n\n\n\n\n**Best for:** Large enterprises, existing SSO infrastructure\n\n**Single Sign-On (SSO) options:**\n- **OAuth2:** Server tier - Supports Google, GitHub, Keycloak, any OpenID Connect provider\n- **SAML2:** Enterprise tier - Supports Okta, Azure AD, etc.\n\n**Key settings:**\n```yaml\nsecurity:\n enableLogin: true\n loginMethod: oauth2 # or 'saml2' or 'all'\n oauth2:\n enabled: true\n autoCreateUser: true # Auto-create users on first login\n blockRegistration: false # Set true to require admin pre-registration\n```\n\n**Benefits:**\n- ✅ No password management\n- ✅ Centralized access control\n- ✅ Automatic user provisioning\n- ✅ Corporate policy compliance\n\n**See full guide:** [SSO Configuration Guide](doc:configuration/security/single-sign-on-configuration)\n\nComplete configuration examples for Google, GitHub, Keycloak, Okta, Azure AD, and generic OIDC/SAML2 providers.\n\n\n\n\n#### Login Security Settings\n\n```yaml\nsecurity:\n loginAttemptCount: 5 # Lock account after 5 failed attempts\n loginResetTimeMinutes: 120 # Unlock after 2 hours\n```\n\n**Notes:**\n- Session timeout is not configurable via settings\n- Password policies (length, complexity) are not currently configurable\n- Use SSO/OAuth2 for enterprise password policies\n\n### 4.3: Feature Control\n\nNavigate to **Settings → Endpoints**\n\nControl which PDF tools are available to users.\n\n\n\n\n**All tools are enabled by default.** You can disable specific tools if needed:\n\n```yaml\nendpoints:\n toRemove: [] # Add tool IDs to disable, e.g. ['sign', 'add-password']\n groupsToRemove: [] # Disable entire groups, e.g. ['LibreOffice']\n```\n\n**Most organizations don't need to disable anything** - all tools are useful and safe\n\n\n\n\n**Example: Disable security-sensitive tools:**\n\n```yaml\nendpoints:\n toRemove:\n - 'add-password' # Disable password protection tool\n - 'remove-password' # Disable password removal tool\n - 'change-permissions' # Disable permissions modification\n```\n\n**Example: Disable entire groups:**\n\n```yaml\nendpoints:\n groupsToRemove:\n - 'LibreOffice' # Disables all LibreOffice-based conversions\n```\n\n**How to disable in UI:**\n1. Log in as admin\n2. Go to Settings → Endpoints\n3. In \"Disabled Endpoints\", select the tools you want to disable (or use \"Disabled Endpoint Groups\" for whole groups)\n4. Save changes\n\n**See all tool IDs:** [Endpoint Customisation](doc:configuration/customisation/endpoint-or-feature-customisation)\n\n\n\n\n### 4.4: Save and Apply Settings\n\nAfter configuring all settings:\n\n1. **Click \"Save\" button** at the bottom of each settings page\n2. **Verify settings saved** - You should see a success message\n3. **Some settings require restart** - Check if restart notification appears\n4. **Test changes** - Log out and log in as a regular user to verify\n\n**If restart is needed:**\n```bash\n# Docker Compose\ndocker-compose restart\n\n# Docker Run\ndocker restart stirling-pdf\n```\n\n---\n\n## Step 5: HTTPS & Domain Setup\n\n> **🚫 Danger: Production Requirement**\n>\n> **Never run in production without HTTPS.** User credentials and PDF files will be transmitted in plain text over the network.\n\n\n### 5.1: Choose Your HTTPS Method\n\n\n\n\n**Best for:** Simple deployments, no reverse proxy needed\n\nStirling-PDF can handle HTTPS directly using built-in SSL configuration.\n\n#### Configure SSL in Stirling-PDF\n\n1. **Generate or obtain SSL certificate:**\n\n **Option A: Self-signed (for testing/internal use):**\n ```bash\n # Generate self-signed certificate\n keytool -genkeypair \\\n -alias stirling \\\n -keyalg RSA \\\n -keysize 2048 \\\n -storetype PKCS12 \\\n -keystore keystore.p12 \\\n -validity 365\n\n # Move to configs directory\n mv keystore.p12 ./stirling-data/configs/\n ```\n\n **Option B: Let's Encrypt (for production):**\n ```bash\n # Get certificate with certbot\n sudo certbot certonly --standalone -d pdf.yourcompany.com\n\n # Convert to PKCS12 format\n sudo openssl pkcs12 -export \\\n -in /etc/letsencrypt/live/pdf.yourcompany.com/fullchain.pem \\\n -inkey /etc/letsencrypt/live/pdf.yourcompany.com/privkey.pem \\\n -out keystore.p12 \\\n -name stirling\n\n # Move to configs\n sudo mv keystore.p12 ./stirling-data/configs/\n sudo chown $USER:$USER ./stirling-data/configs/keystore.p12\n ```\n\n2. **Create custom_settings.yml:**\n\n Create `./stirling-data/configs/custom_settings.yml`:\n ```yaml\n server:\n port: 8443 # HTTPS port\n ssl:\n enabled: true\n key-store: file:/configs/keystore.p12\n key-store-password: your-keystore-password\n key-store-type: PKCS12\n key-alias: stirling\n ```\n\n3. **Update docker-compose.yml to expose port 8443:**\n ```yaml\n services:\n stirling-pdf:\n ports:\n - '8443:8443' # Change from 8080:8080\n ```\n\n4. **Restart Stirling-PDF:**\n ```bash\n docker-compose down\n docker-compose up -d\n ```\n\n5. **Access via HTTPS:**\n ```\n https://pdf.yourcompany.com:8443\n ```\n\n**Benefits:**\n- ✅ Simple setup, no reverse proxy needed\n- ✅ Direct SSL termination in application\n- ✅ Good for small deployments\n\n**Limitations:**\n- ⚠️ Manual certificate renewal\n- ⚠️ No load balancing\n- ⚠️ Port 8443 instead of standard 443\n\n**Learn more:** [Custom Settings - SSL Configuration](doc:configuration/customisation/extra-settings)\n\n\n\n\n**Best for:** Production deployments, standard ports (443), load balancing\n\nUse a reverse proxy like **Nginx, Apache, or Traefik** to handle HTTPS.\n\n#### Option A: Nginx with Let's Encrypt\n\n**Install Nginx and Certbot:**\n```bash\nsudo apt update\nsudo apt install nginx certbot python3-certbot-nginx\n```\n\n**Configure Nginx:**\n\nCreate `/etc/nginx/sites-available/stirling-pdf`:\n```nginx\nserver {\n listen 80;\n server_name pdf.yourcompany.com;\n\n # Redirect HTTP to HTTPS\n return 301 https://$server_name$request_uri;\n}\n\nserver {\n listen 443 ssl http2;\n server_name pdf.yourcompany.com;\n\n # SSL certificates (will be added by certbot)\n ssl_certificate /etc/letsencrypt/live/pdf.yourcompany.com/fullchain.pem;\n ssl_certificate_key /etc/letsencrypt/live/pdf.yourcompany.com/privkey.pem;\n\n # Strong SSL settings\n ssl_protocols TLSv1.2 TLSv1.3;\n ssl_ciphers HIGH:!aNULL:!MD5;\n ssl_prefer_server_ciphers on;\n\n # Security headers\n add_header Strict-Transport-Security \"max-age=31536000; includeSubDomains\" always;\n add_header X-Frame-Options \"SAMEORIGIN\" always;\n add_header X-Content-Type-Options \"nosniff\" always;\n add_header X-XSS-Protection \"1; mode=block\" always;\n\n # Large file uploads\n client_max_body_size 2000M;\n client_body_timeout 300s;\n\n # Proxy to Stirling-PDF\n location / {\n proxy_pass http://localhost:8080;\n proxy_set_header Host $host;\n proxy_set_header X-Real-IP $remote_addr;\n proxy_set_header X-Forwarded-For $proxy_add_x_forwarded_for;\n proxy_set_header X-Forwarded-Proto $scheme;\n\n # WebSocket support (if needed)\n proxy_http_version 1.1;\n proxy_set_header Upgrade $http_upgrade;\n proxy_set_header Connection \"upgrade\";\n\n # Timeouts for large files\n proxy_connect_timeout 300s;\n proxy_send_timeout 300s;\n proxy_read_timeout 300s;\n }\n}\n```\n\n**Enable site and get certificate:**\n```bash\n# Enable site\nsudo ln -s /etc/nginx/sites-available/stirling-pdf /etc/nginx/sites-enabled/\nsudo nginx -t\nsudo systemctl reload nginx\n\n# Get Let's Encrypt certificate\nsudo certbot --nginx -d pdf.yourcompany.com\n\n# Auto-renewal (certbot sets this up automatically)\nsudo certbot renew --dry-run\n```\n\n**Update DNS:**\n```\nA record: pdf.yourcompany.com → your-server-ip\n```\n\n**Access your site:**\n```\nhttps://pdf.yourcompany.com\n```\n\n\n\n\n**Best for:** Docker environments, automatic certificate management\n\nTraefik is a Docker-native reverse proxy that automatically:\n- Obtains SSL certificates from Let's Encrypt\n- Renews certificates automatically\n- Routes traffic based on Docker labels\n\n**Key benefits:**\n- ✅ Zero-config certificate management\n- ✅ Docker label-based routing\n- ✅ Automatic service discovery\n\nAdd Traefik container to your `docker-compose.yml` and configure Stirling-PDF with Docker labels for routing.\n\n**See Traefik documentation:** https://doc.traefik.io/traefik/user-guides/docker-compose/basic-example/\n\n\n\n\n**Best for:** No public IP, behind firewall, home servers\n\nCloudflare Tunnel provides:\n- ✅ No port forwarding needed\n- ✅ DDoS protection included\n- ✅ Automatic HTTPS\n- ✅ Free for most use cases\n\n**Quick setup:**\n1. Install `cloudflared`\n2. Authenticate with Cloudflare\n3. Create tunnel pointing to `http://localhost:8080`\n4. Add DNS record\n5. Run as system service\n\n**See Cloudflare documentation:** https://developers.cloudflare.com/cloudflare-one/connections/connect-apps/install-and-setup/tunnel-guide/\n\n\n\n\n### 5.2: Update Stirling-PDF Configuration\n\nAfter setting up HTTPS, update Stirling-PDF to use the correct URL:\n\n**In Settings → General:**\n```yaml\nSystem Settings:\n Root URI Path: / (or /pdf if using subdirectory)\n Frontend URL: https://pdf.yourcompany.com\n CORS Allowed Origins: https://pdf.yourcompany.com\n```\n\n---\n\n## Step 6: User Management\n\nNow that your system is secure and accessible, let's set up users.\n\n### 6.1: Understanding User Roles\n\n\n\n\n**Out-of-the-box roles:**\n\n| Role | Permissions | Use Case |\n|------|-------------|----------|\n| **Admin** | Full access to all features, settings, user management | System administrators, IT staff |\n| **User** | Access to enabled PDF tools, no settings access | Regular employees, end users |\n\n**Admin capabilities:**\n- ✅ Access all PDF tools\n- ✅ Manage users (create, delete, reset passwords)\n- ✅ Configure all settings\n- ✅ View usage statistics\n- ✅ Enable/disable features\n- ✅ View logs (if configured)\n\n**User capabilities:**\n- ✅ Access enabled PDF tools only\n- ✅ Upload and process files\n- ✅ Download results\n- ❌ No settings access\n- ❌ No user management\n- ❌ No system configuration\n\n\n\n\n### 6.2: Adding Users\n\n\n\n\n**As admin, manually create user accounts:**\n\n1. **Navigate to Settings → User Management**\n\n2. **Click \"Add User\" button**\n\n3. **Fill in user details:**\n ```\n Username: john.doe\n Email: john.doe@yourcompany.com (optional but recommended)\n Password: Auto-generate or set manually\n Role: User (or Admin for additional admins)\n Enabled: Yes\n ```\n\n4. **Click \"Create User\"**\n\n5. **Share credentials with user** (via secure channel)\n\n**Bulk user creation:**\nYou can paste a list of email addresses (one per line) to create multiple users at once.\n\n**Best practices:**\n- Use email as username for easier identification\n- Auto-generate strong passwords\n- Keep records of who has access\n\n\n\n\n**Send email invitations** (requires email configuration):\n\n1. **Navigate to Settings → User Management**\n\n2. **Click \"Invite User\" button**\n\n3. **Fill in details:**\n ```\n Email: jane.smith@yourcompany.com\n Role: User\n Message: Optional welcome message\n ```\n\n4. **Click \"Send Invitation\"**\n\n5. **User receives email** with magic link to register\n\n6. **User clicks link, creates password, and is automatically logged in**\n\n**Bulk invitations:**\nYou can paste a list of email addresses (one per line) to send multiple invitations at once.\n\n**Benefits:**\n- ✅ More secure (user sets own password)\n- ✅ Professional onboarding experience\n- ✅ Magic link authentication\n- ✅ No need to share passwords\n\n**Email configuration required:**\n```yaml\nEmail Settings:\n SMTP Host: smtp.gmail.com\n SMTP Port: 587\n SMTP Username: noreply@yourcompany.com\n SMTP Password: your-app-password\n From Address: noreply@yourcompany.com\n```\n\n\n\n\n### 6.3: User Management Tasks\n\n**Common admin tasks:**\n\n#### View All Users\n- Navigate to **Settings → User Management**\n- See list of all users with status, role, last login\n\n#### Reset User Password\n1. Find user in user list\n2. Click \"Reset Password\" button\n3. New password generated or set manually\n4. Share new password securely\n\n#### Disable/Enable User\n1. Find user in user list\n2. Toggle \"Enabled\" switch\n3. Disabled users cannot log in\n\n#### Delete User\n1. Find user in user list\n2. Click \"Delete\" button\n3. Confirm deletion\n4. ⚠️ **Warning:** This is permanent\n\n#### Change User Role\n1. Find user in user list\n2. Change role dropdown (User/Admin)\n3. Save changes\n\n---\n\n## Step 7: Monitoring & Usage Tracking\n\nUnderstanding how your users are using Stirling-PDF helps with capacity planning and identifying issues.\n\n### 7.1: Basic Monitoring\n\n\n\n\n**View application logs:**\n\n```bash\n# Docker Compose\ndocker-compose logs -f stirling-pdf\n\n# Docker Run\ndocker logs -f stirling-pdf\n\n# Last 100 lines\ndocker logs --tail 100 stirling-pdf\n\n# Filter for errors\ndocker logs stirling-pdf 2>&1 | grep ERROR\n```\n\n**What to look for:**\n- ✅ Successful operations\n- ⚠️ Warnings (disk space, memory)\n- ❌ Errors (failed operations, crashes)\n- 🔒 Security events (failed logins, unauthorized access)\n\n**Common log entries:**\n```\nINFO: User john.doe uploaded file document.pdf\nINFO: Operation MERGE completed successfully\nWARN: Disk space low: 85% used\nERROR: OCR operation failed: Tesseract not found\n```\n\n\n\n\n#### Basic API Monitoring\n\n**Usage Statistics API** (available to all users):\n```bash\n# Application status\ncurl http://localhost:8080/api/v1/info/status\n\n# Request counts\ncurl http://localhost:8080/api/v1/info/requests/all\n\n# Unique users\ncurl http://localhost:8080/api/v1/info/requests/all/unique\n```\n\n**Health Check Endpoint:**\n```bash\ncurl http://localhost:8080/api/v1/info/status\n\n# Response:\n{\"status\":\"UP\",\"version\":\"<version>\"}\n```\n\nUse `/api/v1/info/status` for health and uptime checks - it is always reachable without authentication.\n\n**Use for:**\n- Load balancer health checks\n- Uptime monitoring (Uptime Robot, Pingdom)\n- Custom monitoring scripts\n\n#### Prometheus Integration (Enterprise)\n\nStirling-PDF Enterprise plan supports Prometheus metrics for advanced monitoring.\n\n**Learn more:** [Usage Monitoring - Prometheus Setup](doc:configuration/automation/usage-monitoring)\n\n**Features:**\n- JVM metrics (memory, GC, threads)\n- System metrics (CPU, disk)\n- Application metrics (request rates, processing times)\n- PDF processing metrics\n\n#### Log Aggregation\n\nForward logs to centralized logging:\n\n**Option 1: Docker log driver**\n```yaml\nservices:\n stirling-pdf:\n logging:\n driver: \"json-file\"\n options:\n max-size: \"10m\"\n max-file: \"3\"\n```\n\n**Option 2: Syslog**\n```yaml\nservices:\n stirling-pdf:\n logging:\n driver: syslog\n options:\n syslog-address: \"tcp://your-syslog-server:514\"\n```\n\n**Popular log aggregation tools:**\n- ELK Stack (Elasticsearch, Logstash, Kibana)\n- Splunk\n- Graylog\n- Datadog\n\n\n\n\n### 7.2: Set Up Monitoring\n\n**Basic monitoring approach:**\n\n1. **Monitor Docker logs regularly:**\n ```bash\n docker logs stirling-pdf --tail 100 -f\n ```\n\n2. **Check Docker container health:**\n ```bash\n docker ps\n docker stats stirling-pdf\n ```\n\n3. **Monitor disk space:**\n ```bash\n df -h\n du -sh ./stirling-data/*\n ```\n\n4. **Use external uptime monitoring:**\n - Uptime Robot (free)\n - Pingdom\n - StatusCake\n - Monitor the status endpoint: `http://localhost:8080/api/v1/info/status`\n\n---\n\n## Step 8: Backup & Disaster Recovery\n\nProtect your users' data and configuration with proper backups.\n\n### 8.1: What to Backup\n\n**Critical data to backup:**\n\n| Data | Location | Frequency | Importance |\n|------|----------|-----------|------------|\n| **User Database (if local)** | `./stirling-data/configs/stirling-pdf-DB-<schema-version>.mv.db` | Daily | Critical* |\n| **Settings File** | `./stirling-data/configs/settings.yml` | After changes | Critical |\n| **Custom Files** | `./stirling-data/customFiles/` | After changes | High |\n| **OCR Languages** | `./stirling-data/tessdata/` | Weekly | Medium |\n| **Logs** | `./stirling-data/logs/` | Optional | Low |\n\n**\\*Note on User Database:**\n- **Free edition:** Uses a local H2 database file named `stirling-pdf-DB-<schema-version>.mv.db` (the schema version is embedded in the filename, e.g. `stirling-pdf-DB-2.3.232.mv.db`) - must be backed up. The simplest approach is to back up the whole `configs/` directory.\n- **Server/Enterprise:** Should use external PostgreSQL database (backed up separately)\n\n> **💡 Tip: Server/Enterprise Recommendation**\n>\n> Server and Enterprise plan users should configure an external PostgreSQL database instead of using the local H2 database. This provides better reliability, scalability, and backup capabilities.\n>\n> **Learn more:** [External Database Configuration](doc:configuration/storage/external-database)\n\n\n### 8.2: Backup Strategies\n\n\n\n\n**Create automated backup script:**\n\nCreate `backup-stirling.sh`:\n```bash\n#!/bin/bash\n\n# Configuration\nBACKUP_DIR=\"/backups/stirling-pdf\"\nSTIRLING_DATA=\"/path/to/stirling-data\"\nRETENTION_DAYS=30\n\n# Create backup directory\nmkdir -p \"$BACKUP_DIR\"\n\n# Generate timestamp\nTIMESTAMP=$(date +%Y%m%d-%H%M%S)\nBACKUP_FILE=\"$BACKUP_DIR/stirling-backup-$TIMESTAMP.tar.gz\"\n\n# Stop container (optional, for consistency)\n# docker-compose -f /path/to/docker-compose.yml stop stirling-pdf\n\n# Create backup\ntar -czf \"$BACKUP_FILE\" \\\n -C \"$STIRLING_DATA\" \\\n configs/ \\\n customFiles/ \\\n tessdata/\n\n# Start container (if stopped)\n# docker-compose -f /path/to/docker-compose.yml start stirling-pdf\n\n# Delete old backups\nfind \"$BACKUP_DIR\" -name \"stirling-backup-*.tar.gz\" -mtime +$RETENTION_DAYS -delete\n\n# Log result\necho \"[$TIMESTAMP] Backup completed: $BACKUP_FILE\"\n```\n\n**Make executable and schedule:**\n```bash\nchmod +x backup-stirling.sh\n\n# Add to crontab (daily at 2 AM)\ncrontab -e\n# Add: 0 2 * * * /path/to/backup-stirling.sh >> /var/log/stirling-backup.log 2>&1\n```\n\n\n\n\n**Backup Docker volumes:**\n\n```bash\n# Stop container\ndocker-compose stop stirling-pdf\n\n# Backup volumes\ndocker run --rm \\\n -v $(pwd)/stirling-data:/data \\\n -v $(pwd)/backups:/backup \\\n alpine tar -czf /backup/stirling-data-$(date +%Y%m%d).tar.gz /data\n\n# Start container\ndocker-compose start stirling-pdf\n```\n\n**Automated with Cron:**\nCreate `docker-volume-backup.sh`:\n```bash\n#!/bin/bash\ncd /path/to/stirling-pdf\ndocker-compose stop stirling-pdf\ndocker run --rm \\\n -v \"$(pwd)/stirling-data:/data\" \\\n -v \"$(pwd)/backups:/backup\" \\\n alpine tar -czf /backup/stirling-data-$(date +%Y%m%d).tar.gz /data\ndocker-compose start stirling-pdf\n\n# Cleanup old backups (keep 30 days)\nfind backups/ -name \"stirling-data-*.tar.gz\" -mtime +30 -delete\n```\n\n\n\n\n### 8.3: Restore from Backup\n\n**Restore procedure:**\n\n1. **Stop Stirling-PDF:**\n ```bash\n docker-compose stop stirling-pdf\n ```\n\n2. **Extract backup:**\n ```bash\n tar -xzf stirling-backup-YYYYMMDD-HHMMSS.tar.gz -C ./stirling-data/\n ```\n\n3. **Verify files restored:**\n ```bash\n ls -la ./stirling-data/configs/\n # Should see: stirling-pdf-DB-<schema-version>.mv.db, settings.yml\n ```\n\n4. **Start Stirling-PDF:**\n ```bash\n docker-compose start stirling-pdf\n ```\n\n5. **Verify functionality:**\n - Access web interface\n - Log in as admin\n - Check users exist\n - Verify settings\n\n---\n\n## Step 9: Performance Optimization\n\nFor resource sizing recommendations, scaling guidance, and fine tuning, see the dedicated [Performance Optimization & Sizing](doc:configuration/operations/performance-optimization) guide.\n\n---\n\n## Step 10: Paid Plans (Server/Enterprise)\n\nStirling-PDF offers **Server and Enterprise paid plans** with additional features for organizations.\n\n### Key Paid Plan Features\n\n**Authentication & Security:**\n- **OAuth2 SSO:** Server tier (Google, GitHub, Keycloak, OIDC)\n- **SAML2 SSO:** Enterprise tier (Okta, Azure AD, etc.)\n- Enhanced security features\n\n**Database & Infrastructure:**\n- **External PostgreSQL Database:** Available for Server/Enterprise deployments\n- Better reliability and scalability than local H2 database\n- Professional backup and replication strategies\n\n**Monitoring & Analytics:**\n- **Prometheus Integration:** Advanced metrics and monitoring\n- **Usage Monitoring UI:** Graphical usage statistics in the admin interface\n- Enhanced monitoring APIs\n\n**For pricing and enterprise inquiries:**\n- **Email:** support@stirlingpdf.com\n- **Website:** https://stirling.com/pricing\n- **Documentation:** [Paid Offerings](doc:paid-offerings)\n- **External Database Setup:** [External Database Guide](doc:configuration/storage/external-database)\n- **Monitoring Setup:** [Usage Monitoring](doc:configuration/automation/usage-monitoring)\n\n---\n\n## Next Steps & Resources\n\nCongratulations! You've successfully deployed and configured Stirling-PDF for your organization.\n\n### Recommended Next Steps\n\n1. **📚 Train your users**\n - Share the [Getting Started Guide](doc:getting-started)\n - Point them to [Tool Reference](doc:functionality/functionality)\n - Create internal documentation for your specific workflows\n\n2. **🔧 Advanced configuration**\n - [OCR Configuration](doc:configuration/operations/ocr) - Add more languages\n - [Pipeline Automation](doc:configuration/automation/pipeline) - Automate workflows\n - [API Integration](doc:api) - Integrate with other systems\n - [LibreOffice Parallel Processing](doc:configuration/operations/libreoffice-parallel-processing) - Scale document conversions\n\n3. **🔒 Harden security**\n - [Fail2Ban Setup](doc:configuration/security/fail2ban) - Prevent brute force\n - [External Database](doc:configuration/storage/external-database) - Use PostgreSQL\n - Review [System and Security](doc:configuration/security/system-and-security) settings\n\n4. **📊 Monitor and optimize**\n - Set up regular backup verification\n - Review logs weekly\n - Monitor disk space and performance\n - Plan for growth\n\n### Support & Community\n\n- **Documentation:** https://docs.stirlingpdf.com\n- **GitHub:** https://github.com/Stirling-Tools/Stirling-PDF\n- **Discord:** https://discord.gg/HYmhKj45pU\n- **Issue Tracker:** https://github.com/Stirling-Tools/Stirling-PDF/issues\n\n### Stay Updated\n\n- **Release Notes:** https://github.com/Stirling-Tools/Stirling-PDF/releases\n- **Blog:** https://stirlingtools.com/blog\n- **Newsletter:** Subscribe at https://stirlingtools.com\n\n---\n\n## Troubleshooting Common Issues\n\n### Authentication Issues\n\n**Problem:** Can't log in as admin\n\n**Solutions:**\n1. Check logs: `docker logs stirling-pdf | grep ERROR`\n2. Verify `SECURITY_ENABLELOGIN=true` is set\n3. Reset admin password via command line:\n ```bash\n docker exec -it stirling-pdf sh\n # Use built-in password reset tool\n ```\n\n### Performance Issues\n\n**Problem:** Slow processing, timeouts\n\n**Solutions:**\n1. Check resource limits: `docker stats stirling-pdf`\n2. Increase JVM heap - see [Performance Optimization](doc:configuration/operations/performance-optimization)\n3. Increase LibreOffice instances if document conversions are slow - see [LibreOffice Parallel Processing](doc:configuration/operations/libreoffice-parallel-processing)\n4. Check disk I/O: Use SSD for temp file storage\n5. Run the built-in [diagnostics tool](doc:configuration/operations/diagnostics) and check application logs\n\n### HTTPS/Certificate Issues\n\n**Problem:** Certificate errors, HTTPS not working\n\n**Solutions:**\n1. Check Nginx/Traefik logs\n2. Verify DNS points to correct IP\n3. Ensure ports 80 and 443 are open\n4. Test Let's Encrypt manually: `sudo certbot certificates`\n\n### File Upload Issues\n\n**Problem:** Can't upload large files\n\n**Solutions:**\n1. Increase Nginx limit: `client_max_body_size 2000M;`\n2. Increase Stirling-PDF limit: `system.fileUploadLimit: 2000MB` (env `SYSTEMFILEUPLOADLIMIT=2000MB`)\n3. Check disk space: `df -h`\n4. Increase timeouts: `client_body_timeout 300s;`\n\n### Need More Help?\n\nRun the built-in [diagnostics tool](doc:configuration/operations/diagnostics) inside your Docker container to collect logs, configuration, and system information into a shareable archive.\n\n**For Community Support:**\n- Join Discord: https://discord.gg/HYmhKj45pU\n- Search GitHub Issues: https://github.com/Stirling-Tools/Stirling-PDF/issues\n\n**For Priority Support:**\n- Upgrade to Server or Enterprise plan\n- Email: support@stirlingpdf.com\n- Get dedicated support team\n\n---\n\n**You're all set!** 🎉\n\nYour Stirling-PDF deployment is ready for production use. If you have any questions or need assistance, don't hesitate to reach out to our community or consider upgrading to a paid plan (Server or Enterprise) for dedicated support.\n\nHappy PDF processing! 📄✨",
|
||
"sourcePath": "docs/Server-Admin-Onboarding.md",
|
||
"editUrl": "https://github.com/Stirling-Tools/Stirling-Tools.github.io/blob/main/docs/Server-Admin-Onboarding.md"
|
||
}
|
||
}
|
||
}
|